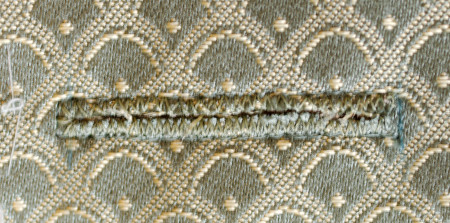
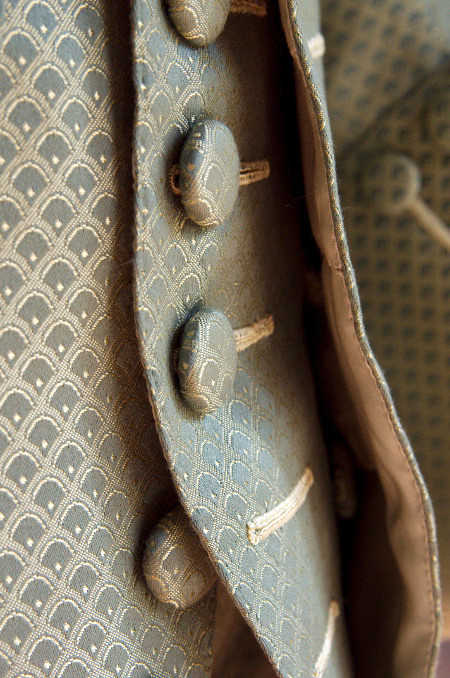
| After tacking the
interlinings on I began the buttonholes from the bottom
upwards. When I got to the opened ones I first sewed a row
on machine stitch around them, then cut them open and
reinforced the edges with zigzag. My poor old much used
zigzag machine didn't manage to get the stitches tight
enough, so I made them while visiting my parents on my
Mom's machine (The first sewing machine I have used in my
life, by the way). |
 |
|
So far
so good, but when I began to cover these reinforcing
stitches on the buttonhole thread I realized that I had
made the decorative ones at the bottom edge more narrow.
I did not want to remake my reinforcing stitching
narrower as I was afraid that the loosely woven
interlining might break if stitched too near the edge.
So I made them as I had planned, then took a critical
eye and finally decided that the contrast to the
narrower buttonholes was too visible, therefore the
latter had to go. I carefully picked out the thread and
remade them roughly as thick as the opened ones.
|
|
|
I had already taken a liking to the
more slender buttonholes and at first the new ones
looked too heavy, but as I did not dare to make the
opened buttonholes slimmer there was no other way. At
this stage the pocket flaps were already finished, with
buttonholes of the slimmer variety, but as they did not
sit directly next to front buttonholes I left them
alone. Well, happily I encountered the problem already
with the waistcoat before beginning the coat.
Next I
made the triangular pocket opening, reinforced the edges
with hand stitching and then sewed on the other layer of
the pocket bag, and for the last thing attached the
pocket flap. I had very stupidly cut the pocket
interlining to stop just just before the buttons, so I
sewed pieces of linen band on the underside to support
the large buttons.
|
|
|
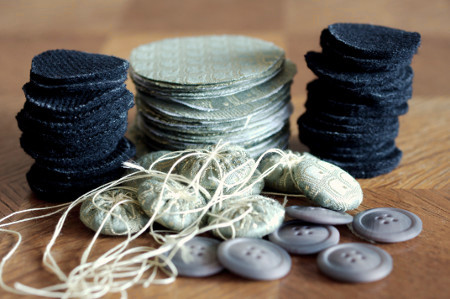
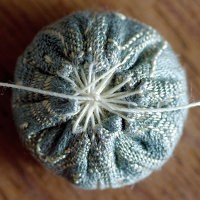
Which
brings us to the matter of the buttons. The larger
buttons for the coat and waistcoat were much nicer to
make than the smaller ones. Along with the pocket edge
of the breeches the buttons were the only parts of the
project where I made use of unforgivably modern iron-on
interfacing. I was too afraid the tiny seam allowances
on the tightly gathered button tops would fray without.
I also added a piece of thick but soft wool for padding
between the button and the top layer, which made them
nicely rounded. Tracing the pieces, cutting them and
ironing the interfacings took some time for the total 68
buttons. Then I could always keep some pieces and
buttons in my sewing purse until they were all covered.
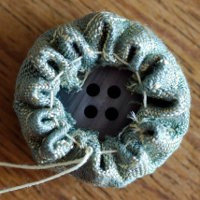
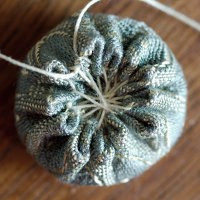
|
|
I tried to improve my technique from the breeches buttons
by gathering the edge regularly (it was made easy by the
pattern) and then joining the ridges that had formed. On
the larger button the allowances had more space, but the
underside still became quite thick.
To
continue about the waistcoat, after finishing the
pockets it was time to put a lining on the fronts. The
whole matter of lining this suit had caused me some
headaches, mainly concerning what to use for it. The
decision was simple for the breeches but the coat was
the main problem. In the Costume Close Up suit, and most
of other sources I've studied the coat is described
lined in silk except the top part of the back (and
possibly sleeves too) with linen, as the latter won't
show when the coat is worn. My problem was what to use
for the “silk” part.
|
|
|
My
textile knowledge of the period is not very strong when
it comes to what the textiles of the period actually
were like (apart from fiber content), the feel, the
weight etc, having seen most of the originals only from
photographs or from some distance behind a glass. As my
fashion fabric, the upholstery viscose was not that
stiff I thought it could use some backing from the
lining added to the interlinings. My budget did not
allow a silk taffeta lining, which would of course be
insane with a cheaper fashion fabric too, and polyester
taffeta would be too stiff, not very nice to work with
and would not breathe at all. Modern ultra thin lining
satin is too flimsy, and the bit heavier viscose one
used for coats etc can be annoying to work with too. I
had in my mind some sort of combination of the flimsy
lining backed with linen, but then I happened to find a
length of heavier satin (probably viscose) at my
favorite second hand shop. It was in a perfect cream
shade. I decided to use it, possibly backed with linen
at some parts on the coat. I could, however, decide on
the coat later.
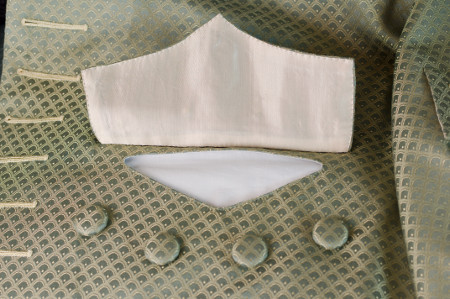
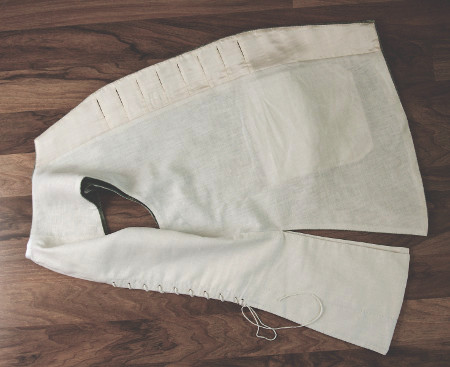
The
Costume Close Up waistcoat (No 17, Suit coat, waistcoat
and breeches, dated 1765-1790) is lined mostly with
linen but has silk facings at the front edges and
skirts. This seemed to me a very neat way of doing
things, as especially the top corners easily turn up
with the shirt ruffles and a satin lining would look
nice there. I did, however decide to leave out the skirt
facings with this longer waistcoat.
|
 |
|
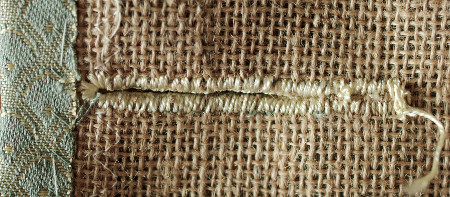
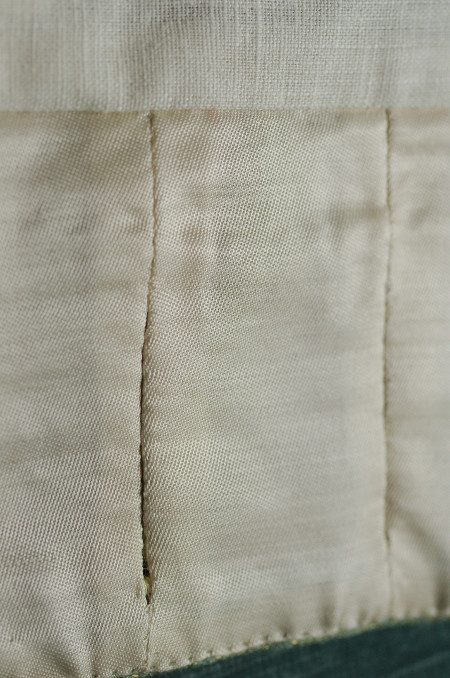
The
picture of the open waistcoat shows most frustratingly
only the button side of the lining, so there is no clue
how the buttonhole part was actually finished. I have
read before vague descriptions of “cutting the lining
open at the buttonholes and sewing it on their edges”,
which sounds to me courting fraying. I've seen it work
well in woollen military garments, but there is no way
I'm going to try that for viscose satin. Happily the
brilliant “At the
Sign of The Golden Scissors”-blog happened to post
about riding habits with
a clear photograph of the “pieced facing”-technique,
where the lining is cut on separate pieces joined at the
ends of the buttonholes. So, that was what I would do.
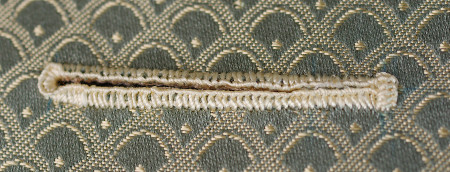
In a
perfect world where all measurements are exact and all
pieces magically match I might have been able to join
the pieces by machine and just leave the seam open at
the right part, but in this reality I thought that no
matter how carefully I'd cut them all the pieces would
not settle perfectly between their buttonholes without
some adjusting and re-sewing, so I sewed them on the
interlining and the buttonhole stitch by hand one by
one. This of course took some time, but the meticulously
neat result was well worth the effort.
|
|
|
I pinned
the rest of the facing and attached it on the front
edges with hand stitching through all layers. I used a
row of stab stitches, here and elsewhere in the suit, as
the proper “Le
point a rabattre sous la main”-stitch is hard to
make through the heavy interlining. After the facing
came the rest of the linen lining. On the shoulder I
pinned it just a bit smaller than the fashion fabric
to follow the curve of the shoulder. On the shoulder
and side seams I just machine stitched the seam
allowances together.
|

|
|
The fronts and back
being now both finished it only remained to join
them. On the silk waistcoat I had sewed the back
piece between the two layers of fronts at shoulder
and side seam, which had resulted in a giant bulky
seam allowance at the shoulder seam ends as the
front pieces curve out. Now I tried to join them the
other way around. I had left the side seams and the
shoulder-neckline-part open at the back, and now
sewed the front piece on the top layer of the back.
Then I pressed the seam allowances to turn towards
the back piece and the back neck allowances to turn
under. Then I pinned the bottom layer of the back
with the seam allowances turned under, just covering
the machine stitch, and at the neck to turn a few
millimetres from the edge.
|
 |
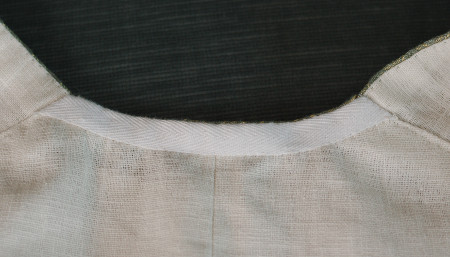
| I finished the neck by
hand and added a cotton band to prevent it from
stretching. I have no idea if the latter was used in
the period, but it seemed like a goof idea to me. For
the last thing I top-stitched all the seams to fix the lining. The
result looks neat also from the inside. |
|
|
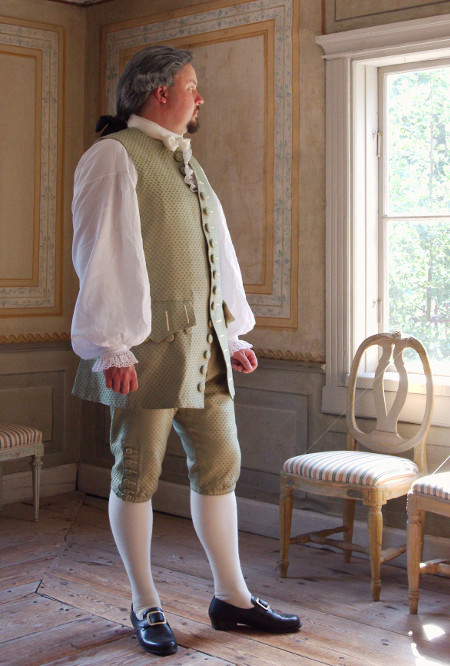
The waistcoat was thus
finished. As said, I had trusted my well-prover
pattern and had not had a single fitting while
making it. Now it turned out that I had obviously
picked an older version of the back piece pattern
without the back lacing, as the edges came together
with no gap in between. Well, of course it looks
nice and neat without a gap, but it kind of makes
the lacing useless as means of adjusting the size
smaller. Jarno assured me, though, that at this
stage of life he is not likely to lose weight.
Anyway, despite this the waistcoat looks quite was
it should be.
The
Saga of the Green Suit is continued in page 4
>>
|
|