Set
of lace for Robe a la Francaise, 2016-2017
When I began my Robe a la Francaise I knew I would sooner or later need proper sleeve ruffles to wear with it - my current ones had been made on the early days of my 18th century costume career and frankly did not look so great. Totally unconnected to this issue I had, for a long time, wanted to learn the basics of bobbin lace, as I have always loved lace and wanted to be able to really appreciate how much skill and time went into it. So, when I had the chance to take bobbin lace class I decided to give it a try.
After the rather confusing beginning stage I fell totally in love with bobbin lace, so much so that I got the insane idea to try to make lace for a pair of sleeve ruffles. When I thought about it further it began to appear less insane - after all, I was so enthusiastic about lace at the moment that would want to make something anyway, especially as my darling husband had bought me a lace pillow as a surprise gift.
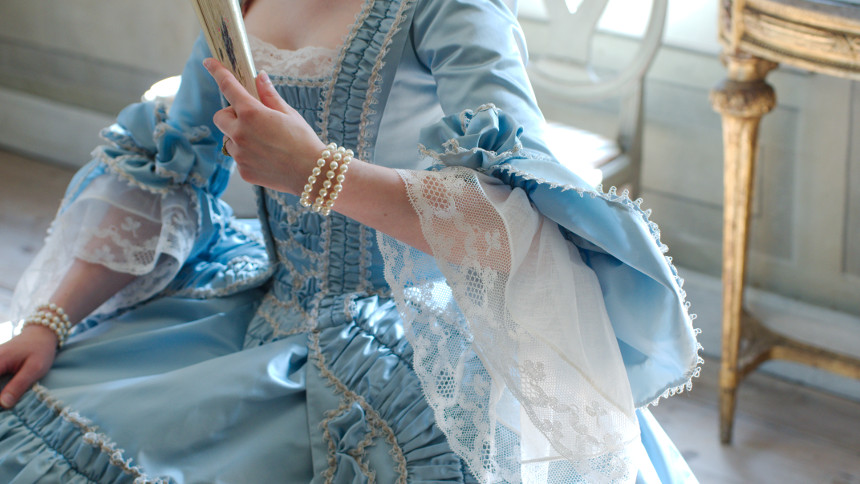
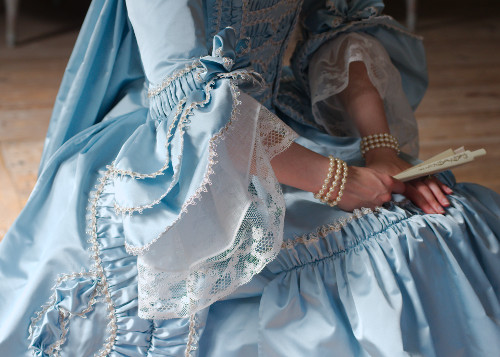
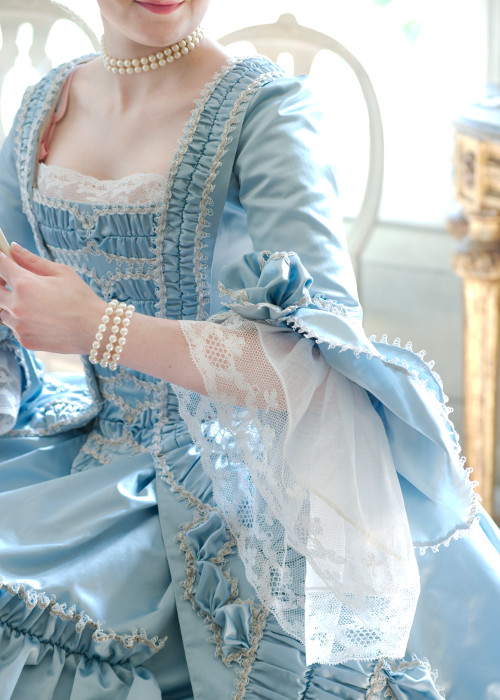
Sleeve ruffles are also such an important element and an eye-catcher in the look of a francaise that they are worth some effort. Besides, the sleeve ruffles are detachable and will be used only rarely, so they are not exposed to heavy wear and don’t have to be laundered all the time. If I actually wanted to use my laboriously produced lace this wouldn't be half bad idea for it.
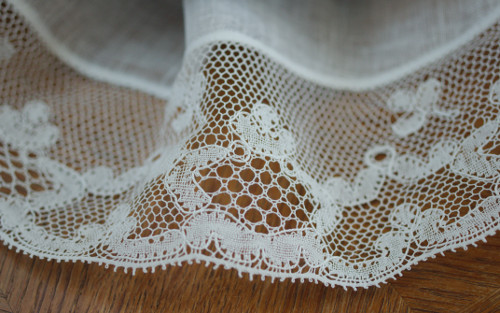
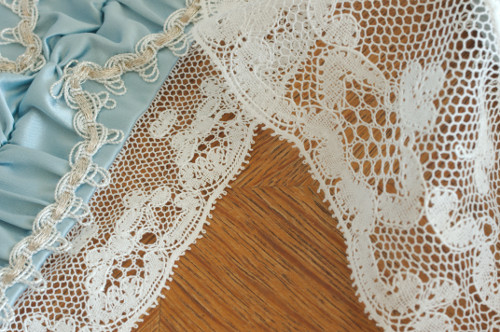
Most of the period lace patterns are, of course, insanely complicated and microscopic in scale, quite beyond the beginners level. I did, however, find a lovely pattern called “Caroline” from a book called “100 Traditional bobbin lace patterns” (Stott & Cook 1982). It was very beautiful, technically within my abilities (I had already made a narrow handkerchief edge lace from the same book and was basically familiar with the stitches required), and to my rather inexperienced eye not totally off for the latter part of the 18th century. The book gave no dates for any of the patterns, but obviously the Buckingham Point laces originated in the late 18th century, and while many pattern in the book have a very Regency / early Victorian look I thought that this one might sort of pass for 1760s to 1770s. As you all know, research is not my strong point, and I very often just choose something that suits my fancy!
At first I planned the sleeve ruffle lace project to be an ongoing craft thing which would get (maybe) finished sometime in distant future, but pretty soon I began dreaming of how awesome it would be if I could photograph the grand new francaise with them. At this point the francaise too was at a very early stage, so I thought I could work with both side by side.
As I was not completely delusional about my craft time and had a fairly new job too I made the decision to enlarge the lace pattern by 20% and narrowing the net base a bit from the inner edge. This, of course, detracts from the historical look, but speeds up the making quite a lot. I got rid of a few bobbin pairs by narrowing the lace, but then again decided to add a few pair on the outer edging to make it more durable.
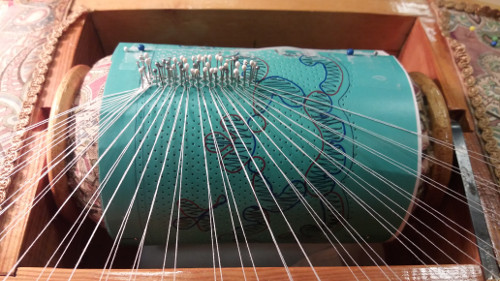
After fighting my way through the first two or three repeats the work began to go easier and faster. It was also highly addictive, especially combined with the entertainment provided by audiobooks. The biggest technical challenge was actually manouvering the large number of bobbins, piling them to layers with hand towels in between and moving them around to get clear working space.
I soon established a rather steady working routine. It was so easy and relaxing to come home after work and just sit down with a cup of tea and continue where I had left the day before without any extra effort for my tired brain. I have discovered lately that getting started with something new and exciting has become a much bigger problem for me than getting bored with repetitive work, and even a small problem requiring decision making and problem solving skills can put a stop on a project for weeks. It was wonderful to see how the lace project made slow and steady progress even when I felt tired, and I could save the few and far between energetic days for the tricky parts in the Francaise.
I didn't actually know whether the period lace for engeantes were made to a certain length (which I think is well possible, as the engeantes seem to be roughly the same widht), or how the lace was joined at the ends. I confess I didn't really do any research on this on my hurry to get started. Then again, the all-lace engeantes in museums are made to a certain shape, longer at the back, so it might make sense that strips of straight lace would be made into a certain length too.
In the end I decided to go with my modern aesthetic sensibilities (which is, granted, often a very bad choice) and try to make the join in the lace as invisible as possible. On the edge pattern I joined the ends following the gimp line, and on the net part I made a few rows to overlap and sewed them together.
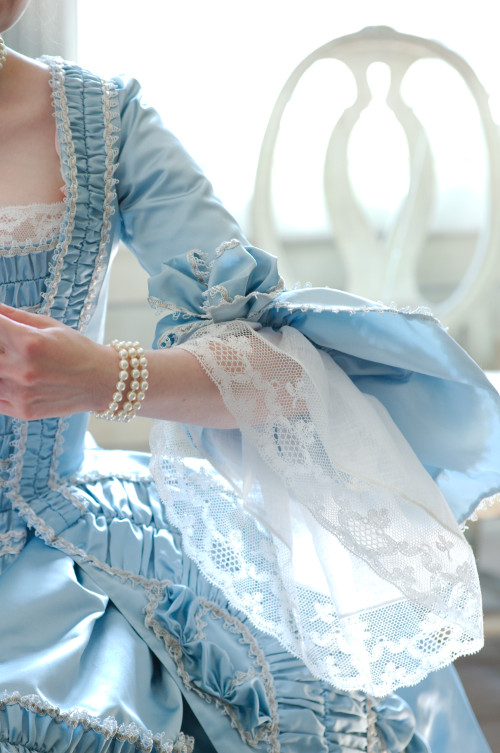
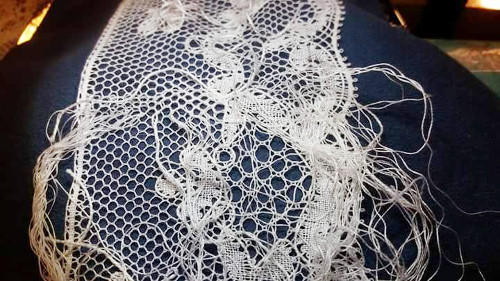
After finally finishing the lace I made the
ruffles of sheer linen and hemmed it narrowly. I starched both
the ruffles and the lace with potato flour and then sewed the
lace edge over the hem. On the afterthought I should have made
the lace a bit longer so it would have shaped better on the
curved edge.
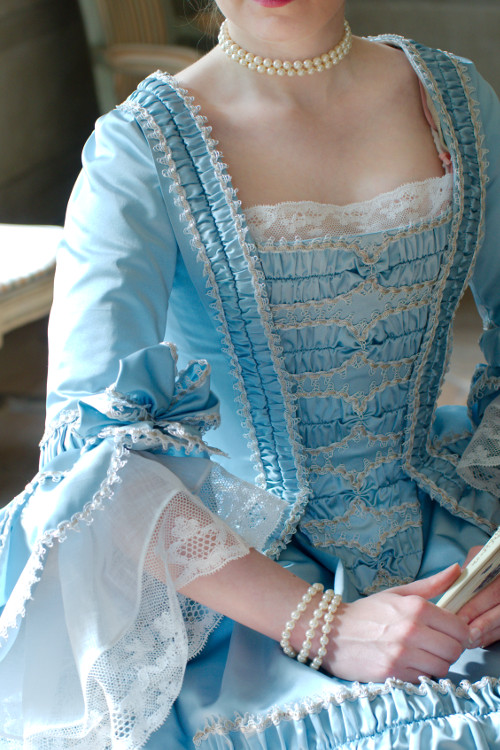
Robe a la Francaise usually has also some lace on the neckline. When the sleeve ruffle lace was almost finished I realized that I might be able make something for the neckline too before the photo shoot - after all, I could hardly use anything modern and crappy with real bobbin lace. But then, on the other hand, I also wanted to keep the wide neckline uncluttered.
Happily when browsing through portraits I noticed that very often the francaise neckline was accessorized only with a rather wide and straight strip on lace on the lower edge instead of the lace going all round the neckline. It could be easily sewn into the top edge of the stomacher, and what's more, covering my bosom would need only a very small scrap of lace indeed!
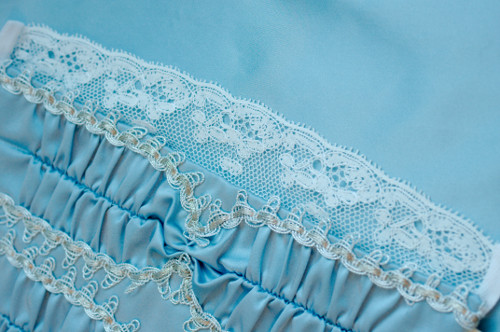
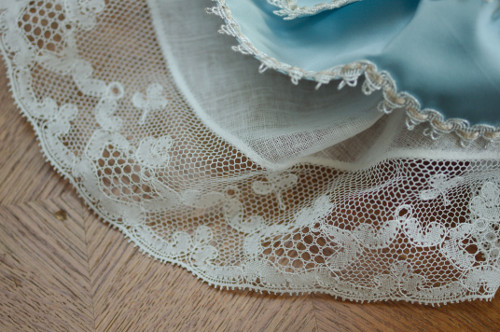
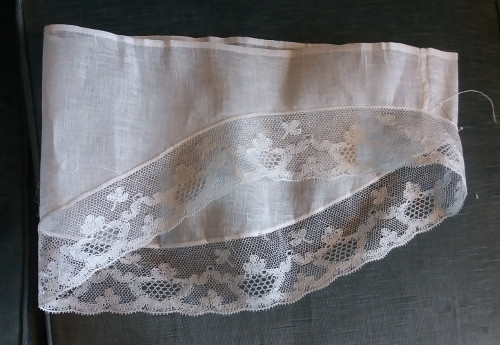
Neckline lace could thus well be narrower than the one on sleeves. I chose a pattern called "Diana" from the same book, as it was very pretty and had the same look as the sleeve lace. I enlarged this pattern too a bit, but it still stayed slightly more dense than the airy sleeve lace.
The stomacher edge required only 25cm of lace, which happened to be exactly 5 repeats. The narrower lace with fewer bobbins seemed to get done in a flash, and I was almost sorry to finish it as the pattern included many interesting and tricky parts. Of course I can continue it some time in the future to go all round the neckline, which would not a a bad idea as the shoulder straps of my stays keep peeking out of the neckline sides.

I starched the finished lace and sewed it into a cotton tape. I also covered the ends with cotton tape so I could pin through them without tearing the lace. Then I tacked the lace on the wrong side of the stomacher. Fortunately I was also smart enough to try it on at this point, as I noticed that the lace didn't fall gracefully on my snowy bosom but rather stuck out of the neckline. I tacked the ends again, this time to curve downwards which helped a lot.
The narrow neckline filler lace, small as it is, turned out to be an essential addition to the overall look on the Robe a la Francaise ensemble. It gives a small but important counterpoint to the flowing lace at the sleeves. Robe a la Francaise could, of course, be accessorized with tons of lace on headdress, neck, fichu etc, so a set of one layered engeantes and a strip of lace on the neckline is really just the barest minimum. Well, one can always build upon it over the years!
The bobbin lace project was all in all a very rewarding experience in many levels. I was myself surprised that I actually got the lace bits finished for the photoshoot, but of course on the other hand the many, many hours I spent over the lace pillow did slow down the progress on the robe itself considerably. Still, the lace making as a craft hobby was incredibly therapeutic, and after finishing these laces I really really missed twiddling with bobbins, as I unfortunately was too busy with new projects to start a new bobbin lace.
Still, If you consider the time spent to these it would not have been a bad idea to purchase an antique lace even with a bit of cost. But then again, as I often keep telling myself (and other people), hobbies are not for optimal calculated efficiency but rather for creative madness of the good sort.