
Fur trimmed
winter gown, 2015
While normal, sane people usually begin their SCA hobby with a
t-shaped tunic, I was determined to go for the fancy stuff at
once. I did manage to put together a
fairly decent 15th century doublet and a pair of
not-so-perfect joined hose, but they soon proved to be
too warm to wear on summer months or indoors at other times of
the year. So, I came to my senses and abandoned my idea of
making a heavy wool gown to wear with the doublet and hose,
going for a light tabard instead.
The doublet and hose were followed by several more practical tunics and short hose, but of course I still dreamed of the fancy fur-trimmed gown (I had already bought the fabric, too). At some point Jarno began to play a sidedrum for SCA fighters at the events, which can be cold at wintertime and a cloak is not very practical while playing. Perhaps the time for the wool gown had finally come, and it would actually get worn, even if only once or twice a year.
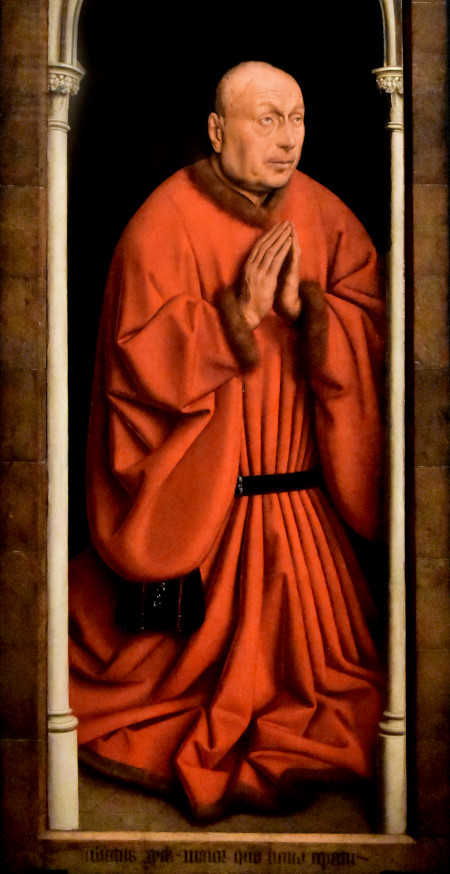
Jan van Eyck, finished 1432
The gown I had had in mind all along was dated at mid 15th
century, and like most of my medieval garments is featured in
Thursfield's “The medieval tailor's assistant” with a pattern
and instructions. Period artwork also got a lot more rich,
plentiful and detailed during 15th century, and this type of
garment shows up a lot on contemporary illustrations. At first
I planned to make slashed sleeves like shown in the book,
which would reveal the slashed doublet sleeves and the linen
shirt pillowing between the latches, but then I realized that
while fancy the slashed sleeves would let the cold wind in,
and this was to become a outdoor garment now. The period
illustrations also show more regular sleeves than slashed
ones, so there is no need to stick to them.
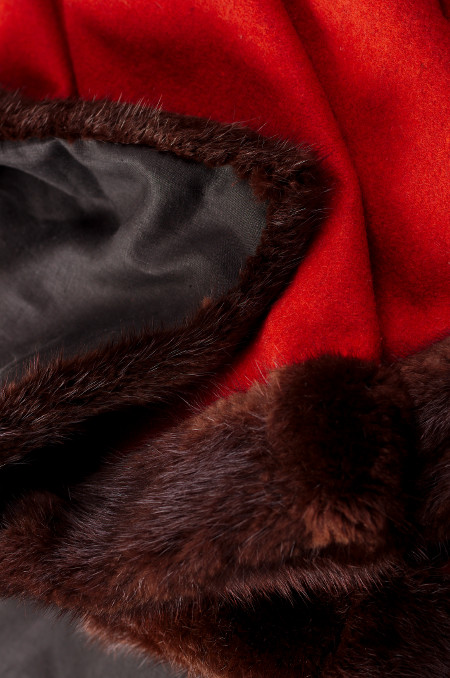
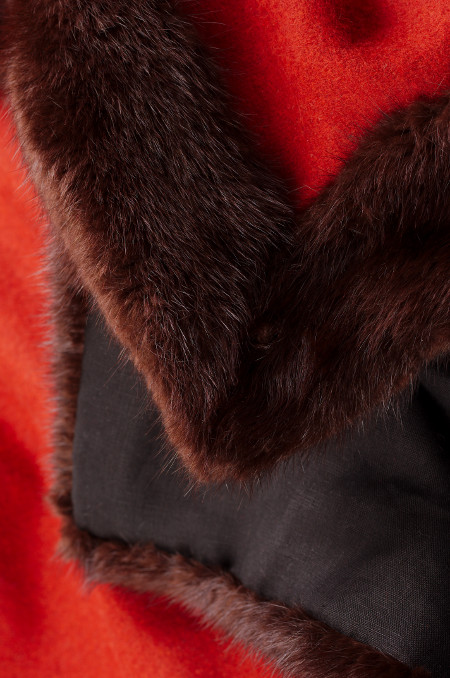
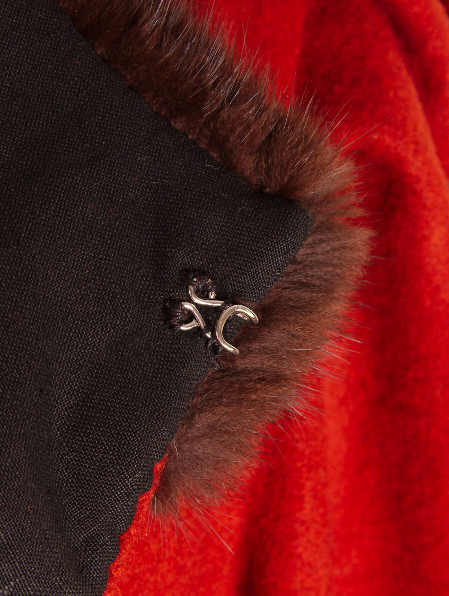
The thick wool fabric I had was excellent for a warm outdoor garment. For the trimmings I had found an old fur coat of mink (here at Couture Mayah we use only recycled fur for both budget and ethical reasons), which looked beautiful with the rust red wool.
I drafted the pattern by Thursfields instructions, copying the doublet bodice pattern to waist level, widening it to a square block and lowering the armhole on the underarm. The sleeve was also based on the doublet sleeve with the puff, heavily widened and raised at the sleevehead. I made a quick mock up of the short bodice and the sleeve, noticed that the sleeve was still too small to fit over the doublet puff and enlarged the pattern a bit more. The second sleeve mock up looked fine, and I marked the pleating and balance marks on it.
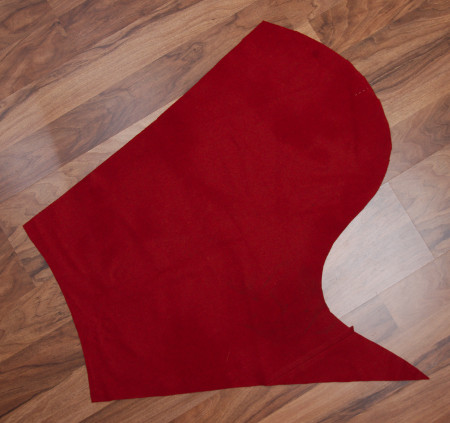
Still following Thursfield I drafted four slanted slashing lines from shoulder to waist towards center front and back. Thursfield advices adding 6-10cm to wait at each slash, I went for 6cm for the simple reason that my fabric width would not allow more if I was to cut front and back side by side. The finished hem width ended up being about 340cm. The gown length was also determined by how much material I had left after cutting the sleeves. Usually I buy a lot of extra material (too much, in fact), but now I had not realized how large a pattern piece the sleeve would actually be.
After cutting the pieces I marked the pattern slash lines for the pleating and the waistline by basting.
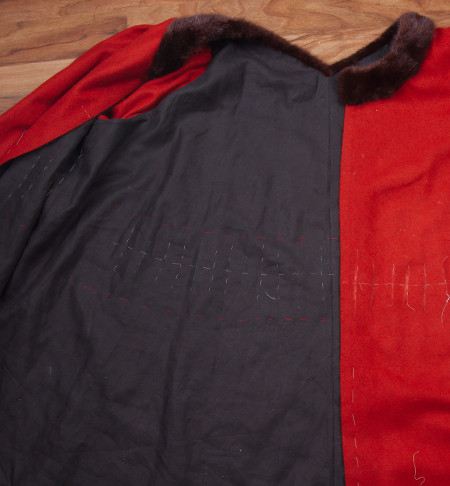
The gown itself was not complicated to put together, but the heavy fabric and the fur trim needed some reinforcing details. I had at first though that the heavy material could well do without a lining, but when I began to think of all the cotton tape I was going to put inside of it I realized that a lining would be very handy in hiding them neatly. A lining would give the garment a nice finished look too, and the underside might peek from the side vents.

The ideal lining would perhaps have been a fluffy wool
mimicking a fur lining, but then the gown would have become
way too warm and cumbersome. Instead I happened to have a lot
of fine black linen, so I decided to use that instead. Black
linen is not, of course, strictly period, but it looks neat
and doesn't make the gown too thick. Again, heavier lining
would give the gown a more period look and fatten out the
pleats, but it would be too warm and also take up quite much
storage room. So, I chose linen. The sleeves I left unlined as
their inside would not show.
I began by basting narrow cotton tapes at the almost bias cut
center back seam. At the front I turned the edges with sewing
a 2cm wide cotton tape on them, hand sewing the other edge on
the wool. Of course I should have used linen tape but I had
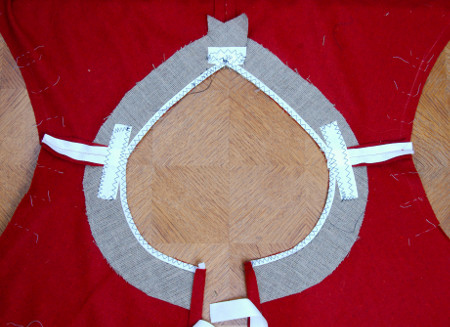
cotton tape at home. At the neckline I basted an interlining
piece of heavy linen, a bit wider than the fur edging on top
of it would be. The linen was cut on the opposite direction
than the wool, so that it would have straight grain on the
bias edge of the v-shaped back neckline. At the top of the
center back seam I basted the interlining pieces after closing
the seam to cross it.
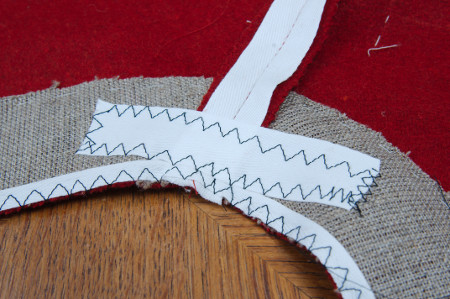
To prevent the already old fur from tearing under pressure, I
reinforced the neckline still more by sewing a narrow tape on
the edge and wider ones over the shoulder seams and to the top
of the center back seam. I stitched them on by machine, as the
lining would mercifully hide them. The shoulder seam also got
its supporting cotton tape as did the shoulder part of the
armhole. Before continuing with other seams it was, however, a
fine opportunity to sew the fur edging on the neckline while
it could still be laid flat.
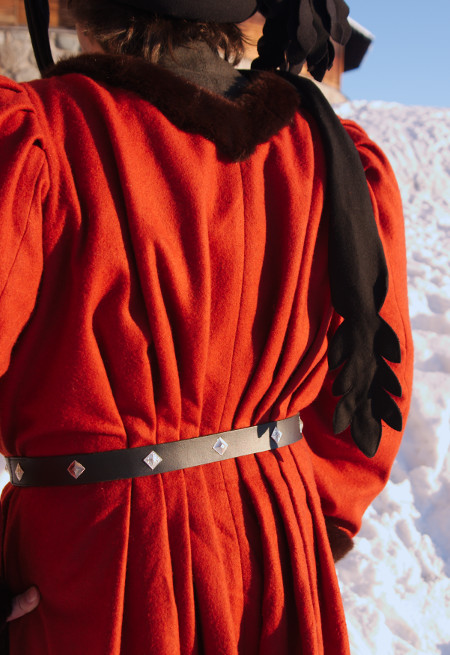
I had taken the coat to pieces and now began to cut and assemble strips for the edging. I had planned a 5mm seam allowance for sewing the edging on the top side of the garment and 1-1,5cm for turning the other edge of the fur strip over the fabric edge. I cut the neck edging 4cm wide (plus the allowances) and the edging for sleeve ends 5cm wide. I studied the period paintings trying to get some idea on what direction the pile of the fur would run. On a few examples it seemed to me that on the neckline it would run from the center front towards the sides, which seemed logical, as if you would continue it over the shoulder and down the back neckline it would meet in a nice chevron v at the center back. On the sleeve ends I cut the pile to run around the wrist.
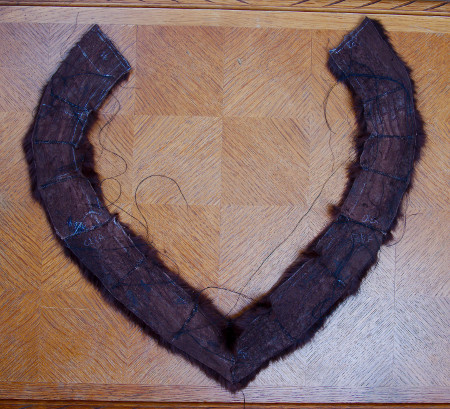
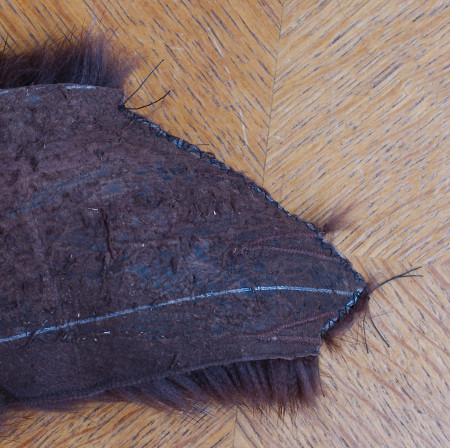
I shaped the fur strips to match the neckline shape with the
help of a paper pattern as I had done in my sleeveless
surcote. I joined the pieces and made darts in them with
loose zig zag and then pulling the seam apart to that the
edges settled side by side. In the plush mink these home made
seams can be detected on the fur side by some irregularity in
the smooth surface of the pile, but as I'm not a furrier I can
live with that. On the afterthought I could perhaps have
rather compromised on the pile direction on some places to
reduce the number of joining seams/darts, but I'll consider it
again on the next fur project.
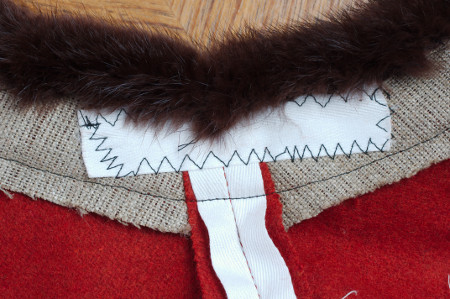
I first machine sewed the fur edging on the top side of the garment with a very narrow seam allowance, then turned the other edge over the fabric edge and sewed it down by hand. At the front edges I sewed the ends of the supporting cotton tape over the fur seam allowance.

When the
neckline edging was finished I closed the side seams and
reinforced the top of the side vent with a band to protect the
fur in case it would get under strain.
Then I sewed on the sleeves. Thanks to the mock up an-d the sleeve head pleats being marked in the pattern and the fabric it was an unusually smooth procedure. I decided to try to turn the seam allowance towards the bodice rather than the sleeve so that the sleeve seam would settle right next to the doublet puff on shoulder and not be hindered by thick seam allowances. On the underarm this also widened the armhole a bit, which helped to drag the sleeves over the stiff doublet puff when putting the gown on. This way I could also hide the seam allowances too under the lining. I sewed then on the shoulder on the cotton tape that was in turn hand sewn to the bodice, and on the underarm to the bodice.
Thursfield tells you to first finish the gown and then form the pleats on the waist and secure them on the stay band. It makes sense in a way, but there is still this small problem of whether the hem can be evened before at least fitting the pleats, as they are not hanging straight and may thus move the hemline from where it would freely fall. I bet no one would be very happy about making over the fur edging (or even parts of it) if the hemline turned out uneven in the end. On the other hand, it would be so much easier to edge while it could still be laid flat, without the pleats. So, I thought the safest course would be to sew on the lining on the top part of the gown down to waistline so that I could at least try to pin the pleats, and then see how it would affect the hem.
I closed the center back, shoulder and side seams of the lining and then began to pin it on the gown, beginning on the shoulders and front edges. Then I sewed it by hand on top of the fur edge on the neckline and on the armhole. When I began to sew the lining on the front edges, however, I noticed that no matter how carefully I had thought I had cut the lining the other front piece still did not quite match. Happily I had left a generous allowance on the front edges, which was just enough when I smoothed the lining to go as crooked as it wanted to go.
Next I began to baste the lining on the gown both under and over the waistline for trying out the pleating. On the front I had no problems, but on the back my lining proved again unwieldy and in the end just plain too narrow. At last I had to give up and once again admit that lining large pieces including bias neatly is nothing to be done hastily or with methods of bag-lining.
I ripped the center back seam on the lining open and began smoothing it over the wool. I sewed the other edge by hand on the wool seam allowances, then smoothed the other side and turned and pinned and sewed it on top of the other edge. At the bottom of the seam I of course left the lining still open for the edging. The seam allowances were just wide enough for the new seamline. This was actually not that hard to fix, and in the end it's probably for the good that the bias-cut seams stick together.
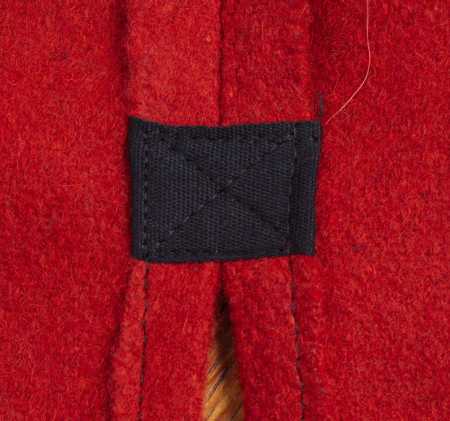
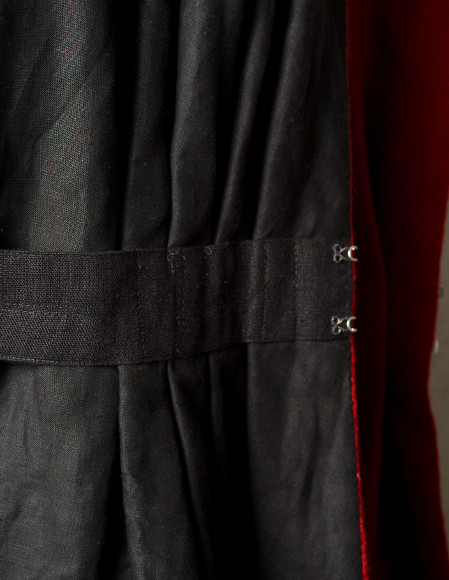
Next we come to the part number two where I differed from Thursfield's methods. She advices to sew the pleats on a wide band on the waistline, which itself seems very sensible, but then she tells you to cut this band 10-15cm longer that the wearer's waist circumference. I reasoned that the extra must be meant for the ease you must leave on the sides (as the pleating is focused on center front and center back), but it still sounds very generous allowance to me. If you make the band sturdy, the extra on the sides will look bulky under a belt. According to period paintings, this style was worn very tightly belted, almost giving a hourglass line in some examples. Of course you don't have to make it so heavy (the strip in the book picture does not look very heavy), but I like things sturdy and durable and supporting the heavy skirts. So, my solution, be it correct or not, was to try out the theory of a single tight and sturdy waistband. I could always take the pleats apart if it would a prove catastrophic one.
I cut the waistband of a sturdy linen, making it just a few centimeters longer than the waist circumference measured over the doublet. I sewed it into a three-laeyered band and sewed hooks and eyes on the ends. Then I put it on Jarno and marked where the side seams should fall. Then I pinned the gown on the band on the front edges, sides and center back, and began pinning the pleats.
I realized pretty soon that the basted pattern enlarging lines were of little use as pleating guides, and the pleats looked just better when I just pinned them to where they roughly looked right. I pinned the front and back on the left side, leaving some extra allowance on the sides. Then I took the gown off Jarno and basted the pleats, using different thread for pleat ridges to keep on track. Then I transferred these markings on the right side, pinned them again in the waistband and put the gown back on Jarno.
Like I had expected, the hemline had to be evened a bit, but not much. The length, dictated by the amount of material I had to use was also okay. At this point I perhaps should have let the gown hang for a little longer for the hem to really show where it was wont to stretch, but unfortunately I was determined that Jarno would wear it in a few days on a 12th day event, and the weather forecast promised that he would need it, too. Usually I nowadays try to avoid finishing anything on the last minute and rather wearing something else, as rushing often leads to shortcuts that make the final thing less than perfect – and it' so boring to fix it later. This time, though, I calculates the deadline being tight but still realistic, so I pressed on. So, I quickly copied the evened hem shape on paper to get a pattern for shaping the fur edging.
I had originally planned to make the hem edging a bit wider than the others, but when I had noticed how the sleeve end edgings that looked narrow on paper pattern looked far more fluffy in fur I decided the same 5cm plus allowances would do well for the hem. On the hem I cut the pile to run from the center towards the sides and on the side vents downwards so that they met on the corners on the nice chevron v. The center back where the pile starts away from the seam on both sides is not very pretty but happily mostly disappears among the folds. I used the original hem fold of the fur coat for the top of the side vent edgings so that it turns easily under.
I sewed the fur on the hem on a hurry, which unfortunately shows in some places. Though the wool is sturdy, an interlining layer under the edging would not have hurt, as the fur was hard to get to settle evenly with a sewing machine. Of course it would have probably went all smoothly by hand, but that would have been so hard and taken so long... So, in the end the fabric wrinkled in places. Still I stubbornly pushed on, convinced that if this long planned gown would not be finished for this event it might perhaps never get finished at all.
After getting the top edge of the fur on the hem all around things began to look a bit brighter. Sure, it was not perfect, but not absolutely terrible either, and while hand sewing the other edge would take some time it was at least less frustrating. After securing the other edge I pinned the lining on and went around the hem again, sewing it on. The lining tidies things up nicely, and the underside on the hem looks even neater than the outer side with the wrinkles.
Then there was the waistband and the pleats. Like I had predicted, the tight deadline led to shortcuts: I decided to machine sew the pleats down. I mean, it would not show on the outside! And even on the inside black machine stitch on black waistband would be relatively inconspicuous. So, I pinned the pleats according to my basted marking and sewed them down one by one, trying to keep them symmetrical.
On the picture on Thursfield's book only the bottoms of the pleats are sewn down, which is probably enough if the gown is thick enough, but on my lighter version I decided to sew the pleats to turn in the right direction. Jarno does not have a valet to dress him, and I'm not always around either to arrange the pleats carefully under the belt when dressing up.
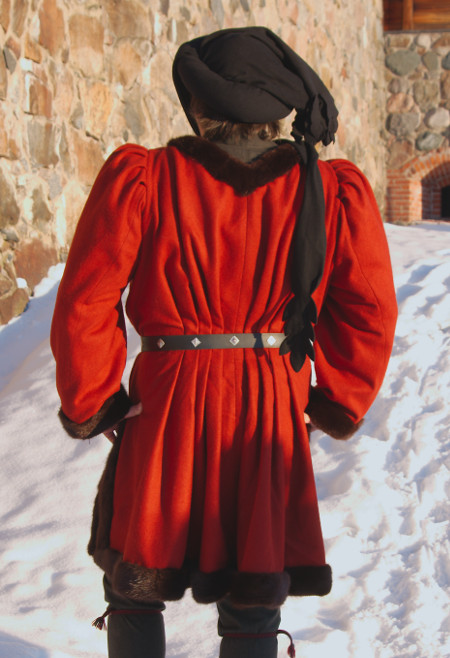
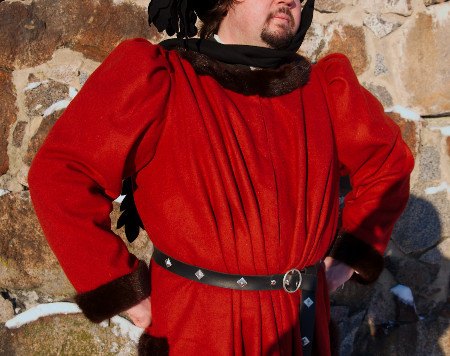
I added a few pairs of hooks and eyes to close the front edges, and then the gown was happily finished, even at the night before the event. Like I stated earlier, I try to avoid last minute sewing, but now I remembered how rewarding it can be to get something finished just in time and wear it brand new (well, Jarno wore it, but I could still watch it). And it really was just what was needed on a very cold day. I was also happy to discover that perhaps I have learned some rudimentary things about working with fur, as it didn't feel so desperate and exhausting this time on the whole, and also I had apparently learned to cut it more carefully as all the flat was not covered in extra hair.
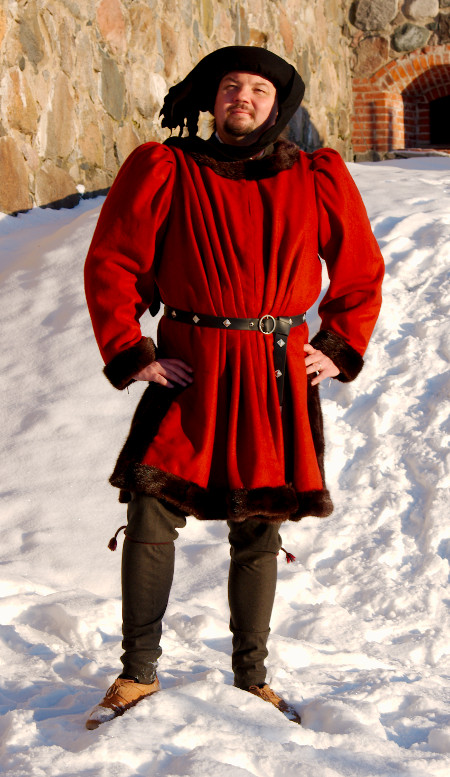
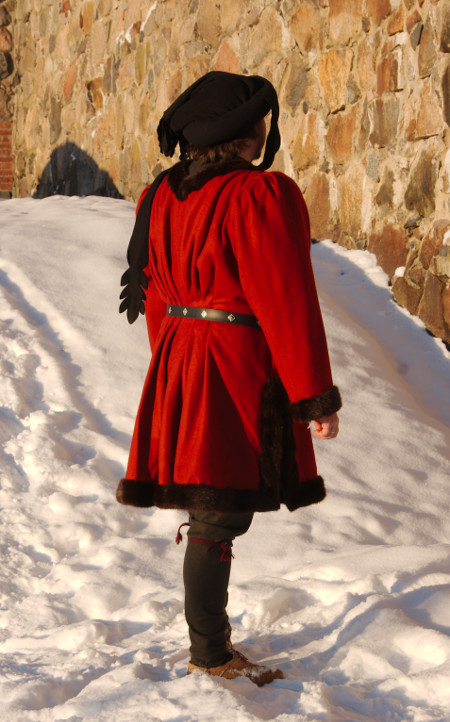
So, in the end I'm mainly happy that I at last got this garment done and the materials got some use rather than gathering dust. It also turned out rather decent looking if you look ever the hem wrinkles. The skirts are not as wide with heavy stiff folds as in some paintings on noble and fashionable lords, but on the other hand a wider hem would have demanded more material, been more costly and probably not very practical. The fur edging does help the hem to stick out a little, though. The pleats also look a bit skimpy compared to a wool or fur lined gown, but at least it takes up less storage room. I also noticed that the waist tends to ride up on move over the belt, but this is a minor thing. But the sleeves I really like, they ended up just right.
Practical is actually something that this garment was not primarily planned to be, but turned out to be in the end. It's much more practical outerwear than a cloak. It looks best over the doublet, which gives the sleeves their proper shape, but can be worn without it too for more relaxed wear. And it surely doesn't hurt that it looks very rich with all that fur.