Shoes for 1870's
ballgown, 2018
My costume for the Prior Attire Victorian Ball in Bath needed shoes. Of course, late Victorian evening shoes are not terrible unlike modern pumps, and don't even show much under the sweeping skirts (except in the throes of vigorous waltzing) so I could have just worn modern shoes. But all of the shoes in my closet were too high or open toed or somehow wrong, so it became obvious that I would have to get something new anyway.
The thought of another shoe-remaking project naturally entered my mind early on, but this time I resisted it for a while. After my last, mostly successful but laborious shoe project, namely the matching embroidered satin shoes for Robe a la Francaise I had sworn not to touch shoes for a while, at least a few years. Of course 1870's shoes might be a bit more simple, with no buckle straps to construct etc. But still I first tried to find ready made options.
My internet searches and checking a few brick and mortar stores confirmed the same thing: I could either purchase good replica shoes that would cost some money, or settle for a halfway okay pair of modern pumps for a lesser sum, or then just spend a bit of time and make dirt cheap ones. I decided finally on the budget option, as the shoes would really be a rather inconspicuous part of the outfit.
I was so short of the ballgown satin that I ruled out totally matching shoes at once, so it would have been convenient to pick a color that would go with other future dresses too. Black would have been something of a safe bet, I guess, but I felt it to be too dark for the soft pastel overtone of the whole outfit. Cream white might have looked better, matching the gloves and lace fan, not to mention that the "Ladies' and Gentlemen's Etiquette" from 1877 recommends white satin boots to be worn with a ball gown. But then again I was rather sceptical about white fabric shoes staying white, and wanted to go for some more practical color instead.
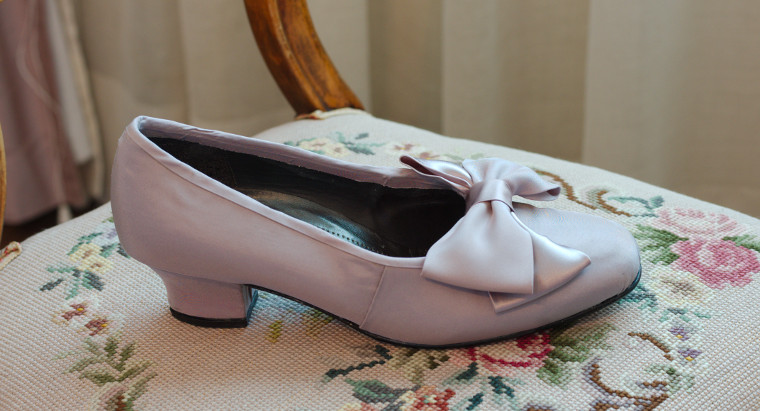
And then there was this very pale lilac satin available: It harmonized with the dress fabric, had a light look without being white and would probably disguise dust stains.
After some consideration I decided to use the reverse side of of the satin in top. It had a duller, less plastic sheen. I had also learned from my last satin shoe project that shiny fabric highlights every bump and wrinkle while its much easier to get a neat finish with matte fabric.
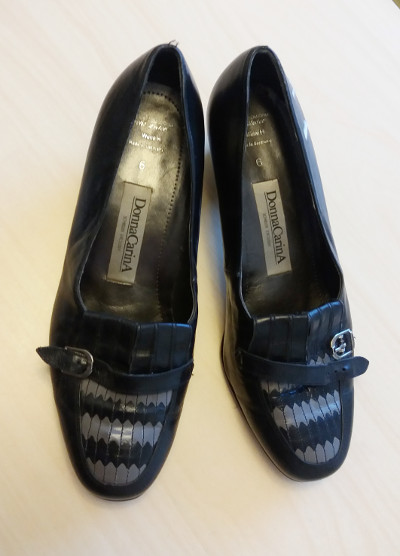
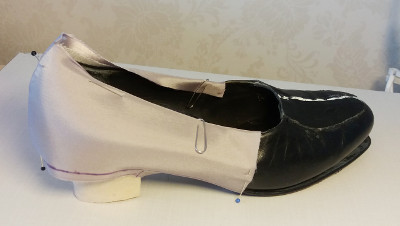
I was lucky to find a 2€ pair with a low heel and rather square toe, that had a look not that far removed from period shoes. They also fitted my feet perfectly.
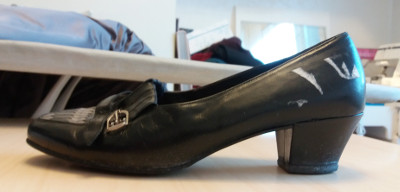
Apart from being a little worn the shoes were in good condition and of better quality than I have usually used for my re-make projects, just old-fashioned. This time I actually felt a little bad about demolishing them with scissors and screwdriver. The quality of the construction was also obvious as they didn't fall apart as easily as cheap shoes usually do.
As stated above, the shoes had a very good shape to begin with, so I didn't plan massive alterations this time. I did, however, want a bit more periodesque shape for the heel.
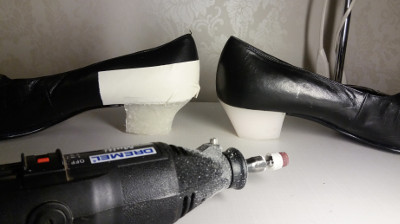
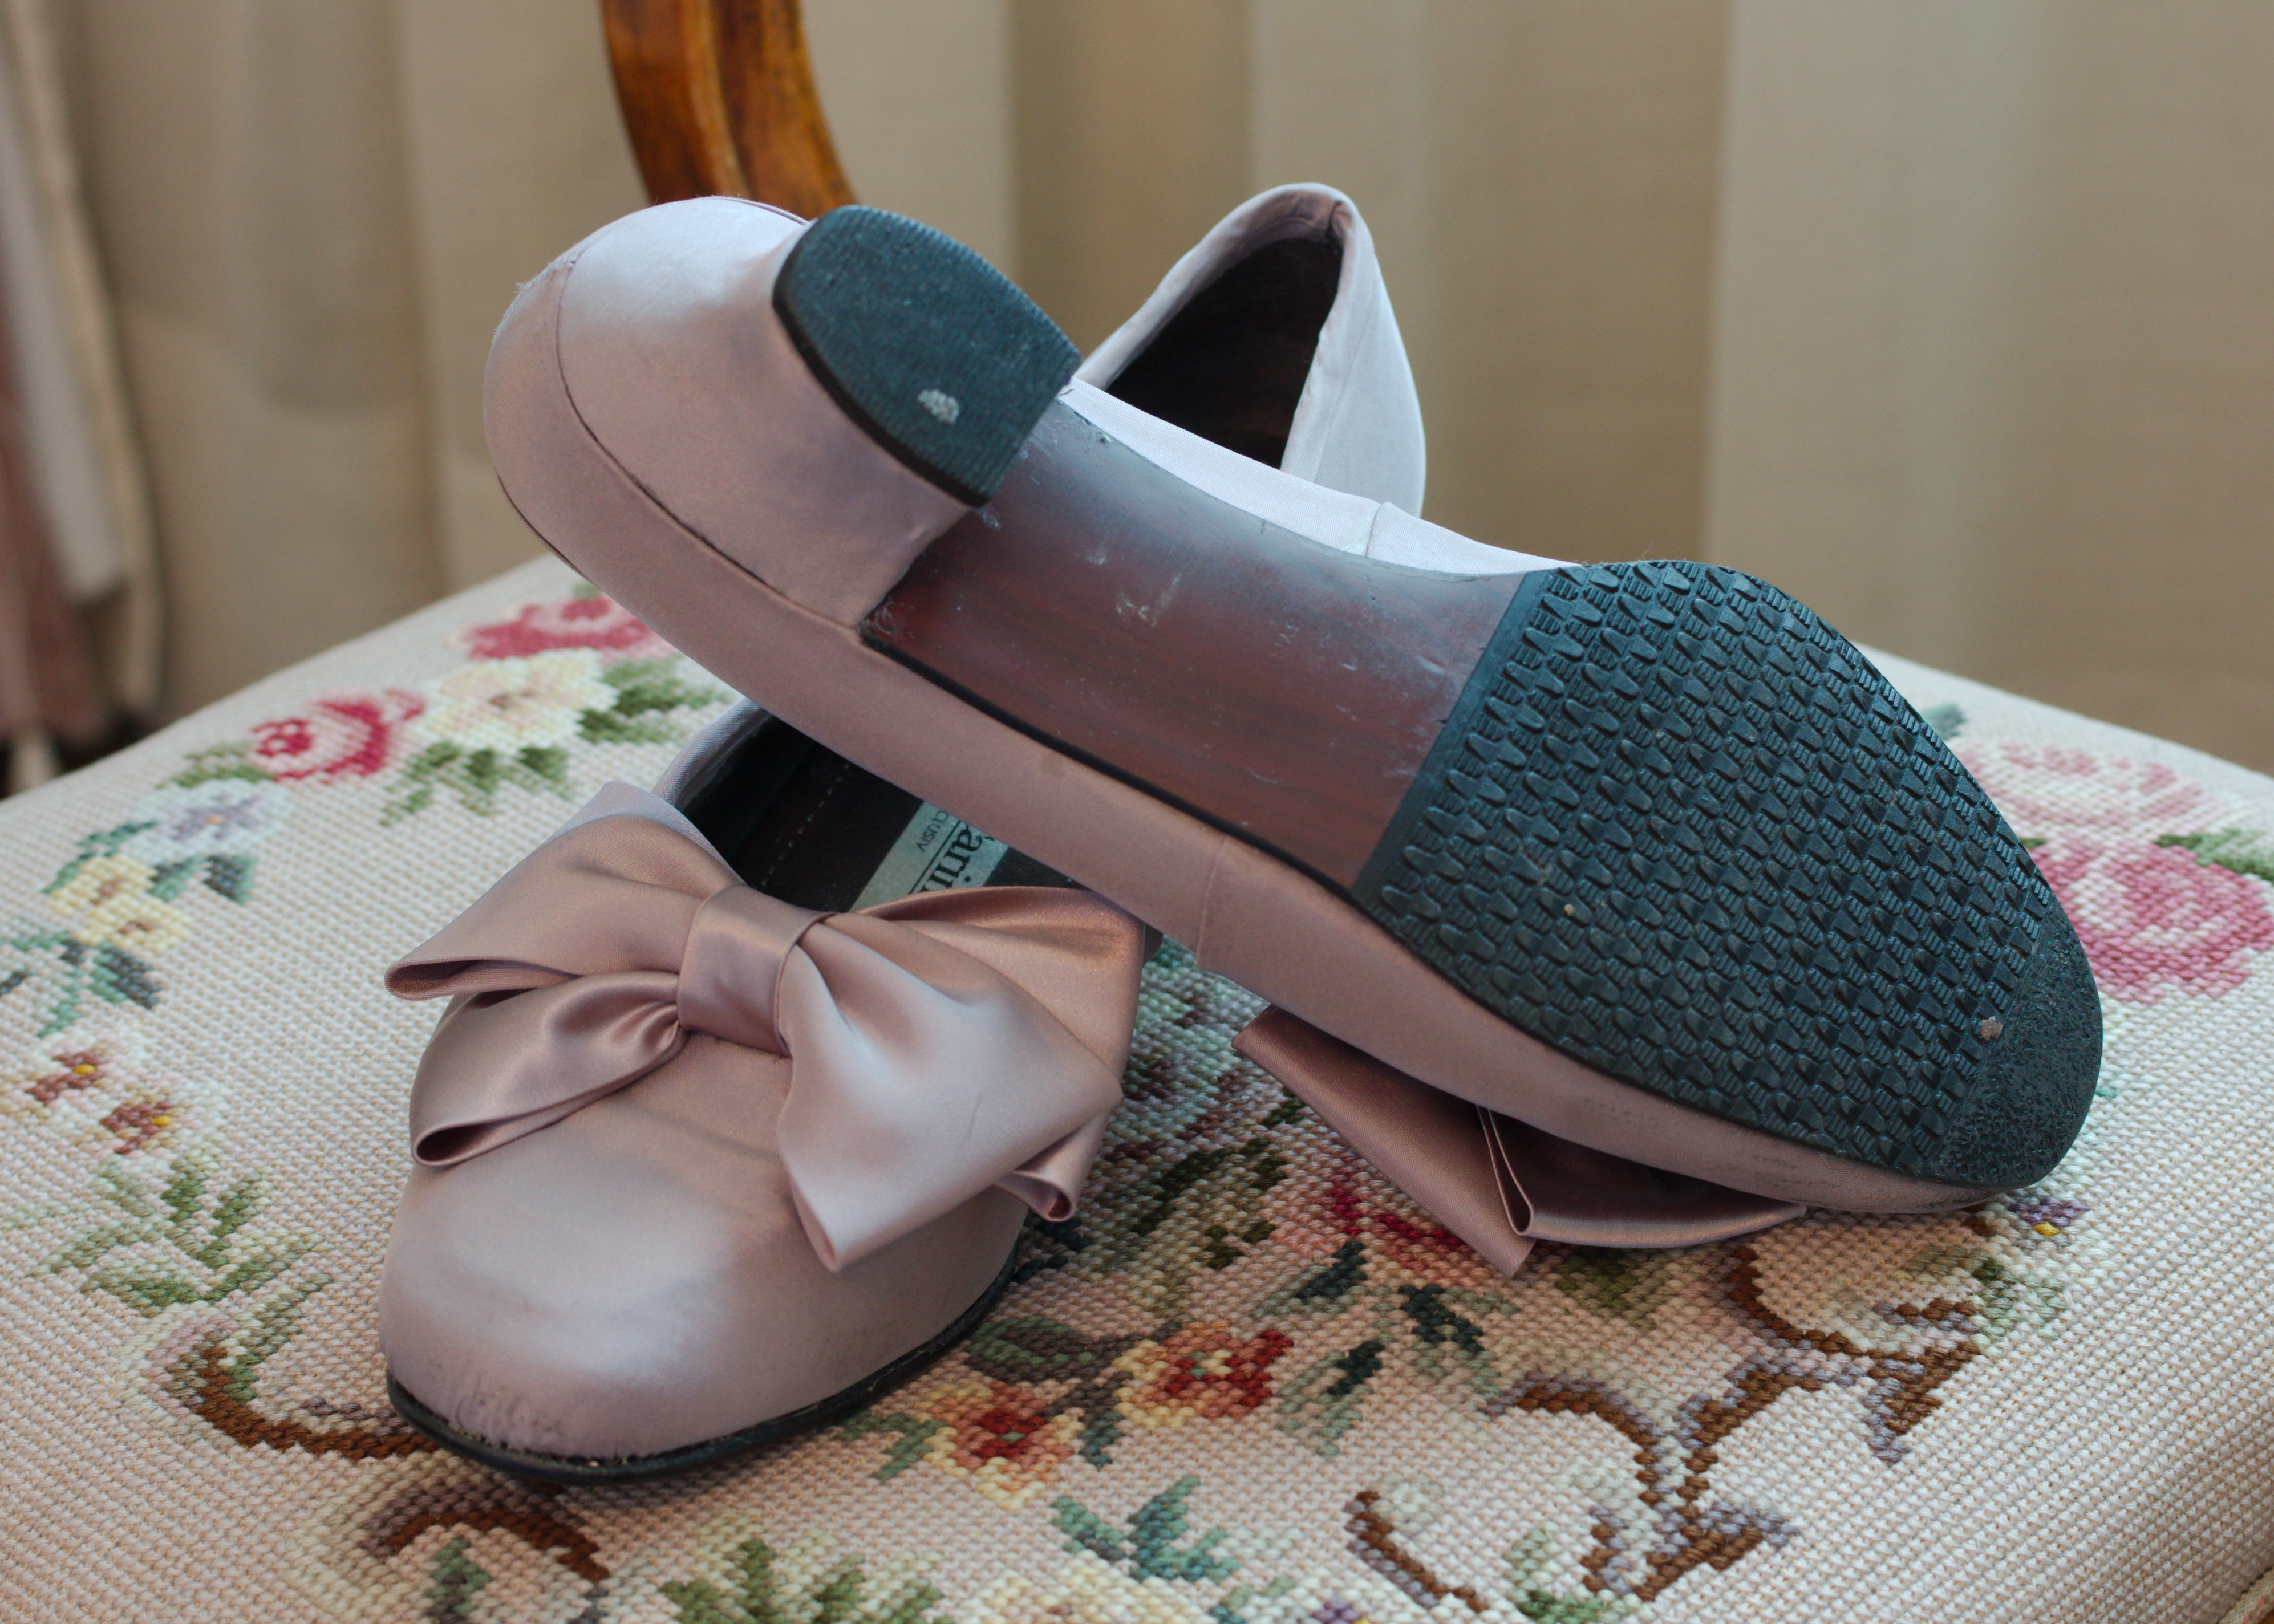
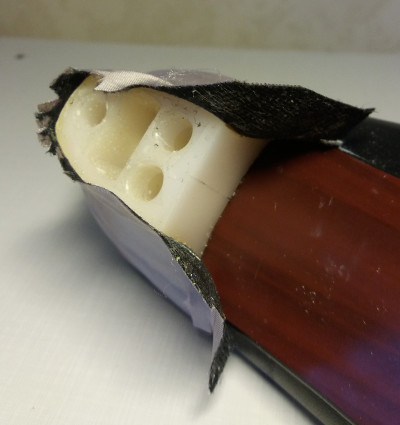
A heel curved at the back and sides but at a straight angle at the front seems common in 1870's shoes. I peeled off the leather covering at the heels and shaped them with a grinder until I got them to the desired shape and roughly identical.
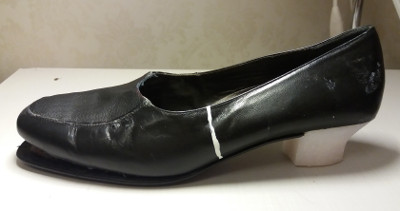
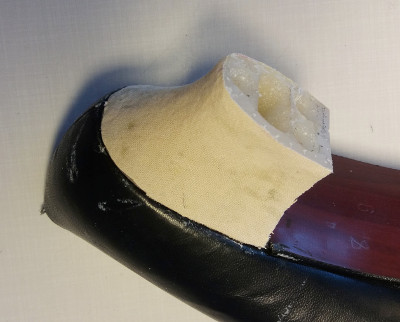
The toe was decorated with strap and tiny buckle that I got straight rid off with scissors. The toe also had a decorative stitched surface bordered by a raised seam. I glued an extra layer of rather thick leather to flatten the surface and disguise the seam. I also cut the vamp into a more curved shape. The side seam place is marked with white.
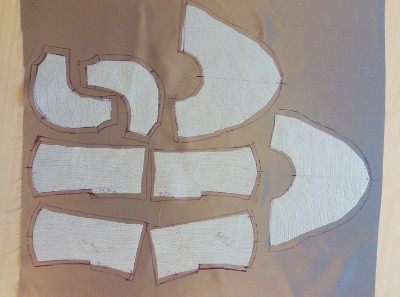
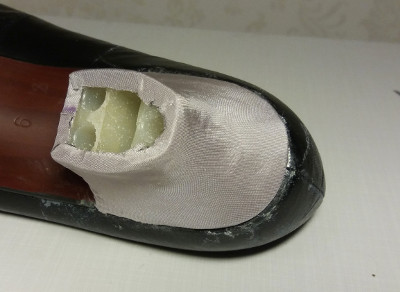
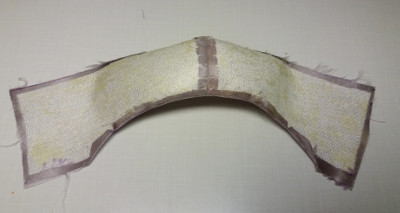
I drafted the cover pieces with muslin as usual. Again I used the heavy, napped fusible interfacing to absorb most of the glue and give a smoother finish. The interfacing does not generally reach the seam allowances, though, so that the seams will lie as flat as possible.
I began the covering with the heel. As the grinder had left the surface a bit uneven I added a layer of muslin to smooth the surface under the final top layer of satin.
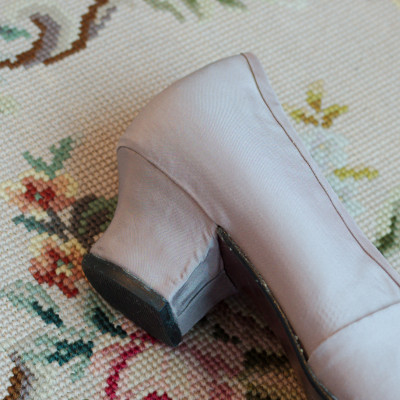
Smoothing the fabric over the lower, sturdier heels was easy compared to he curved heels I had done on the Francaise shoes. I did, however, face a new challenge: This was a first pair of shoes I have done where the outsole does not continue all the way down the front edge of the heel. This meant the heel covering would have to reach the front side as well. With fabric covering that meant turning the seam allowances under.
Well, I did not get this part quite perfect, and the edges don't lie quite smooth, but then again it's a place not very visible when wearing the shoes so I did not lose my night's sleep over it.
The happy surprise with the heel was while re-shaping it, I noticed quite by accident that it was just a bit loose. I was able to lift the heel with a screwdriver just enough to tuck the raw edges under it at the top edge.
I usually just cover the heel fabric edge with the counter tops, but this always leaves the joint of the heel a bit heavy and clumsy, so this was clearly an advantage and resulted in a much neater finish.
As the shoes wouldn't have buckle straps I reversed my usual order of glueing on the tops by beginning with the back rather than toe. I tried the satin pieces on, checked the line of the heel edge and pulled the lower edge slightly tighter with the help of a gathering thread. Due to the outer sole / heel construction the seam allowance also had to turn more sharply at the heel join than usually.
I first glued the seam allowances to lie flat, then applied glue on the whole piece. I matched the back seam carefully at first, then smoothed the fabric down towards the toe.
Making real seams on the sides of the uppers would have been beyond my skills, so I just turned under the seam allowances on the toe part which I glued on last. In 18th century shoes they cover this join by a tape, which is amazingly handy.
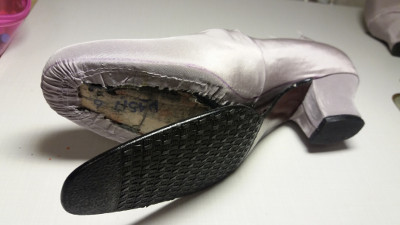
The fabric edges on the toe are gathered and turned under the sole as usual. As you can see from the pictures, this time I did not remove the outer sole completely, as its end was placed very securely under the heel and I had no desire to tear the shoes apart more than I had to. I got the outer sole loose enough that I could tuck all the fabric edges under, and then glued it back on.
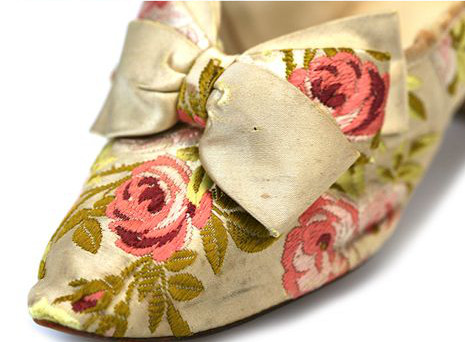
Embroidered
Floral Evening Shoes in the Manner of Late 18th Century,
USA. c.
1886
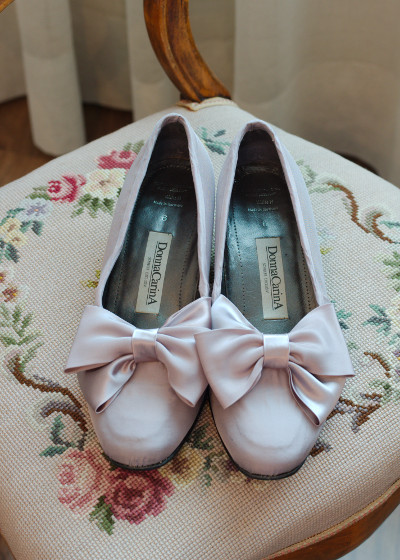
I finished the edge with self-fabric bias tape. Then there was only the final touch of the ubiquitous fabric rosette left. I decided on rather simple double bows. On a bit later shoe above the bows are made of two different materials, which inspired me to use different sides of the same material to get a very subtle twist. It might be a modern touch, but I like the look.
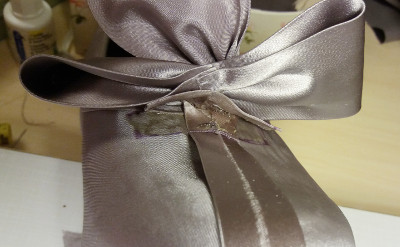
To form the bows I sewed two bias loops and basted them together. On the underside I basted a small piece of bias tape left over from edging. The bias tape gathering the bow is sewn on the vamp at one end, the tape at the back of the bow glued over it. The other end is turned over the shoe edge and glued on the inside of the vamp.
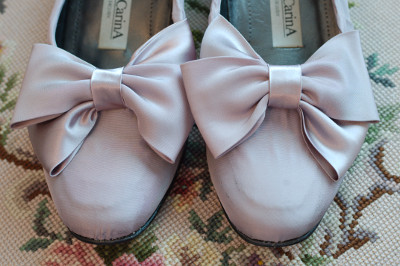
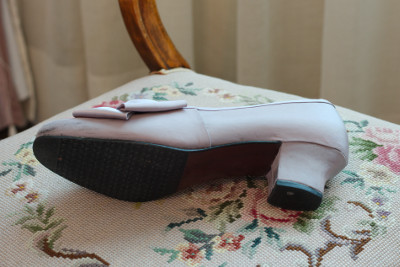
The finished shoes are a nice addition to the ball toilette. I have to confess that in purely aesthetic terms, they are not my favorite shoes ever, they are a bit too girlish for my taste, but still I think they more or less right for the period and that's the main thing. The color harmonizes well with the dress and they are not too conspicuous in any way.
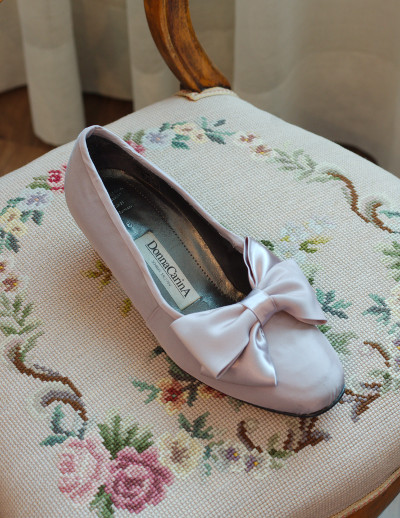
The color I chose might not look that good with other possible future dresses I might want to wear them with, but then again they were not that time-consuming to make and the biggest expense was the glue, so it doesn't matter that much if I'll end up using them with only this one dress (which I like very much).
The best thing about these shoes may well be that they are amazingly comfortable to wear. At the ball I danced a lot at I did not have think about my shoes for once, nor did my feet felt tired at the end of the night.