Kirtle, 2011
The leap from 18th century to the Middle Ages was not totally unpredictable. My fascination with the romantiziced vision of this era began already in my youth, when I was a huge fan of novels of the Finnish author Kaari Utrio. On the fall 2010 me and Jarno went to renaissance dance class, originally because they teach also English Country Dances that can be danced on the 18th century too. There we were introduced to a bunch of very nice SCA people, and no further encouragement was needed: The journey into the noble past of von Mannheims began...
"The Middle Ages" is an era of about one thousand years. Costume wise I find the late medieval era, 14th and 15th centuries most interesting. And where my costuming inspiration leads, von Mannheims shall follow.
The Material
I began my medievalist career with the obligatory linen shift and a basic dress. I had the good luck to find a very nice wool flannel in light blue (the said color always being a recommendation with me) for less than 10 euros per meter. Well, of course it probably had something else than wool on it too (the bolt had scant information of what and how much), and it was also stained at places which explained the price. I decided to take the chance of washing it, and bought the rest of the bolt though it was a bit more than I needed - thus I could pick the best parts of it.
To my great delight the flannel survived machine wash very well, which was good to know since this was going to be my basic dress that would get worn everywhere. Most of the stains also faded enough not to show through to the right side. The remaining ones could easily be avoided.
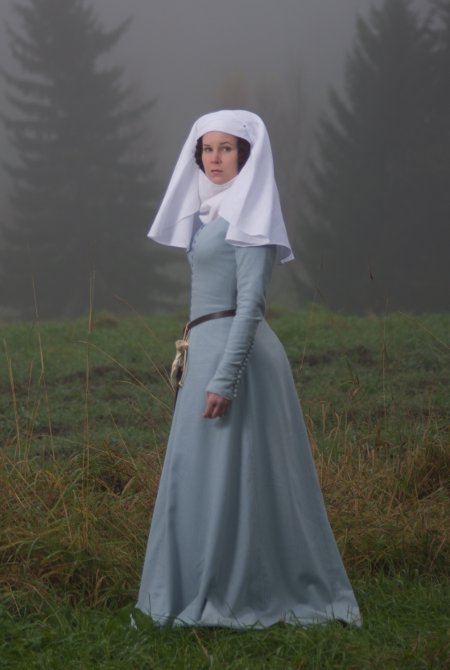
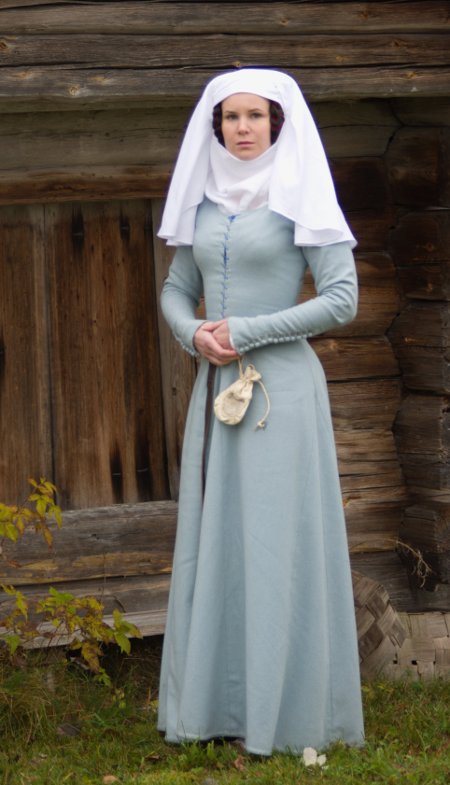
I decided to make a simple, tight fitting underdress, or kirtle. A woollen underdress may sound quite heavy, but as most of the year was rather chilly in medieval northern Europe (also indoors) people wore many layers of warm clothes. Though a woollen kirtle may have originally been worn mostly under other clothes, a reenactor can well wear it as a main dress. I can also make other garments to wear with it later.
Drafting the pattern
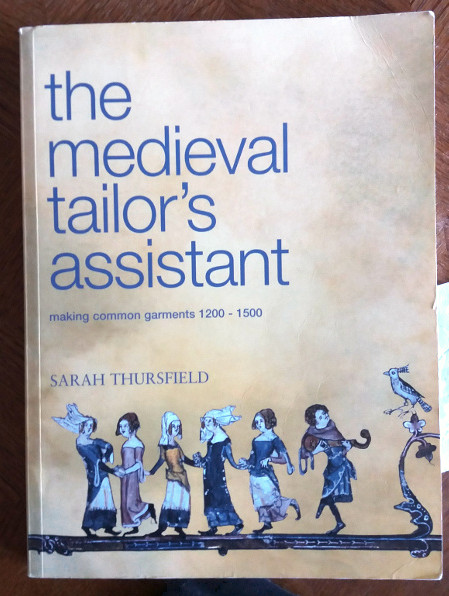
The main source for my medieval projects is Sarah Thursfield's "The Medieval Tailor's Assistant", which I bought on a friend's recommendation. It's definitely worth all the praise. I also used some internet sources about the fit of late medieval gowns. The popular (and authentic) method of draping the material on the body was not to my liking, as I like to make as much as I can myself and enjoy the learning process, and also get paper patterns I can use later on other projects.Thus I got the idea of altering my modern basic dress pattern to a medieval dress pattern. This may sound like a lot of useless work, but as I like fussing with pattern drafting and I was not in any hurry it was rather more fun.
The main difference between medieval and modern cut is that in the former the bodice is cut on four parts with seams on center front, center back and sides. No princess seams (which are an 19th century invention) and no darts. To be honest I had great doubts as to how this could ever work (despite reproductions I had seen), but happily I was proved wrong.
I began altering my modern bodice pattern by moving the waist shaping from the darts to the seams. Getting rid of the breast dart was more complicated. I turned it on just about every direction: A bit on the armhole, some on the neckline (where it could be gathered), on the front edge and waist (which creates the shaped front edge typical of the four-panel-cut), and even the side seam. I compared the result with Thursfields pattern blocks (which are done by draping the material on body). They have very curved side seams, which looked very silly on my mock up, so I straightened them - it might be different if I had more bosom and ultra-stretchy material. The front seam shaping, however, which would be quite a no-no on modern pattern drafting, worked much better than I had thought (as long as the bodice is tight enough) and I could even add a bit more shaping than I had dared to attempt on paper. It caused, of course, some horizontal wrinkling at the bosom, but as I was working with wool I decided to cheat a little and gather the front edges a bit before sewing the linen tape on them. Actually I wouldn't be surprised if this simple trick would have been used on the period.
On a sidenote, I have since this seem some pictorical evidence which might suggest some kind of princess cut, but the main consensus seems to be that it didn't exist. I'm quite happy to use the four-panel-cut as it works on my body, but more well-endowed ladies might need a bit more shaping to achieve a tight fit. Anyway, if someone knows more about the possibility of princess cut on the 14th-15th century I am very interested. The Greenland gowns seem to have something of the kind.
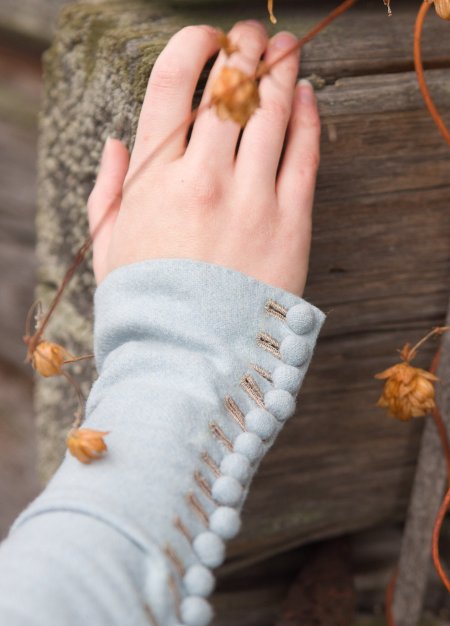
The sleeve pattern is drafted according to Thursfield's instructions. The medieval shoulder seam is shorter than a modern one, and the sleevehead rises well over the shoulder. That makes me wonder why Thursfield's sleeveheads have hardly any ease. Okay, it may well be period, but according to my logic a sleevehead with a bit more ease would fit so much better over the shoulder, so I added some to mine. As the medieval sleeve was set very high on the underarm it allows surprisingly wide movements while still looking tight. The sleeve reaches almost knuckles and is really tight all the way, and only after a couple of mock ups I was happy with it.
For some reason Thursfield doesn't use gores in the hem, but I wanted to use this economical cut, which was also a convenient way to avoid stained spots on the material. The finished hem width is a bit over 3 meters.
Sewing
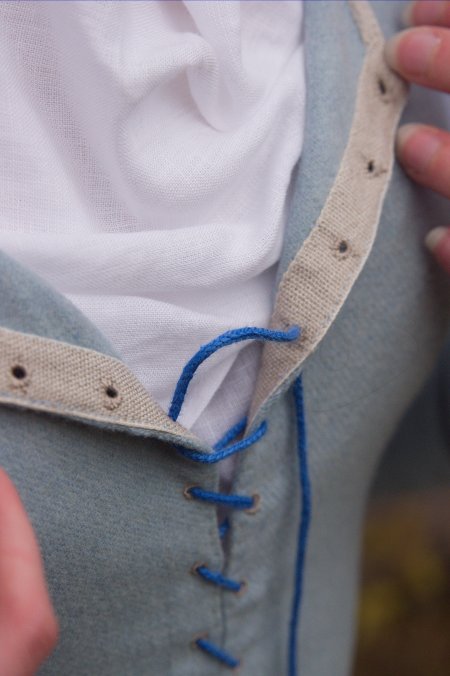
After sewing the hem gores to kirtle pieces I began putting it together on the back seam and the shoulder seams. Then I turned the neckline edge with narrow linen tape, gathering it a bit on the front. Then I sewed a linen tape on the front edges to support the lacing eyelets. Like I mentioned, I also gathered the edges on the bustline to form a bit of shaping. I sewed the other edge of the tape by hand and then worked the eyelets.
Being now able to lace the dress and not just pin and guess I closed the side seams and tried it on. It turned out that I could well take in a bit more at the side seams. As the wool had a bit of stretch the bodice fit now (with a shift underneath) better than I would have ever believed. Despite all my initial doubts I was by now ready to swear by the four panel cut.
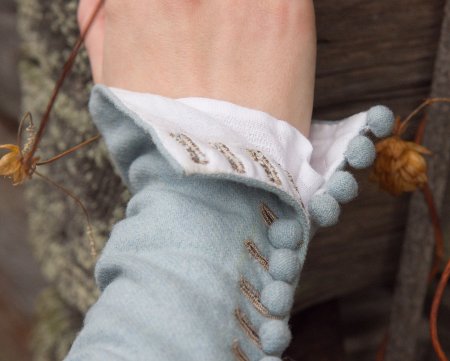
Now that I was more than happy with the bodice I began working on the sleeves. I reinforced the edges of the buttoning slit with linen tape and lined the lower part from the wrist down so it would look neater if I turned the sleeves up. Then the sleeves traveled for some time in my handbag until they had 13 buttonholes each. I even remade some of the first ones to get them even. Cute little cloth buttons were fun to make, and also very economical as in the late 14th century you need to have a lot of buttons, and for once you can use the small cutting leftovers for something.
All that was left was to set the sleeves (which went easily this time, sleeves being always a bit of an adventure) and finish the hem. I decided for a practical length that is a bit over ground - or was, since I think the material has stretched a bit in that direction too.
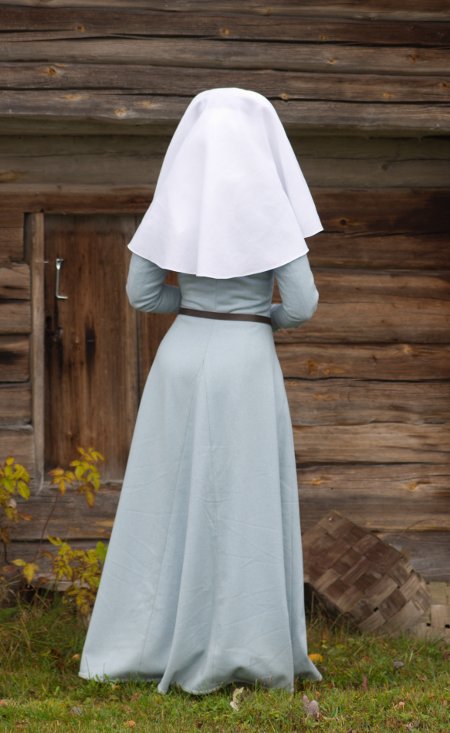
Apart form a few dress rehearsals at the dancing class I wore the kirtle for the first time at the Hämeenlinna Fair 2011. It was warm enough for evening and not too warm during the day, and very comfortable. It's simple but has an understated charm. I planned it to be my "basic medieval dress", and I think I shall be wearing it a lot too.
The belt is a modern one, the purse bought from the fair. The lacing cord is luceted.