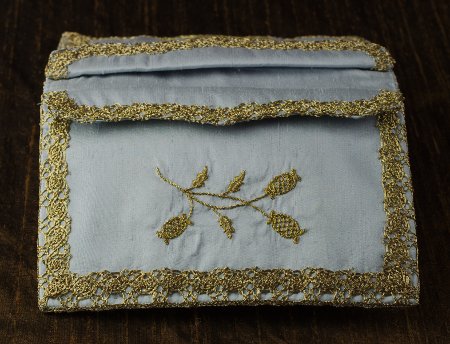
Pocket book, 2012
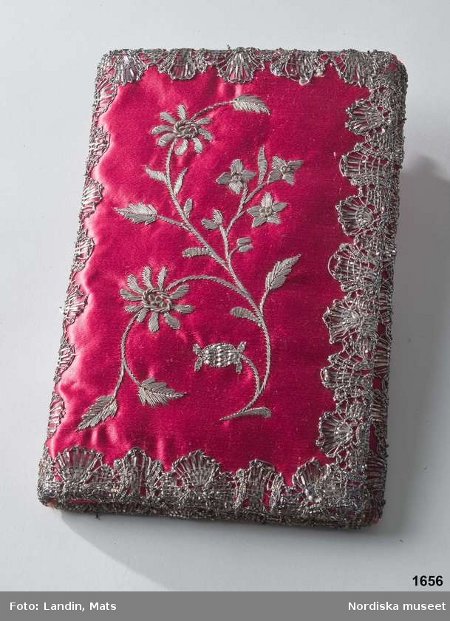
Every time I buy a new biography, I look at the pictures first. At the centerfold of Kristina Ekero Eriksons biography of Märta Helena Reenstierna, “Årstrafruns dolda dagböcker” there was a picture of a beautiful pocket book that had belonged to the lady in question. To my shame I must confess I have yet to finish the book (it's not that I didn't find it interesting, it's just that my sadly insufficient Swedish), but the lovely cherry pink pocket book with silver lace and embroidery stuck to my mind.
In good time before Christmas last year I decided to make Jarno an 18th century gift, as he (like most of us) already has pretty much everything on this century. I thought that a pocket book would make a great gift, as it would have been very suitable in the period too to embroider one for one's husband for Christmas. A pocket book might not be quite as practical as a modern wallet, but then again I have presented him with plenty of more utterly useless modern gifts anyway.
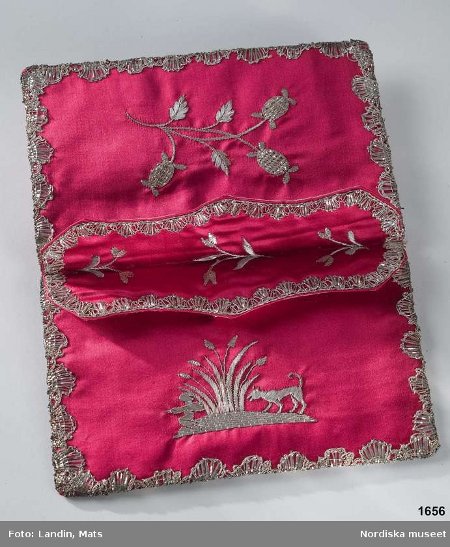
I searched for an extant 18th century pocket book I would like to replicate (or at least draw inspiration from) but couldn't find any that I liked enough or that would be easy enough to make. Finally I returned back to Märta Helena's pocket book, and decided that while the floral decoration was quite feminine it would go for a gentleman too if I'd just change the color of the silk. And there was, after all, also a hunting scene depicted on the inner cover quite suitable for a gentleman.
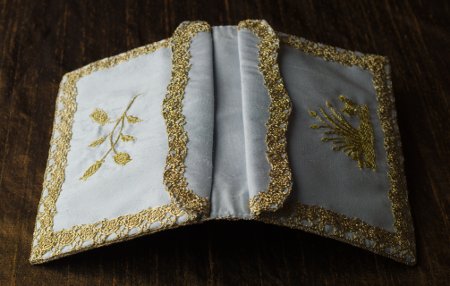
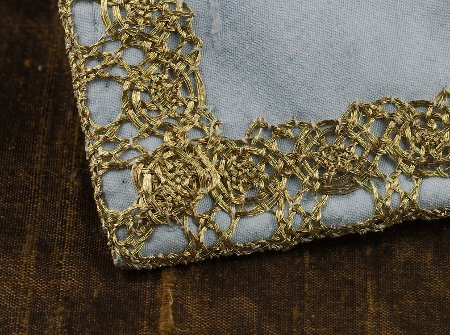
I settled on a pale blue dupioni silk, and for the embroidery I chose DMC's gold metal thread. It's kinda garish gold, but will do. I chose the lace to match the shade.
Märta Helena's pocket book belongs to the collection of Nordiska Museet, and I managed to find larger versions of the tiny pictures in the book through Digitalt Museet search (Search for "Märta Helena Reenstierna" to see the original). Sadly the pictures show only the front cover of the closed pocket book and the opened interior, so I had no idea what the back cover looked like. Thus I decided to make it a mirror image of the front cover.
*Update in 2025* When I checked the museum site again, to my happy surprise they had added more pictures - and indeed, the back cover is a mirror image of the front!)
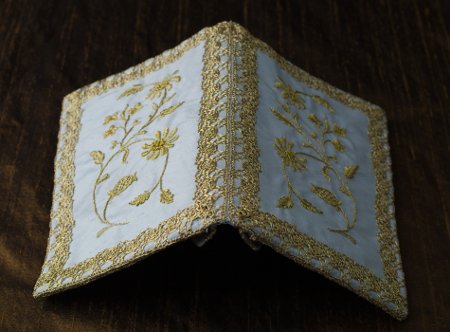
I also made some minor changes in the embroidery design, such as leave out the embroidered flowers on the pocket flaps, as I didn't feel the overall look really absolutely needed them and besides it would be easier to adjust the size and shape of the flaps without embroidery. I also changed the dog to resemble a Finnish Spitz in memory of my parent's deceased pet which Jarno was very fond of.
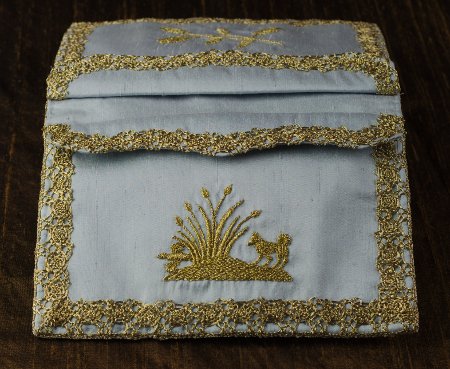
The museum site does not mention the size of the pocket book, but based on other sources I decided that it would measure 11cm x 17cm closed. The construction is based mainly on my own interpretation of the pictures. Probably the next week I shall suddenly come across the in-depth tutorial which reveals how it should be done, but that's how it goes.
I cut the cover and the pocket tops on the inside as a single piece. Between them I inserted inner pocket pieces, the ends of which turn over the top pocket to form the flaps seen in the picture. Thus the pocket book has four flaps in total. At the sign of the Golden Scissors has pictures of a similar type of pocketbook which is mentioned to have four pockets, but not how they were made. I backed the thin dupioni with iron-on interfacing to give it some body and added a piece of leather between the top cover and its lining.
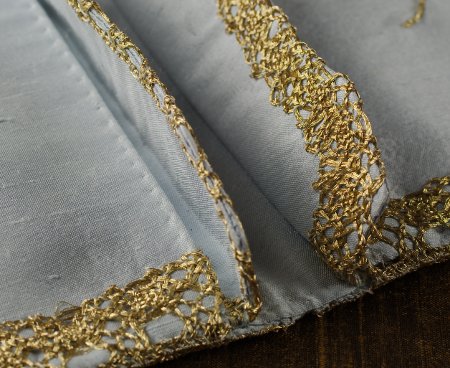
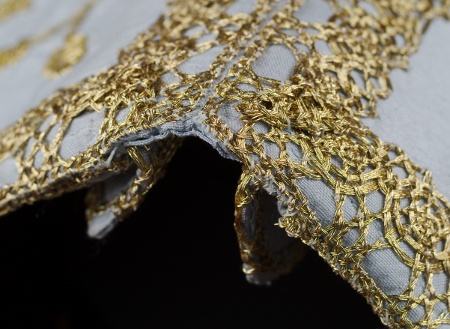
I began with the inner pocket pieces, which I lined in silk, leaving an ample turning allowance for the flap. At this point I still left the bottom unfinished so that I could adjust its size later. I hand-stitched the flap edges and added the metal lace. On the original pocket book the flaps are edged with a similar but much narrower lace than is used elsewhere, while I only had this width, so I turned the edge of the lace on the underside to give the impression of a narrower lace.
After finishing the inner pocket pieces I placed them on top of another and measured how much allowance I would need for the cover back to get the pocket book to close neatly. Then I cut the leather reinforcement to the desired size with the allowance (I had settled on 1cm) added, and placed the silk on the leather wrapped over the inner pockets to determine how long that in turn should be. Then I added a further bit of allowance for the outer edge where the piece is folded inside to form the outer pocket. Now that I had my measurements for the main piece I lightly marked the corners and folding lines on a generously sized piece of silk.
I sketched the embroidery motifs on paper and traced them on bold marker so that they were clearly visible through the thin silk held against window glass on daylight. I traced them faintly on pencil. Somehow I managed in the copying process to get the sprig on the top pocket upside down, but that hardly matters unless you compare it to the original. After copying all the motifs I fastened the iron-on interfacing and neatened the edges of the piece with overlock as dupioni frays wildly and I was going to work on this piece for some time.
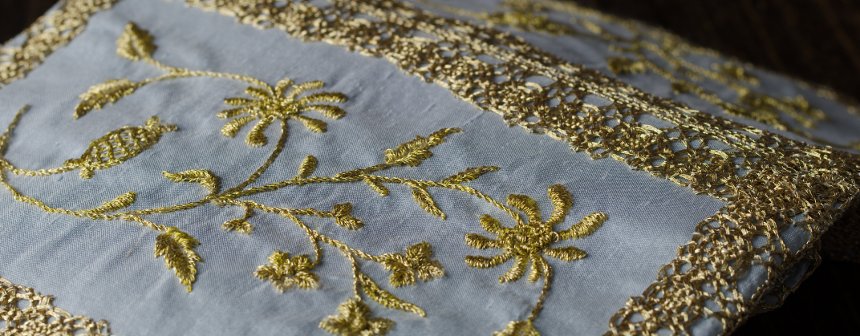
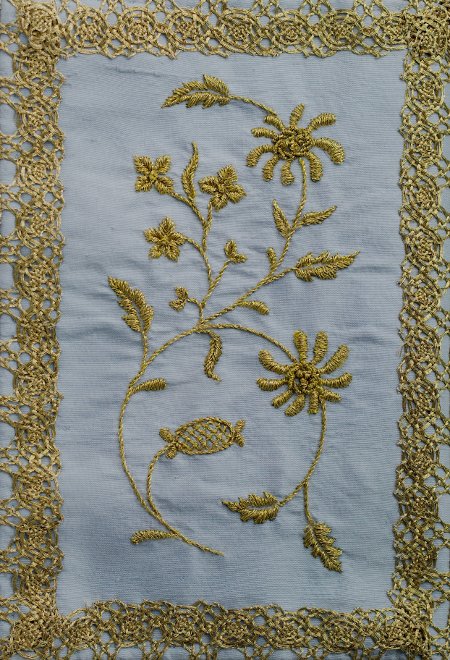
I began working on the embroidery at the sprig on the top pocket (the one upside down), and from there moved on to the floral motifs on the top covers. I left the hunting scene last on purpose as it would be the most challenging one. A flower still looks like a flower even though it's not perfect, but a dog can easily end up looking like a sheep, so I wanted to practice with easier motifs first. While historical clothing offers endless opportunities for lavish embroidery, I have done little of it as it's so time consuming, so I don't have much experience on it (not counting cross stitch and petit point, which I did a lot when I was younger).
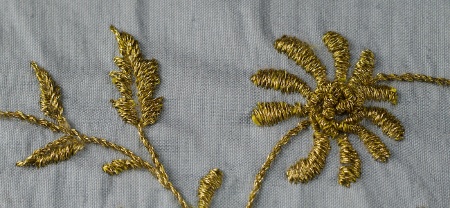
I used mainly the same stitches that are used in the original piece: Stem stitch, satin stitch and french knots. The stitches around the center of the sunflowers I interpreted to be bullion knots, a new stitch for me and useful to learn, though it was a bit tricky to make in metal thread.

I was unable to recognize the filling stitch used for the berries, so I used diagonal filling stitch instead. It doesn't look the same but I rather like the look. It's still bit of a mystery to me how all those different kind of flowers and berries seem to bud from the same stem, though...
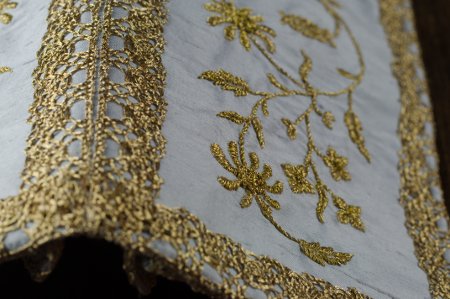
Working on the embroidery was rewarding, not to say addictive, even though the metal thread was a bit annoying to work with as it tended to twist and fray all the time. It does, however, give a nice raised effect on the unpadded embroidery. The rather simple motifs worked on just one color were quite easy to replicate, but detailed enough not to get boring.
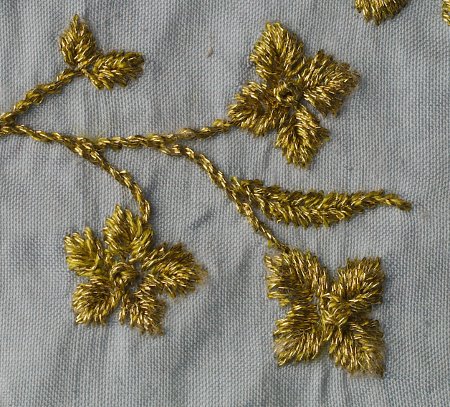
As usually happens, my embroidery technique evolved as I worked, and some days I worked more carefully than on others, ans thus for example every leaf is a bit different. At some point I got a bit perfectionistic and decided to work the petals of the tiny flowers in dense fishbone stitch instead of the simple satin stitch used in the original.
After finishing the cover motifs I realized that they looked a bit top-heavy, which was probably caused by my not realizing how much the camera angle distorted the proportions when drawing the pattern. I added an extra leaf on the bottom scroll to balance it a bit.
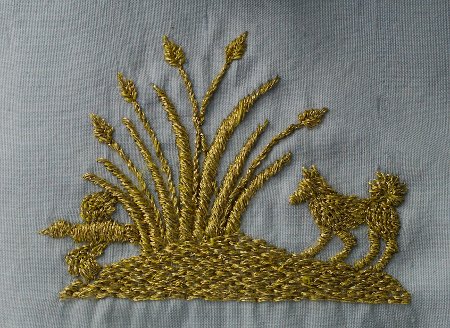
The duck and the dog in the hunting scene inspired me to improve my technique further, I worked the duck's wings on stitches of different length to imitate long feathers, while the head and body were worked on dense vertical satin stitch. The dog's head and legs were also worked on dense satin stitch to imitate short hair, while the body is worked on longer stitch which follows the direction where fluffy hair would grow. I also tried to pad the shoulder and thigh with short stitch under the top stitches to make the dog appear more three dimensional, but it doesn't really show. The tail, on the other hand, became super fluffy and rather oversized, but at least you can easily tell it's supposed to be a Finnish Spitz.
After finishing all the embroidery I began to assemble the pocket book. No matter how tight I had fastened the silk on the embroidery frame the stitches had nevertheless pinched the silk a little, so my edge marks did not match anymore. I fitted the cover again over the leather interfacing and then trimmed it to the right size. I lined it with the same silk, leaving the lining a bit shorter to accommodate the folds. I closed the ends on machine and long sides by hand, adjusting the materials to turn neatly at the back. The suede interfacing gripped to the fluffy iron-on interfacing in the silk so well that it didn't need any basting or glue.
Next I trimmed the inner pocket pieces to the right depth and closed their lower edge, this time on machine as they would be hidden. I left a large gap between the flaps at the center to be sure that the pocket book would close neatly. Then I sewed the inner pocket pieces on the edges of the cover, folded the ends of the embroidered cover piece to form the outer pockets, and sewed them to the inner pocket edge.
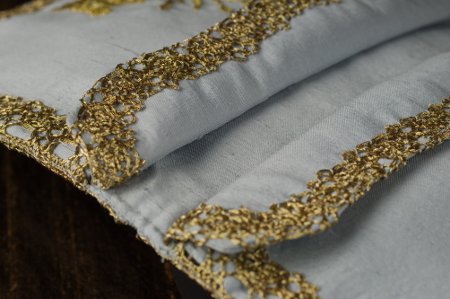
I left the closed pocket book rest overnight under a magazine pile to settle on it's closed shape, and then began the most arduous part of the project: Hand stitching the edges through all layers. This included a lot of blood, unpicking and starting again, dirty words and twisted pins, but it did give the book a firmer shape. Luckily the stitching didn't have to be neat and even (which it certainly was not) as it would be covered by the lace.
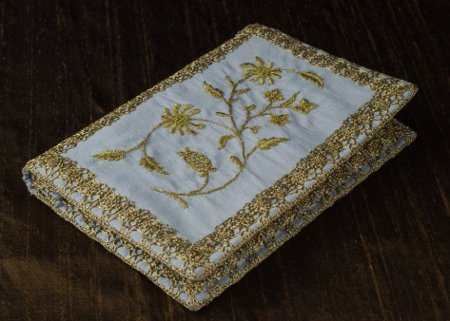
Adding the lace was, on the contrary, extremely nice and relaxing, and with it I finished the pocket book several whole days before Christmas. I also managed to keep the project secret from Jarno, though once I was almost caught red handed when he returned early from band rehearsals.

The finished pocket book is not quite an exact replica of the original, but I was not overly ambitious about making one, but rather felt that it would be easier to make a nice looking pocket book if I had a model for it. A pocket book like this as a wallet may not be overly practical at storing coins, but notes and credit cards should stay more securely inside. I'm not quite sure if the gold decoration is a bit too garish, but then again it suits the period, and also works better in candlelight than daylight. Making it was very rewarding, and I may well get inspired to begin some other embroidery project sooner or later.