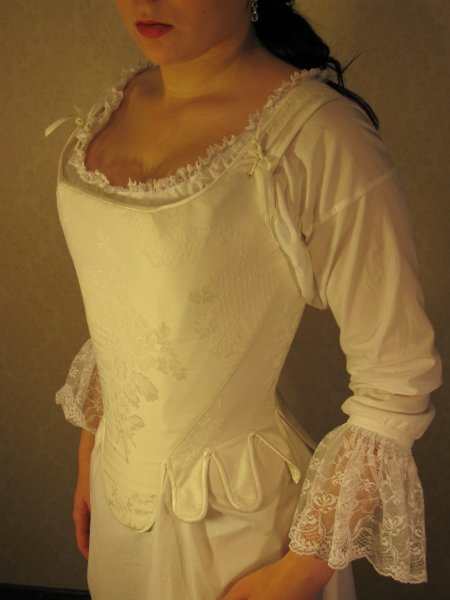
Stays, 2008
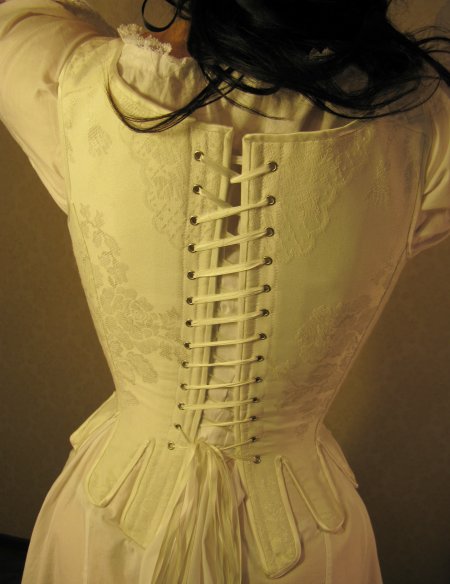
My first 18th century corset, or stays as they should be called. They don't look quite like they were from a museum, but perhaps like from a half-decent period movie at least...
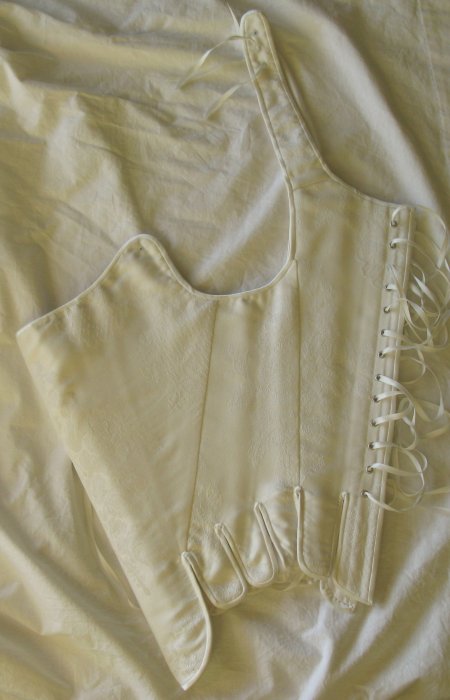
The fist step towards my dream, an 18th century dress was to make the base for it, a pair of stays. I chose a half boned model, because I wisely thought beginning with a too ambitious project too risky for my sanity, and besides I have neither a waistline nor a bosom needing extreme measures in a way of restriction. And of course, as the boning channels are hidden under the top fabric, they can be machine sewn without any scruples.
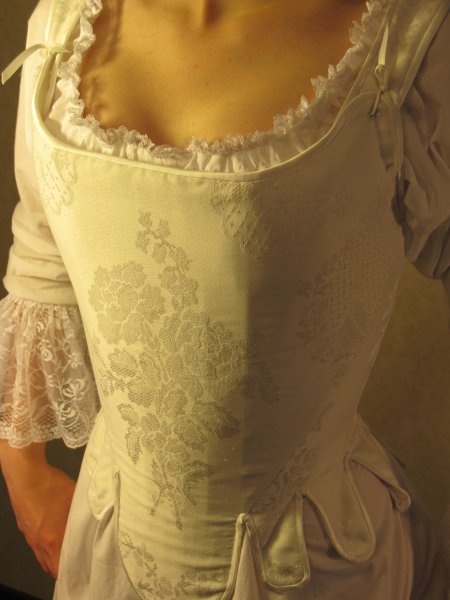
The top fabric is found from sale basket, artificial but very pretty. The colour choice is a bit boring, perhaps, as there were lovely coloured stays at the period, but I thought white would be the practical choice, not showing through white dresses. The stays are edged with a ready-made bias tape - not period, but nice and easy to handle. For the boning I chose narrow steel boning. I filed the bone ends rounded and covered them with tape so that they would not break the fabric.
The pattern I used was Butterick's Making History-pattern b4484, "Misses' historical underpinnings", though I ended up altering it pretty much. It was way too short for me, so I had to make it considerably longer, and I also got rid of the front lacing, putting just straight bone channels on it's place. I also changed the lower edge of the center front panel to be wider, so that it would, according to my thinking, flatten my stomach and leave a nice, flat surface for a long dress bodice. Altering the pattern for stays was a challenge rather different from making patterns for normal garments, which I'm more familiar with, as it's not supposed to fit the body as it is, but form the body to a certain shape, but still remain tolerable to wear.
After the first mock-up version I actually buried the project for a long time. I got back to it much later, when I came up with the idea of making a similar style of corset decorated with the logo of my favourite band, Kamelot - a project of which you can read more here. So I got back to work with the pattern, keeping the shape of the pattern pieces I had managed to get quite well so far, but erased all the boning channels, which had suffered somewhat from altering the pattern so much. I drew them anew, partly following the original pattern, partly using other sources. I also left off the horizontal bones at the bust line, because they demanded some extra trouble in the construction, and as I said earlier, my bust is of the size that does not require extra support.
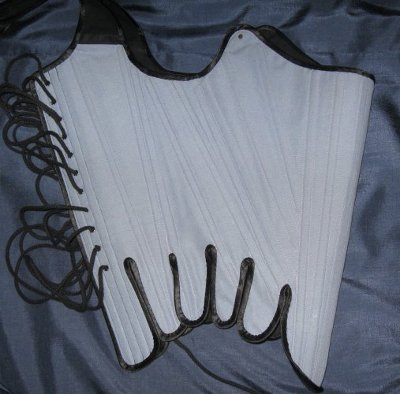
Another thing I left off were the short bones in the waistline tabs, in my boned mock up they did not give any support, but just jutted out oddly, and I did not get how they were supposed to work. Instead I extended the regular bones to the tabs as far as possible.
Then I began the Kamelot-corset, which also served as a helpful prototype. At first I thought I would add more bones in the real stays, but the Kamelot stays turned out so nice and comfortable that when I begun the real thing again I did not have to change much. I made the upper edge rise a bit higher both front and back, and made the waist a bit tighter in case it would give away in use.

The method I used in constructing the stays was a mix of the instructions that came with the pattern and various internet sources, most notable among them the "How to Make an 18th Century Corset"-tutorial from La Couturiere Parisienne.
I cut the two inner layers out of stiff cotton/polyester-fabric, and stitched the boning channels. I know linen to be the accurate choice, but I was afraid of the stretching. The lining is thin cotton batiste. I shamelessly broke the rules of accuracy again in interlining the top fabric with iron-on interlining, because it frayed terribly.

I sewed together the edges of all the layers, and also the edges of the yet uncut tabs, which I had already stitched on the base. As all the layers were now more or less securely together, I carefully cut the tabs apart. As the allowances between the tabs were tiny I reinforced them with hand sewn stitches over the edge, and the ends of the slits also.

Another not very authentic choice was to stitch the center back boning channels on both sides of the lacing through all the layers, and with machine too, in hopes of stabilizing the lacing eyelets.
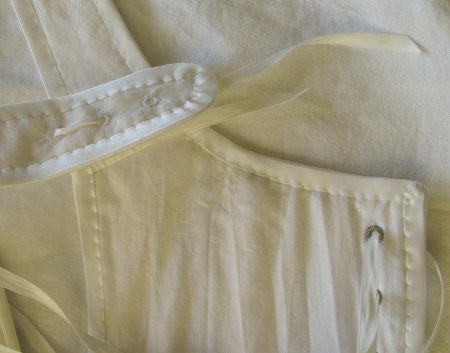
Yeah, the eyelets. I used the metallic ones yet unheard of on this century. I would not have, in spite of all my impatience, considered hand-bound eyelets an unconquerable task, could I have been sure that the finished stays would fit perfectly and serve me for all eternity - which I wasn't. So, in case that the stays would fail (because you can't really try it on until it's pretty much finished, and you only see if it's truly good after some use) I did not want to put too much work into them.
Another inaccuracy in the lacing holes is that they are spaced evenly like in 19th century corsets, while at this period they were spaced differently with just one lace. Somehow I decided to go with the familiar way.
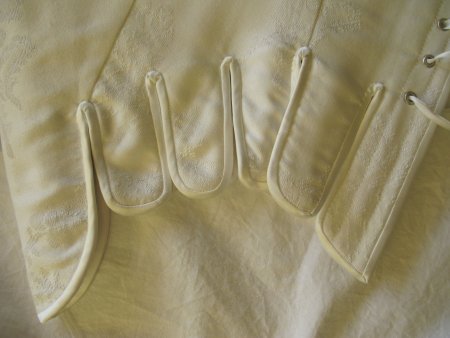
Presently we shall return again to the tabs. In my Kamelot-stays I found out that edging them was not quite as simple as I had imagined, but wiser from that experience, this time I took my time and made much more of it by hand. I still attached the tape on the outside on machine on the parts where it was handy, but on the ends between the tabs I made it by hand.
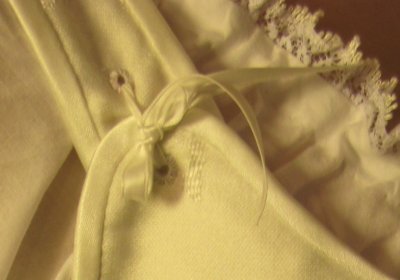
Having reinforced and shaped the lower edge I could finally carefully try the stays on. I still had to shape the neckline a bit, and take a little off from the armhole at the front. Then I fitted the shoulder straps and sewed them on.
After the lower edge the rest of the edging was child's play almost, a quick job with machine. This time I had the patience, though, to fasten the other side of the tape on the inner side of the stays fully by hand, not stitching on the seam line between the tape and the bodice (the fast solution I use with modern stuff). When done by hand, however, in a stiff garment like this it gives a lovely, tight and neat finish.
The finished stays are pretty good for a first attempt. There were some surprises about the fit, though. It's so far a bit too tight at the waist, the lacing leaving open too much there, but at least that won't hurt in the case of possible stretching in use. A bigger problem is that the upper edges of the lacing tend to be too close, drawing the shoulder straps too near each other too, and thus are in the danger of showing from the neckline of a dress. On hindsight it rises also perhaps a bit too high both front and back, unlike the Kamelot one, which I thought too low. In the pictures you can also see some of the tabs twisting in a weird way. But it's my first one, after all, and I think I can manage with it, as long as I am not making anything scandalously revealing over it.
