18th
century hat, 2022
I don’t remember when I first began to fancy a black 18th century hat, but once I began my new monochrome print Robe a la Francaise it became clear that I absolutely needed one to wear with it. It would also be a useful go-with-everything accessory.
Choosing
the Style
At first I was inspired by the fabulous “Brain hat” in the "The American Duchess Guide to 18th Century Dressmaking" -book, but at some point I began to think that maybe I wanted something less dramatic instead. I also felt that it would be nice if the hat had some lighter touch to balance the black look, which is ultra stylish but can look a bit harsh.
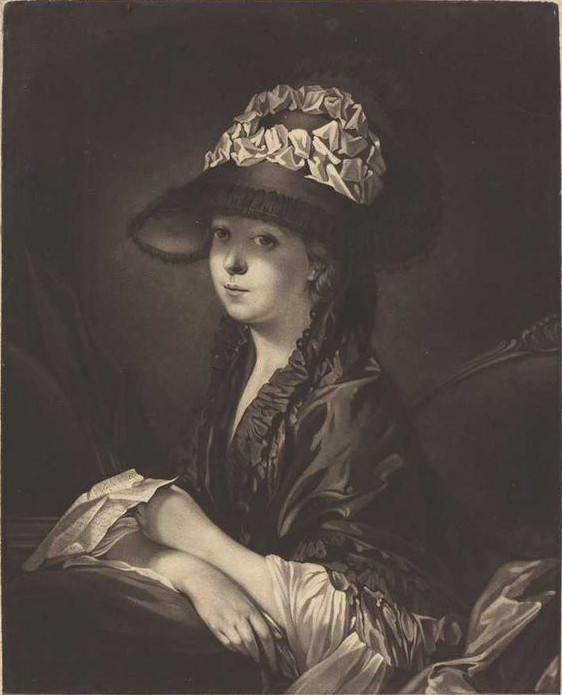
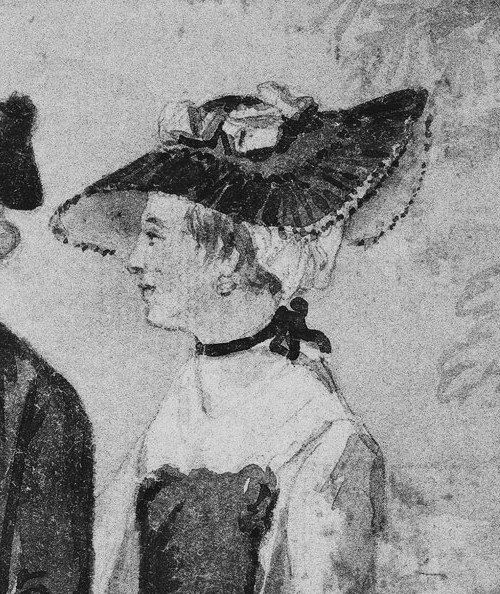
Watson after Falconet:
"Lucinda, Miss Moore", 1772
I found some pictures of black hats trimmed with what looks like white (or some other light color), and especially liked this one. Ribbon decoration and ruching around the brim, what’s not to like! In general looped ribbon around the crown seemed to be a very typical hat trimming for straw bergeres and fabric covered hats alike. Pinterest even directed me to a great blog post by Kozy Kitty about recreating it. She had made wonderful instructions with a lot of pictures. I followed her instructions on some places but went on my own in others. My way of doing things is certainly not based on any historical research on the subject, but I just chose a construction method that seemed to make most sense to me.
Another hat that looks
very similar,
Paul Sandby: "Thomas and Elisabeth Sandby"
(Detail)
Paul Sandby: "Thomas and Elisabeth Sandby"
(Detail)
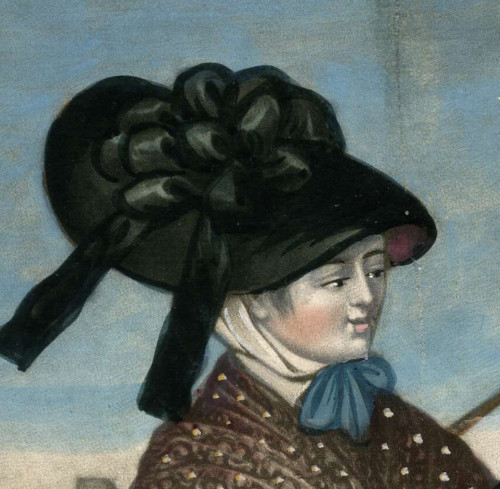
"The Sailor's Pleasure",
artist unknown,
published by Sayer & Bennet 1781
(Detail)
published by Sayer & Bennet 1781
(Detail)
I also found this picture of a black hat with a small glimpse of the lining which looks like pink. I thought it was a great idea for adding a bit of colour and possibly reflecting some light on the face. I really liked the idea of light pink combined with black, even if it might not be the most typical choice. It would sort of give the same look as black and white but with a less strong contrast.
Both the black and powder pink materials were machine woven dupioni, not quite the period accurate silk taffeta but a solid budget choice in my opinion.
Making
the hat
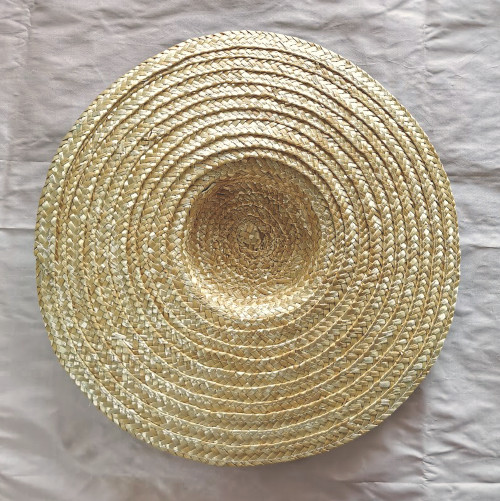
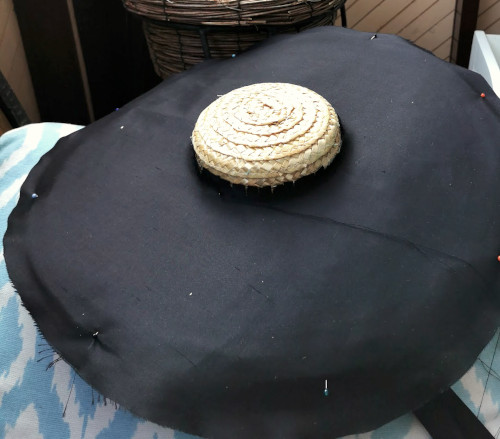
For the base I used a modern straw hat partly re-sewn to get a period-correct shape with a small flat crown. This seems to have been the standard base on the period too, as you can often see the outline of straw rows through the top material in portraits. Obviously it was not seen as a visual flaw then, but nevertheless I was neurotic enough to try to prevent the effect. Of course, the upcycled straw I used was also thicker and more coarse than what they used.
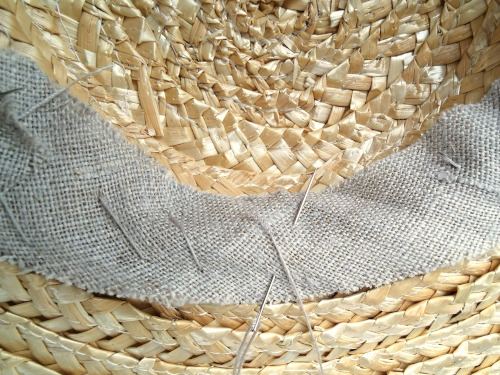
I stitched a layer of coarse bedsheet cotton over the top of the brim. It’s whole purpose was not just to soften the lines of straw edges, though, but also to make it easier to sew things through the fabric instead of the brittle straw, and also support the straw where I would stitch through it. I have had bad experiences of breaking the straw in the past so I have grown to be more careful with it. To the same end I tacked a bias strip of coarse linen at the base of the crown, where a lot of stitching would go.
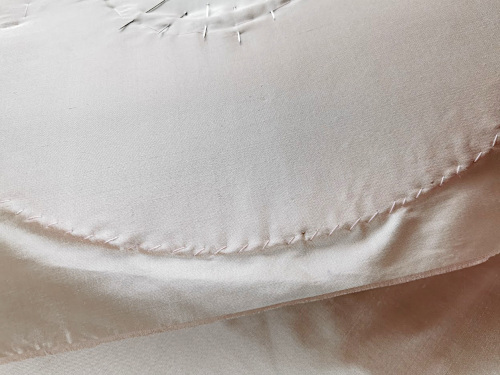
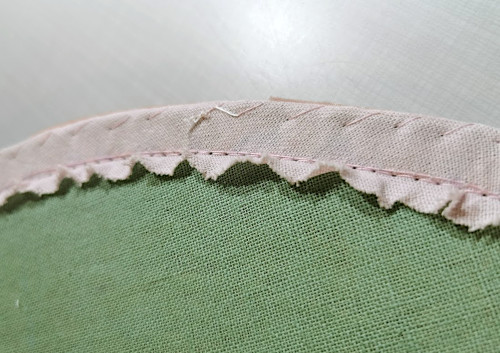
I also underlined the underside of the brim, also partly to prevent the straw lines from showing through but also because the powder pink silk was so thin that it easily lost its colour against a different colored base. Happily I had an almost matching bedsheet cotton in stash for the underlining. I turned it over the brim on the outside and stitched it through the brim edge.

Then I pulled the silk lining tight over the brim underside, already twisting the brim slightly in the final curved shape. I pinned it on, stitched it on the crown base and basted through the brim edge where the ties would be sewn. Then I whip stitched it on the interlining at the edge of the brim and cut away the extra material.

Yet another reason for interlining the brim had been that it was easier to draw markings on the fabric. The base I had assembled was not quite evenly round, but I managed to mark quarters nonetheless. After getting the brim underside lining on I sewed the ribbon ties. As I didn’t have a perfectly matching real silk taffeta ribbon I just used the doubled silk fabric as I usually do.

Then it was the time for the brim top covering. First of all, I succumbed to using modern fusible interlining for the brim top covering. It gives the thin silk some body and gives a nice, smooth look. Like stated above, I’m not ready to invest in thicker silk.
I tied the ribbons together to keep the hat in a slightly curved shape and pinned the silk over the brim. This may have been a bit unnecessary, but I did not want the top layer to get strained when worn. Then I basted it on the brim edge.
I finally finished the edge by sewing a bias strip of black silk on the underside of the brim, then turning it over and whip stitching it on the top material. This mess would later get covered with the ruched trimming. Yes, I know, bias cut is not period, but it’s so neat I just could not resist it.

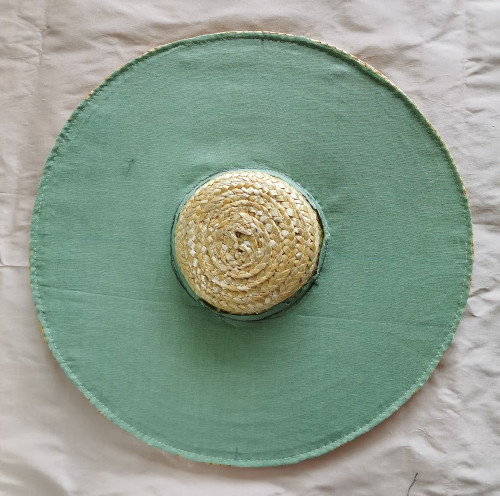
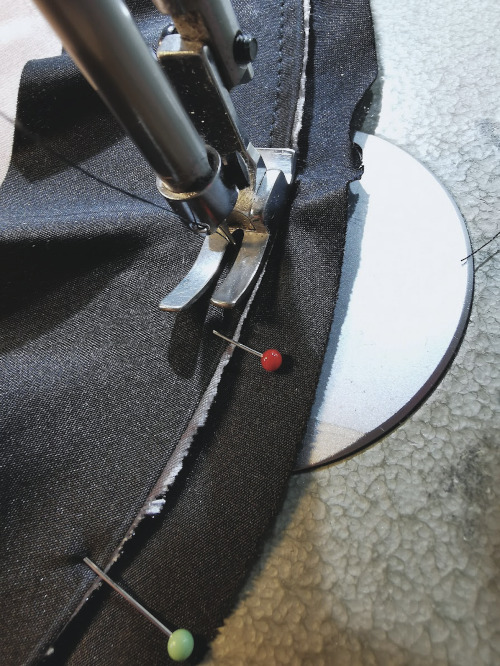
Next I turned to covering the crown. The technique of using a round flat piece on the top and joining it into straight, gathered strip introduced to me by Kozy Kitty’s post not only looked attractive, but would also disguise the fact that my self-assembled crown was a bit lopsided.
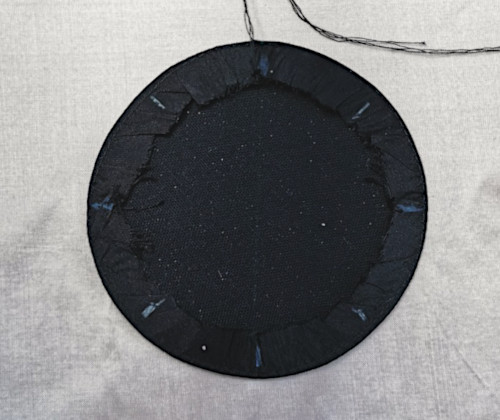
I made up the crown covering a bit differently though to get it a bit stiffer and this mask the unevenness of the crown more effectively. I put a double layer of fusible interlining on the round top piece, then sewed a gathering thread on the seam allowance and pressed it into shape over a round cardboard piece, turning the seam allowances in with the help of the gathering thread.
I cut the straight strip for the sides a bit full to better disguise the asymmetrical shape, gathered the top and sewed it on the edge of the round top piece with small whip stitch. Then I turned the lower edge in for sewing it in place.
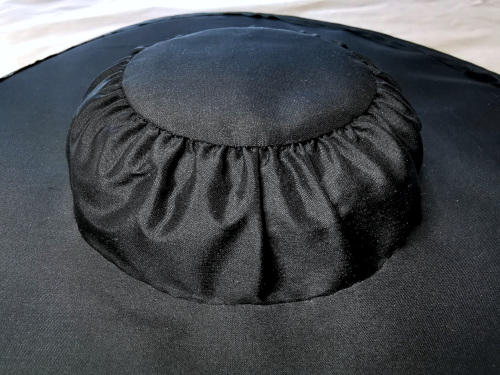
I measured an equal distance from the brim edge for the crown cover base, which did not quite match the original crown base. The covering piece with a bit of extra fullness managed to disguise the gapping on one side rather well, and the distraction provided by the trimming would take care of the rest. Of course it would have been much easier to use a ready-made perfectly symmetrical base or take more care in making my own, but the end result is what matters. Apart from practical considerations I also really like the look created by this detail, and it goes well with the ruched brim edging which would follow next.
Trimming
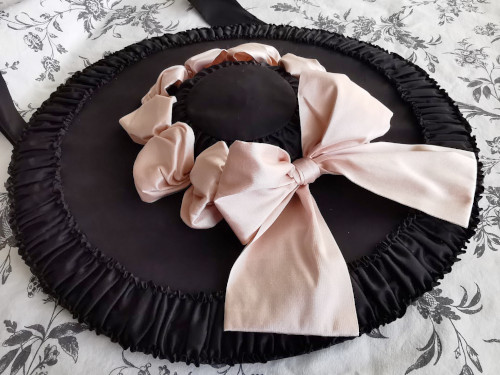
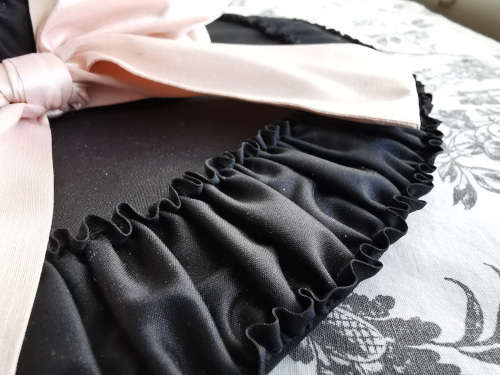
The ruching on the brim edge was the most pain to make in the whole hat. I began by cutting a double length strip (with the necessary joins) of black silk and pressing the seam allowance to turn in. The finished width was 5cm. The period correct method might have been just to cut the edge into tiny scallops with pinking shears, but as modern silks fray easily I didn't want to do that. In theory, if the ruching was made from ribbon instead of fabric, the edge would not be just cut either.

I whip stitched gathering threads about 5mm from both edges. I basted matching points on both hat brim and the ruching strip to keep the ruching even, as I did not trust my skills of keeping it even without some measuring.
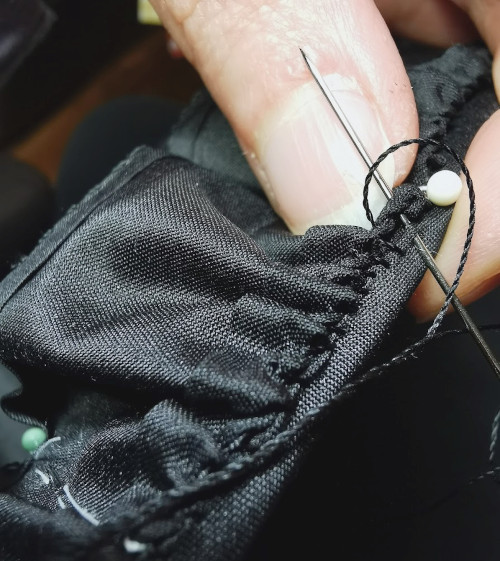
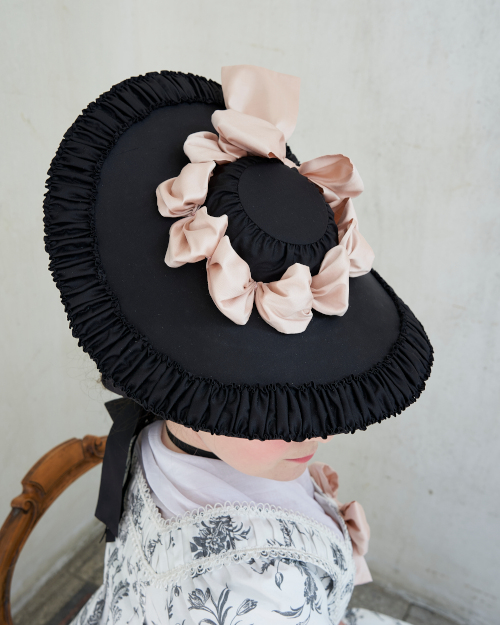
Then I pinned on the matching points and painstakingly drew in the gathering threads and sewed the gathers in place from the underside on the cover layers. This was a long a tedious way of doing it, but the result looks lovely at least to me. As the edges rise up a little and the middle part is left a bit loose the finished width is about 4cm, which to my eye seems to be in nice proportion to the hat in general.
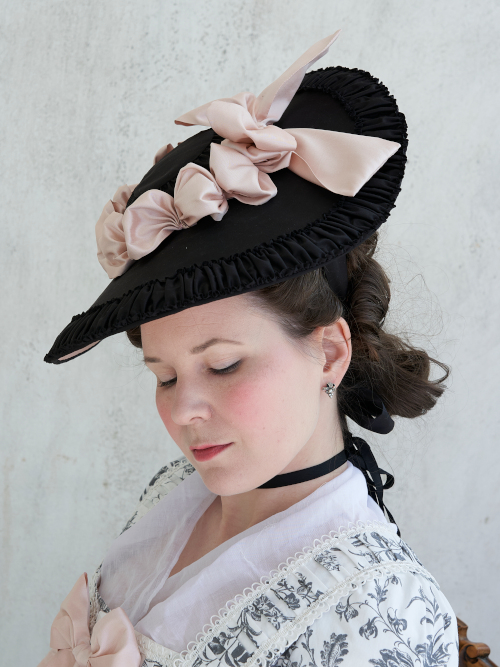
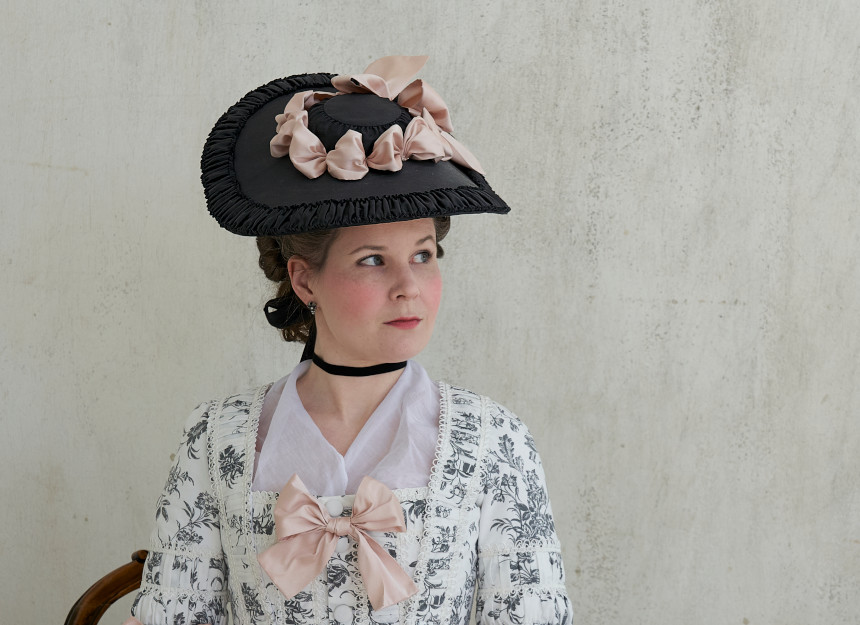
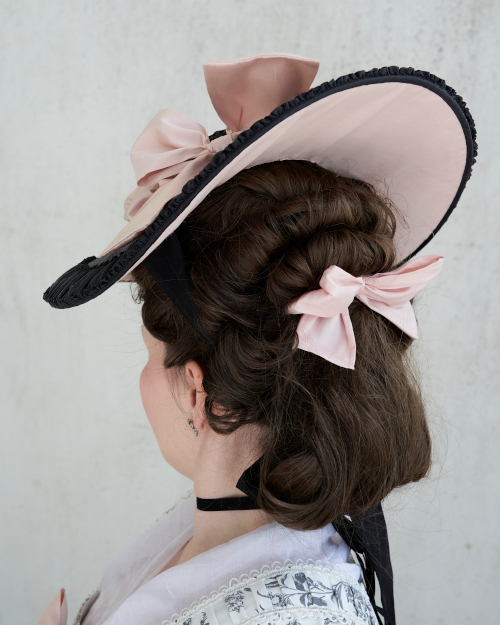
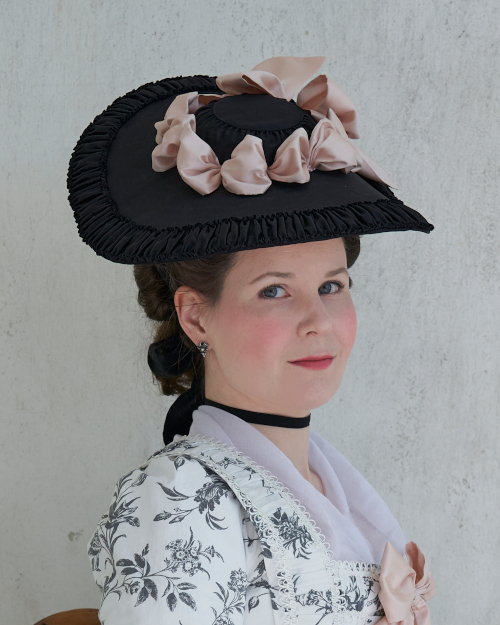
The finishing touch, adding the pink ribbon was quick and fun instead. I made a doubled 8cm wide tape of the power pink silk, gathered it into puffs and sewed them at the crown base at regular intervals. Then I tied the ends into a bow. The single row of puffs is slightly simplified from my original inspiration painting, but more common and also more keeping with the proportions of my only modestly wide hat.

For the last thing I added a crown lining, a round piece of silk with the edges folded into pleats and sewed on the crown base to cover all the stitching there.
Final
thoughts
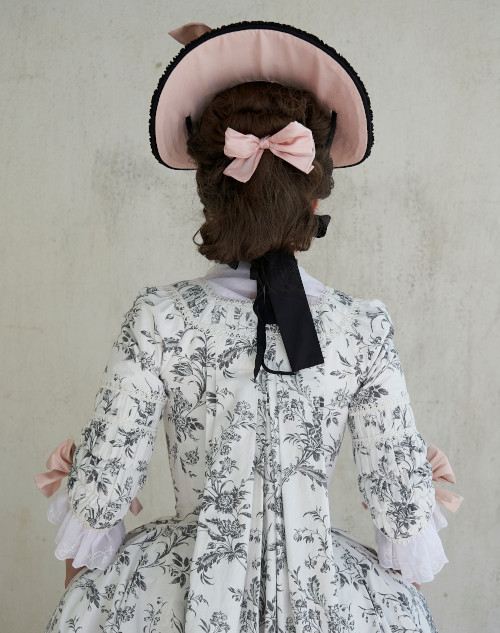
The hat turned out to be very cute, and was a perfect addition to the outfit I had mainly intended it for down to the matching pink bows on the dress. I can also see it working well with other costumes from the 1760s to 1770s. I have also been planning a black cape forever to complete the look, and maybe I will actually get to it some day!