Redingote-styled
jacket, 2017
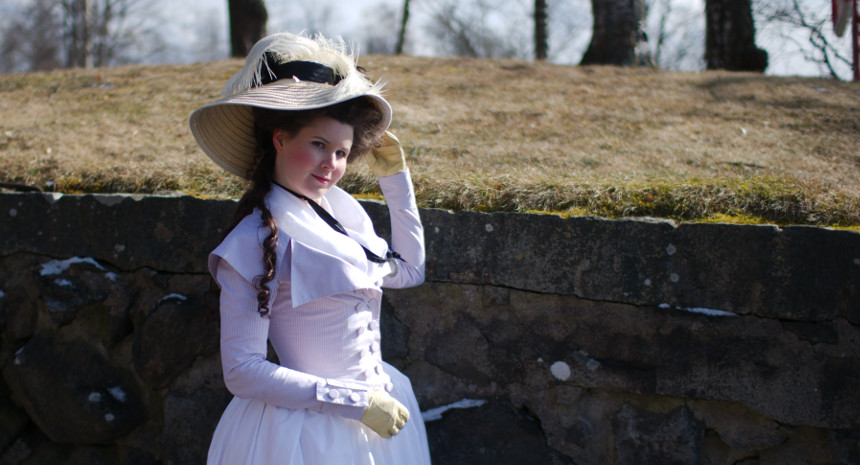
Everyone knows (or at least should know) that red-and-white-striped Redingote-esque silk jacket in Kyoto Costume Institute collection. Like every other right-minded person, I wanted to make one of my own. It did not, however, end up sporting flashy red stripes (or in silk, either), as it happened that I found a pretty shirt quality cotton in the bargain bin of a local fabric chain store. It did have stripe, at least, but it was super narrow and in white and old rose that looks mauve from a distance. While not quite the same thing, I thought it might work well for a softer, more feminine and very subtle color palette a’la “The Duchess”- movie.

I finally got around beginning the jacket because I wanted to get something new for the annual L’Amusette ball which would have “The French Revolution”-theme this year. While a cotton jacket is not really the first choice for a ball (and I might have well worn my Chemise a’la Reine), I thought it was right for the decade in general and might work well with the “Vive la Revolution” theme. At least no one would have any reason to suspect me of having Royalist sympathies and I wouldn’t end up my evening in the Guillotine! (Yes, we did have a guillotine. It was only a 50cm tall model, but in perfect working condition for slicing carrots etc.)
The skirt
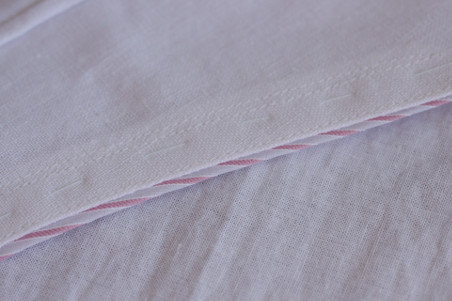
I had already made the skirt the following summer with this project (among other things) in mind to be my versatile white petticoat (or a fancier under-petticoat). It was made of densely woven percale cotton that began life as a double-wide duvet. Unfortunately it had gotten into some sort of accident, had the plastic cover torn at one corner, gathered some dirt in the process, and was acquired in this sad state by me for 2 euros or something like it. For its second incarnation I cut a hem ruffle 30cm wide and double the hem width long. I did hem it, both edges, by hand, though it was painful and even bloody business because the weave was really that dense and the feel of the fabric resembled a taffeta.
I had originally planned to also gather and sew the ruffle on by hand to avoid visible machine stitch, but after the the battle with the hemming came to my senses. Instead, I figured out a sneaky little cheat method as follows: Just sew a single gathering thread by machine, gather, fold the ruffle along the gathering line, and sew it on with narrow zig zag so that every other stitch gathers the base fabric and every other the gathered ruffle. After this you pull it open like you would do with a whip stitched ruffle. Granted, it’s not as neat as the real thing, but looks half way okay from a distance (no one really looks at your petticoat hem up close) and doesn’t show any obvious machine stitch.
Drafting the jacket pattern
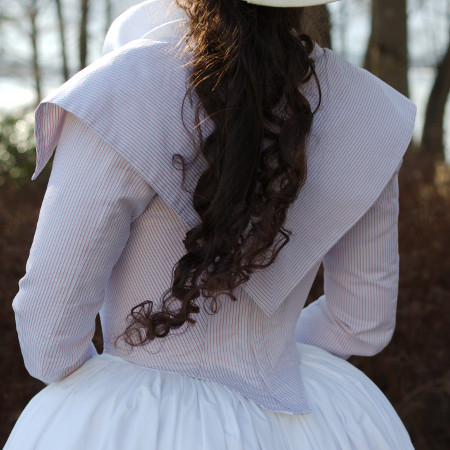
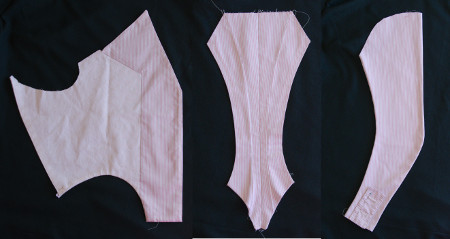
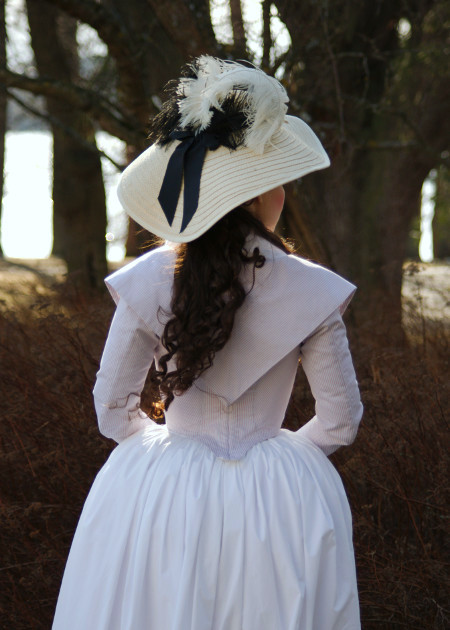
I began with the jacket by analysing my source image for the pattern drafting. I haven’t been able to find a photograph of the back (has anyone? I would be curious to know!), so I simply guessed it to have a similar cut to the dress bodices of the period with no skirts, as I can’t spot any trace of skirts from the side-front image in the Kyoto book/website. So, I began to draft a 1780’s bodice pattern based on images of museum pieces and the round gown with a vandyked collar (c 1780-90) in Janet Arnolds “Patterns of Fashion 1”. I went perfectionistic over the shaping of the back seams, though they would be mostly covered by the collar, but then again I could use this pattern as a base for possible future 1780’s projects. Anyway, at some point I realized that instead of drafting a bodice pattern I really should be drafting a jacket pattern with a higher back neckline and a wider shoulder, so I will still have to make another pattern for possible 1780’s dresses yet to come...
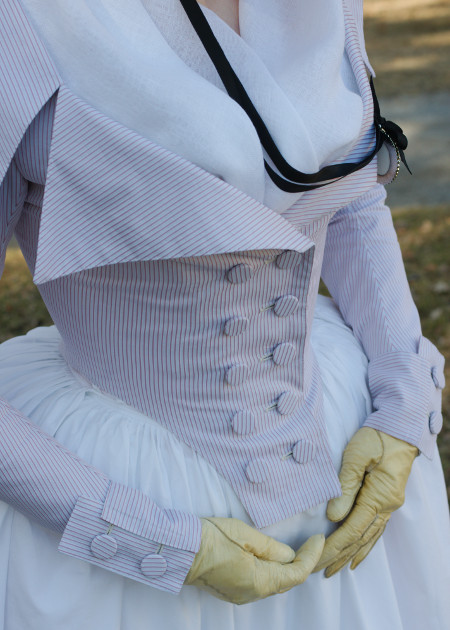
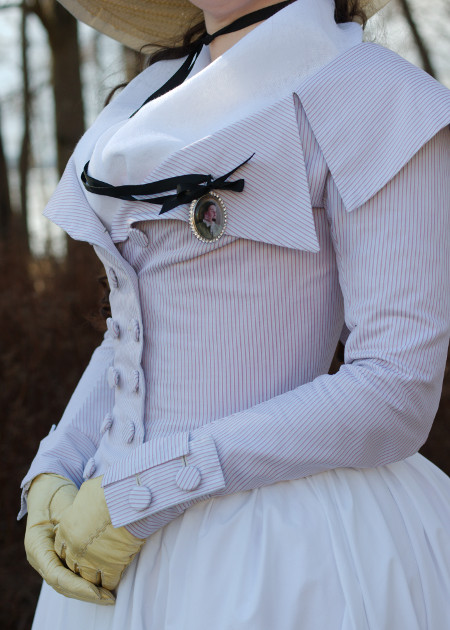
The dress bodice of the era is typically drafted with a curved front seam to create the right silhouette, but the double buttoned front of the jacket would need a straight center front line. I wondered beforehand about how exactly would this give the curvy pigeon-breast silhouette boosted with a poufy neckerchief popular on the period. But then, taking another look through the period pictures, I realized that the top button of the Redingote was often worn unbuttoned, which contributes greatly to the pigeon-breast effect.
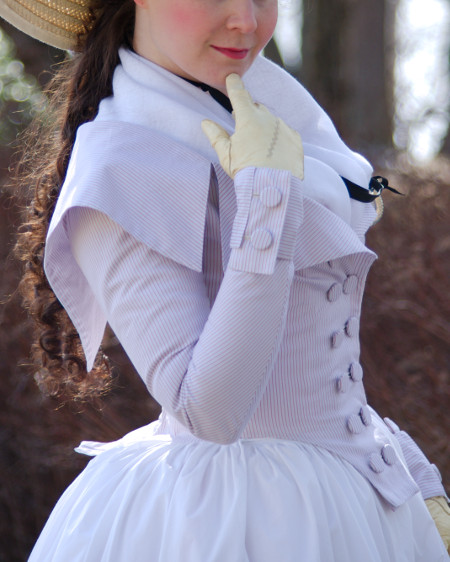
While drafting the pattern and fiddling with the mock up version I pretty soon fell into improvising on my own, not so much based on the original source. That explains the bodice front edge being narrower than in the original, while this lead to the buttoning being also more narrowly set. The result looks balanced in my opinion, though. The collar also turned out quite different from the original. I had already on an early stage decided that I wanted the lapels to be sharp rather than rounded (while I could not make them pinked in cotton anyway), and while studying the source image further I realized that the square neckline would go way too up on me to look balanced with my rather long torso. Many redingotes seem to have a neckline somewhere between round and a v-shape, so decided to go on that direction myself.
The large pointed back part of the collar was drafted with the help of Arnold's round gown pattern and mock ups. When drafting the front lapels I turned to my school material for advice, and came up with something with wide front facings, revers and a tiny 1cm rising allowance and a seam where the lapels join the back collar. I have no idea if this is at all period!
The buttoning is, by the way, on the modern ladies side. Here I followed my source image, though the earlier on the period ladies jackets were buttoned similarly to men's coats.
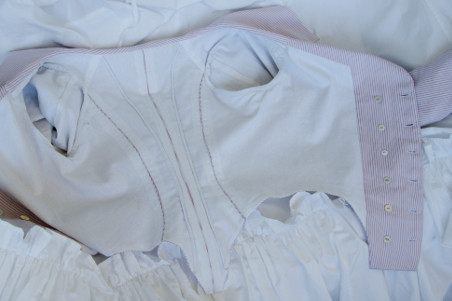
I used the two-piece sleeve pattern I had made for the Brunswick-waistcoat as a base for the sleeves. The needed only some slight adjustment and drafting the sleeve cap taller. The sailor cuff was drafted after the KCI jacket image, estimating the width of the cuff plackets, and the sailor cuff in the Pierrot jacket in Norah Waugh's “The cut of Women’s clothes” (diagram XXIV).
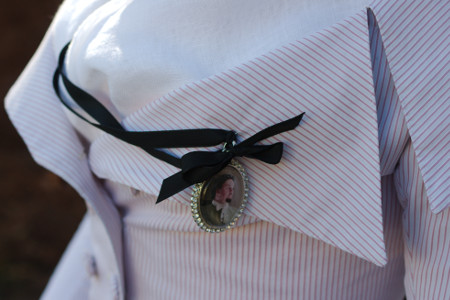
The stripes are a prominent feature in the KCI jacket. In my chosen material they are not as conspicious, and from a distance blur into a solid lavender, but nevertheless I wanted to follow the original in cutting. Fortunately I happened to have an old striped bedsheet for the mock up version, so I could already have some idea of the stripe direction.
I had a large piece of the fashion fabric, and beforehand felt a bit quilty about wasting it on a garment that I could cut from less, but then ended up using the larger part of it. Usually you can cut an 18th century bodice with elbow-length sleeves from a tiny scrap, but the long awkwardly shaped sleeves, wide front pieces with facings and of course the large collar took up quite much fabric.
For the lining I used some linen in my stash left over from some shift or shirt. It's quite light, but still gives some nice backing to the thin cotton.
Sewing
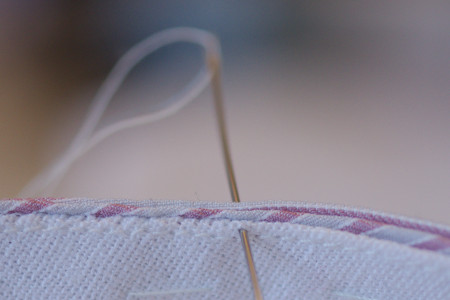
When planning the construction I realized pretty soon that this jacket would get a lot of hand sewing, as I would have to at least finish the collar edges with running stitch to keep them neat, the same goes with the bottom edge, and of course there were the buttonholes. So I decided that this would be the perfect project to try the period method of joining the individually lined bodice pieces by hand. The material was easy for handsewing and could be manipulated with pressing to some extent if the handsewn seams should not turn out very neat.
I did some things by machine, though. First of all I covered the front edge and the part that formed the lapels in the front pieces with a facing on the striped fashion fabric. An extra layer would also support the buttons and buttonholes. Then I pressed the seam allowances on the front edges, lapels and hem to turn under, pinned the fashion fabric and lining together and sewed the edges together by hand.
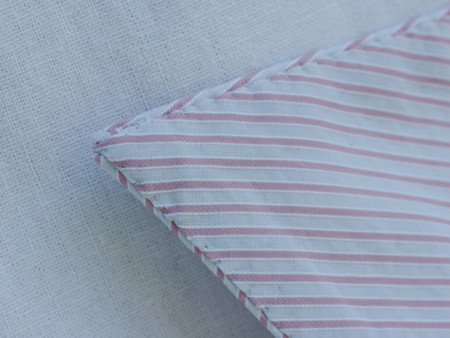
On the lapels I pinned the underside a bit shorter so that they would naturally fold over. The small corners were oh so easy to get neat by pressing and clipping the seam allowances to shape first and then sewing the layers together through the edge, compared to sewing the corner from the inside in the modern way, turning it over and then trying to jam the seam allowances to fold neatly inside.
I still left the armhole and shoulder seam open, and also about 5cm of the hem from the side seam. I also worked the buttonholes at this point, as the separate pieces were easier to handle than the finished garment.
Someone (I think SannaK from Rococo Atelier) directed me to this fabulous tutorial which made me finally figure out how that "joining finished bodice pieces"-thing one reads about is actually done.
On the side seam and back pieces I first pressed the seam allowances on the lining to turn under at exactly the seamline. Then I sewed a line of machine stitch right next to the edge for reinforcement, then another line at 1cm distance to create a boning channel, and yet another about 1mm from the boning channel to secure it. Then I pressed the fashion fabric seam allowance to turn under 1-2mm outside the seam line and basted the layers together.
On the lower edge of the pieces I turned both seam allowances under like on the front piece, but did not yet sew them together.
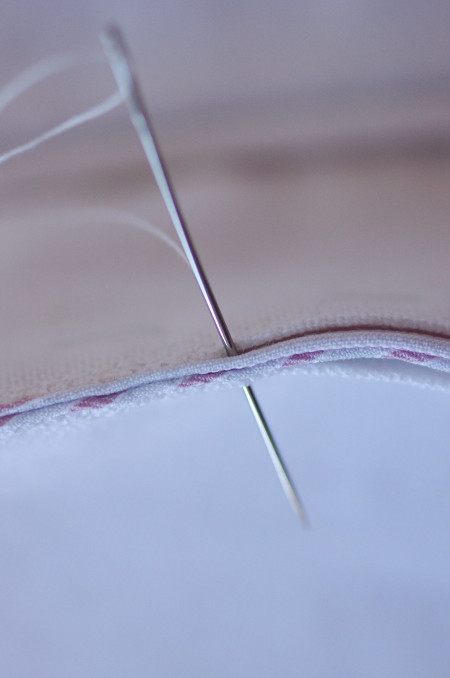
Then I joined the seam though the fashion fabric with a very short running stitch, catching the lining every time the needle came out. This way the lining is caught in the seam but does not thicken the seam itself or create bulky seam allowances. Sewing the seams went surprisingly smoothly (at least with these materials) and the seams turned out surprisingly neat, too. Of course they took some time, but I can imagine that on a fancy hand-trimmed dress sewing a few bodice seams by hand would be just a drop in the ocean of hours spent with needle in hand.

In Arnold's round gown the back pieces have extra fake seams done as narrow tucks. I followed this, but the tucks turned out quite bulky compared to the neat seams (maybe I should have made the tucks only on the fashion fabric), so if I would do this again I might consider making all seams real ones.
I sewed the shoulder pieces on by machine, as they would be mostly hidden under the collar.
The sleeve seams are also sewn by machine, all layers together with all the seam allowances turned on one side. It has taken me some time to get rid of my modern conceptions of bag lined sleeves with extra length for allowance in the lining, but finally I have come to realize that this way of making tightly fitted, curved sleeves just makes way much more sense. I even managed to get the stripes match for the most part.
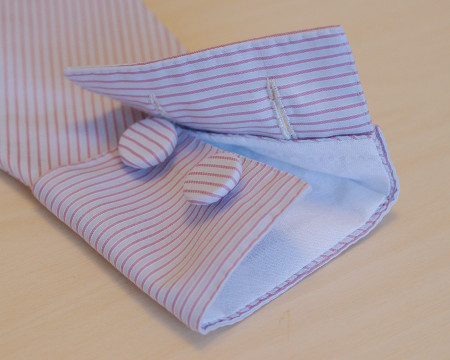
I cut the wrist opening slit on the lined sleeve, turned the edges under and sewed it by hand with the sleeve end. The construction of the sailor cuff is my interpretation of the KCI jacket picture and some other sources. I had already made up and edge-stitched the cuff and the placket pieces and worked the buttonholes beforehand, as that kind of small things fit even in the smallest of handbags.
I sewed the placket on the top edge of the slit and the cuff end on the bottom edge. Then I sewed the lower edge of the cuff around the sleeve end (when sewing it by hand I could get it curve just right), and pinned the end of the cuff about 1cm over the placket. For the last thing I sewed a vertical line of running stitch through the cuff and placket and added the buttons.
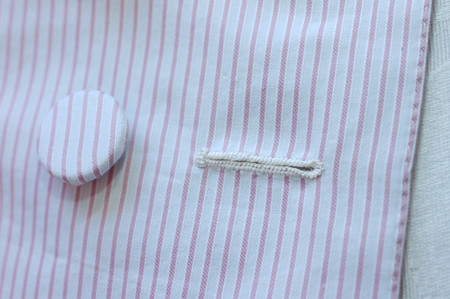
Which leads us to the subject of buttons. The KCI jacket sports flashy, large metal buttons, but as I aimed for a softer look to begin with I thought that fabric covered buttons would also look nice. Of course it was also a matter of cost, as I wanted to keep this jacket an out-of-the-stash-affair. I, so went through by button stash until I had 16 buttons of identical shape and size even if the colors varied. A bit larger buttons might have been more correct for the period, but these would do.
As I was making a jacket as opposed to a dress I thought that I could sew the sleeves on round like in men's coats, instead of pleating the top part between the shoulder lining and fashion fabric. I also sewed them on by machine, and was maybe a bit lacking in patience. The sleevehead is a bit too full, and does not settle quite smoothly, and the back corner in particular looks tacky, but as it's safely hidden under the collar I decided to let it be. On the inside I turned the allowances inside and whipstitched the top.
The back collar is lined with the same striped cotton but has a supporting layer of linen in between. I left the top layer longer at the neck to turn more neatly. I machine sewed the bottom layer on the neckline and then pinned the top layer to cover the seam and sewed it on by hand. For the last thing I closed the tiny seams between the back collar and lapels.
I sewed the buttons on the bodice with flat reinforcing buttons connected on the inside, it might be a bit modern but will protect the fabric from from the strain created by the tight buttoning. While I like working buttonholes by hand, I made the hidden ones with machine to save time. Always on the hurry to move on to some of the other unfinished projects!
With the buttons on I could finally try on the jacket for real. The size was an educated guess based on the mock up version, and as the technique I had used for the seams did not leave much room for alterations I had decided to just sew the thing together and then find out how tight I might have to lace myself. I did aim for a rather snug fit, as light cotton and linen tend to stretch at least a bit in use.
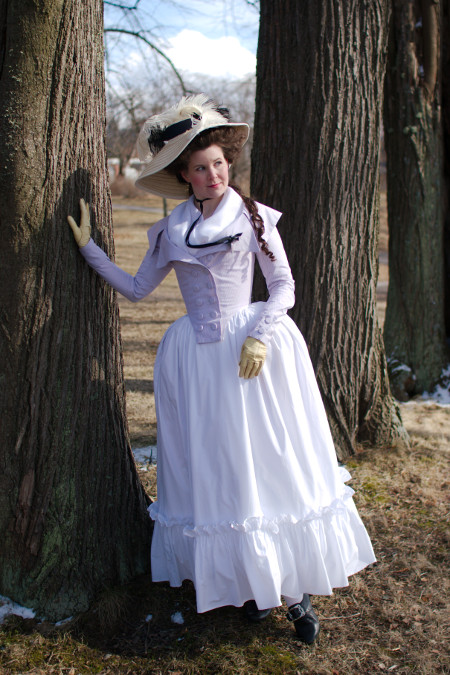
Happily the jacket ended up fitting quite well, snug with a comfortable level of lacing. I had worried beforehand that the front would wrinkle between the buttons, but the double buttoning keeps it even surprisingly straight all the way down. Besides, according to period images wrinkles between the buttons on tightly buttoned garments definitely did happen. The buttons also closed all the way up, though on the pictures I wear the top button open to leave room for the large neckerchief. Leaving the top button open does, of course, create some unseemly strain in the bodice, and especially accentuates the vertical wrinkle I often seem to get under my arm.
I did notice one problem, however: the plastic boning didn't settle well on the casings of the curved side seam, and tended to turn on its own. As the seams ended only just below the waistline I tried to remove the bones altogether, and the jacket seemed to fit quite well without them. On the center back seam the boning was okay, though as it had been on a roll for a long time it tended to curve out while inside the finished jacket too, as you can see in some of the pictures. I also had to shorten the bones at the top as I had raised the neckline.
The remaining problem with the jacket is the minor irritation caused by the absence of any kind of skirts or basque: The waist tends to ride up easily to reveal the stays over the skirt waistband. But then again, if the waist had been even slightly longer it wouldn't fit, so I guess not much can be done to it.
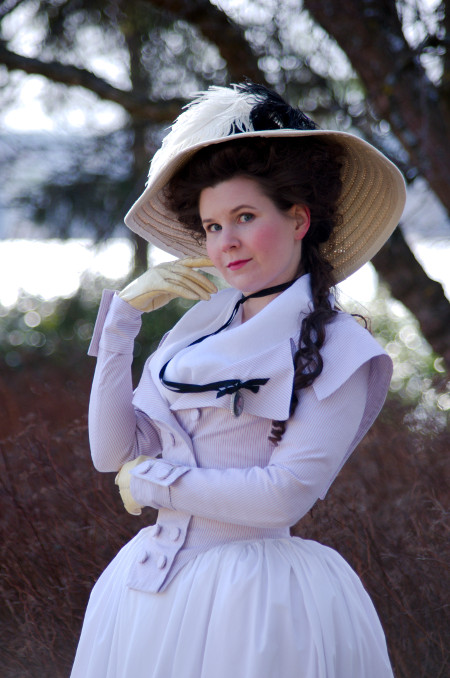
The jacket turned out to be a very cute little thing, simple but lovely. I wore it to the "Vive la Revolution"-ball with a tricolore cockade pinned on the lapel, and I can see the outfit getting much further use on picnics with a slightly chilly weather so typical of Finnish summers.