Victorian
secrets
(underneath the fancy frocks)
When I jumped from
18th century forth to the Natural Form era (ca 1876-1883) I
needed among other things to update my underwear. While period
lingerie could be really fancy and intricate I chose to
replicate a rather simple basic set with just a few decorative
details.(underneath the fancy frocks)
I sewed nearly everything by machine, which gave a neat but still relatively period correct look. While I really like hand sewing, I also like using a (good) sewing machine where its fitting. Some of my methods in assembling and finishing these garments may not be quite true to the period, but I chose ones that seemed relatively fast to make, neat and durable. I confess that I didn't do very much research for this.
Combination
underwear, 2018
The combination underwear suit (combining chemise and drawers for less bulk under the outer garments) I wore under my first dress, also seen on the corset photos, was an antique piece I had been lucky to come across. At that point when I was just beginning it was great to find one item for the ball outfit ready made, only needing a bit of alteration to fit me. I also had to do some darning and reinforce some more worn parts.
However, it was clear from the start that this beautiful, hand-embroidered garment would be too fragile for regular wear, so it would be better to save it for only the fanciest occasions. It works well with an off-shoulder ball dress, but I needed to make a more practical one for other wear. Besides, a change set of underwear is needed anyway for multiple day events.
Many period patterns that I found were for a close-necked, long sleeved combination suits, but I thought that a flimsier one would be a better choice. Not so much because it certainly looks more alluring to modern eye, but rather because many layers of garments can be quite warm in today's central-heated world, so it's better to keep underwear to the minimum and leave the flannels to the Victorians.
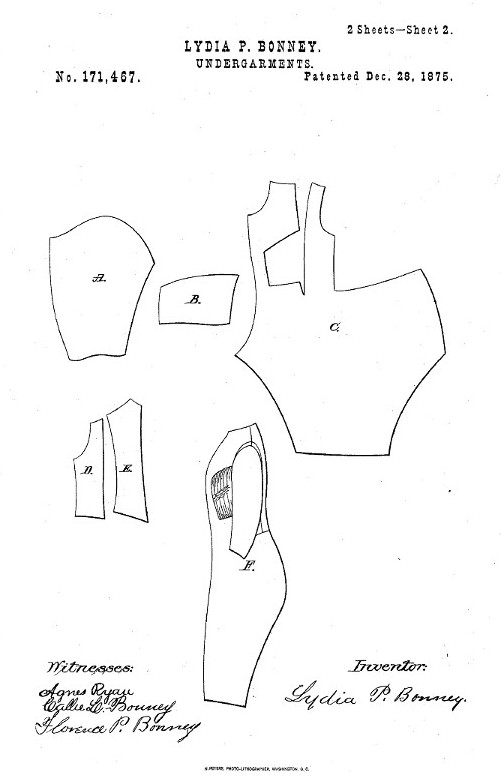
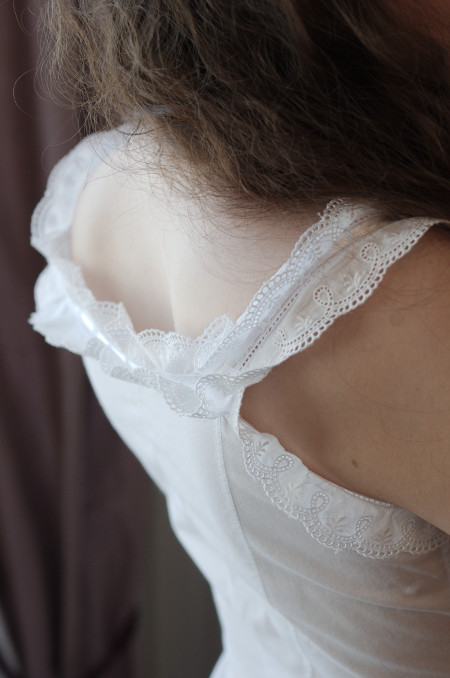
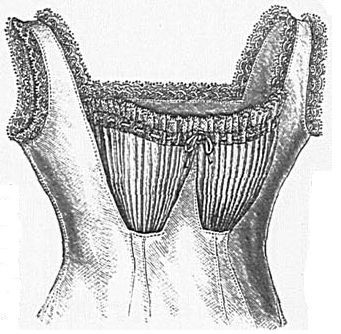
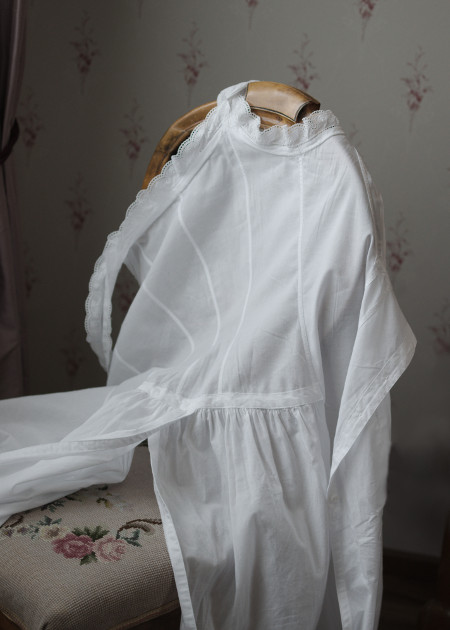
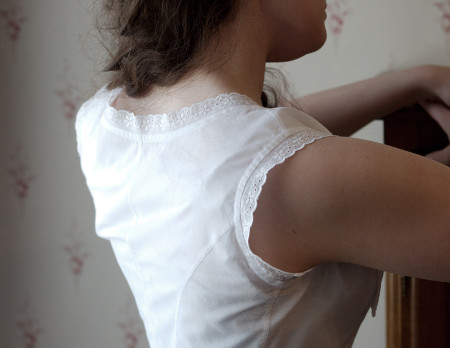
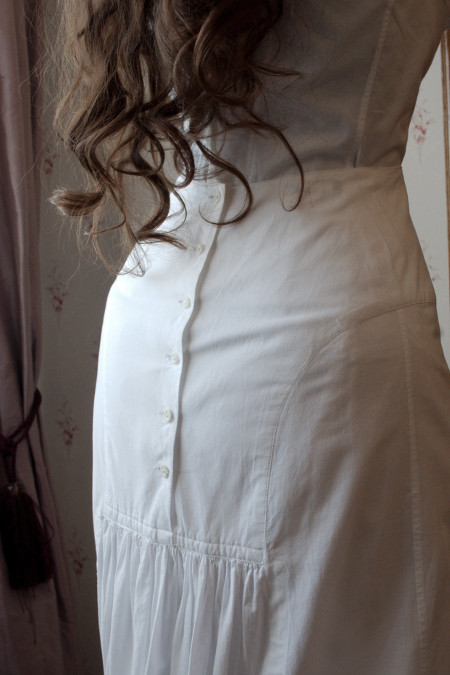
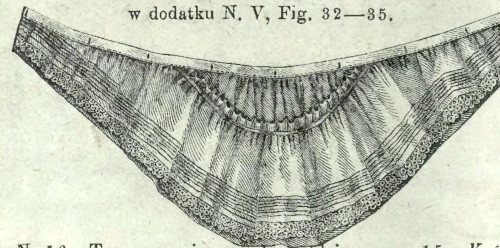
This pattern above, while being close necked looked very interesting with the gathered bust gusset. I also found a rather similar example of bust shaping in a low necked chemise with shoulder straps (below), and was somehow inspired to try to make some kind of mix of the two and see if it would work. Okay, with my rather modest cup size a few darts would have been quite enough for a well-fitting shape, but I wanted to try it out just for fun. So, I made a mock up of the basic pattern and experimented with the gusset size and shaping until I was happy with the look.
The back is cut with a center back seam and shaped seams like in several patterns I have seen, it's pretty much straight from my basic bodice pattern.
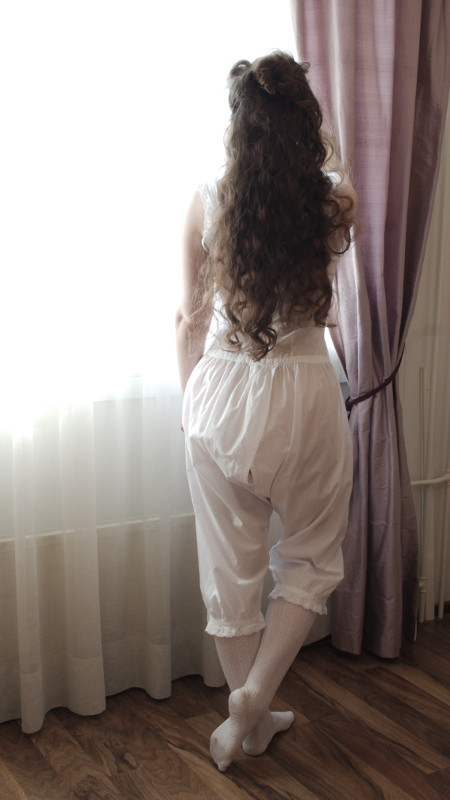
Drafting the loose leg was made a lot easier by the antique combination suit, from which I could copy the measurements for comfortable fit. Again, like in many period patterns the leg is cut in one piece, and on the back the extra width is gathered to the bottom of the back pieces.
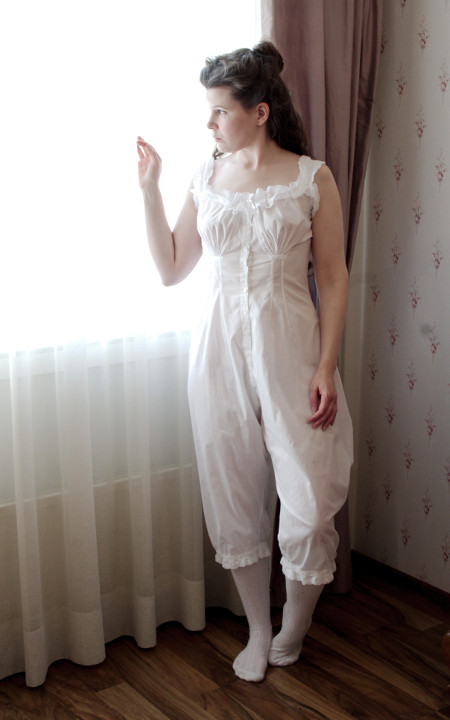
I made the combination suit in lightweight cotton batiste. Making it was pretty simple, I sewed the seams as narrow flat-felled seams and reinforced the open crotch seam edges with bias tape. Yes, the open crotch that modern people find so intriguing and at odds with the idea of prim and proper Victorians - they had to use the bathroom too, and it's hard enough in a tight trained gown without modern panties in the way!
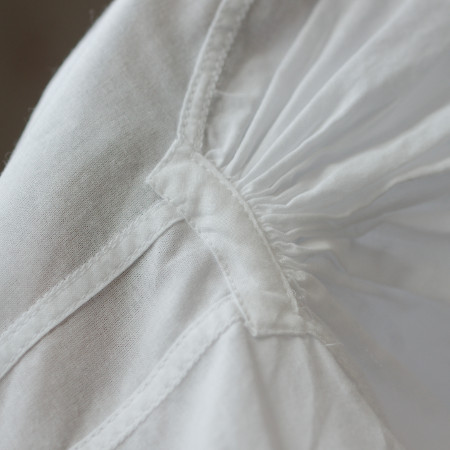
The front darts end at the bust gusset, and the seam allowances are neatened on the inside with a bit of bias tape. The gathering at the back is finished similarly.
I had cut a facing for front edges and made the buttonholes vertical, like in a modern shirt. When I tried the finished garment on I noticed that the front edges gapped quite a bit between the buttons. When I took a closer look at original pieces I noticed that the smart Victorians made their buttonholes horizontal if they wanted a smooth fit, even if the result may look a bit heavy and asymmetrical to modern eye.
I made the buttonholes too by machine, which is really not period-correct but I did not want to put too much time in the underwear at this point.
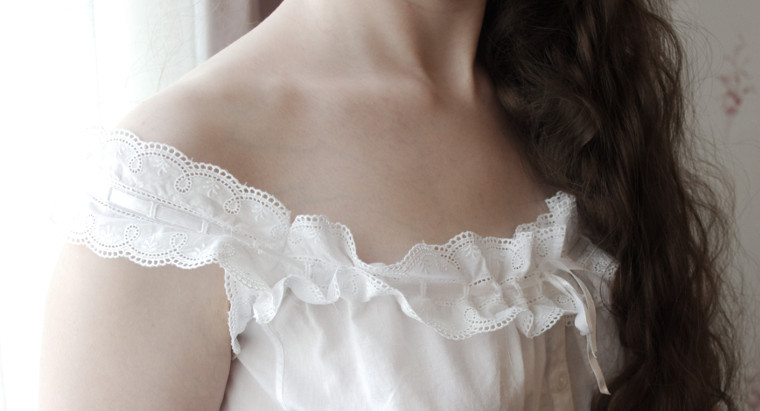
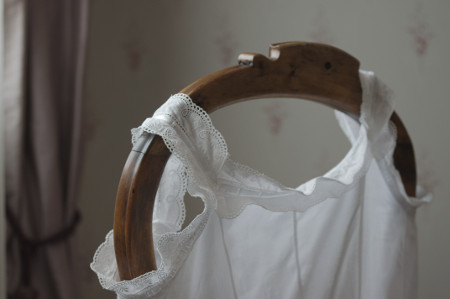
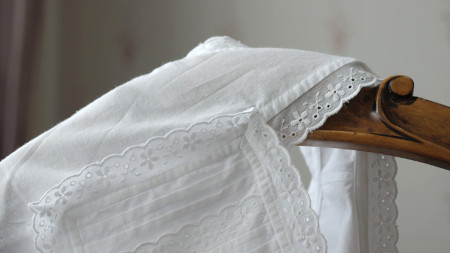
My Mother-in-law had given me some beautiful cotton broderie anglaise, and I thought this would be the perfect project for them. One of them had a frill in both edges of the center part with eyelets and the other only on one edge. I used a combination of both to edge the legs, neck and armholes and form the shoulder straps. It was a very easy way to give the combination suit a very pretty look.
The finished garment is both really cute and also very comfy, I'd almost like to wear it for just lounging at home on hot summer days.
Corset cover, 2018
I have to confess that when getting introduced to the fineries of an Victorian toilette I was rather sceptical at first about the need for a corset cover. I mean, its very pretty and all, but I felt it would be just another unnecessary layer in an outfit which might be cumbersome already. Obviously its purpose is to disguise the line of corset edges, boning and lacing, but really, would a thin layer of fabric have much effect on that? Also, the more frilly specimens seemed more likely to add extra bulk under the top garments than streamline the silhouette. As my first dress was to be a heavily interlined ballgown I was happy to abandon even the idea of a corset cover.

However, my next dress would be of quite thin and clingy material, so I thought it might be smart to at least try a corset cover with it. So, I decided to make a quick, low-necked and sleeveless one without much extra frill, which would serve for many other outfits hopefully following too. I was especially inspired by this extant one in the Metropolitan Museum. It seemed basic enough but with some nice little detail.
The Met corset cover has a decorated panel at the bust, and many others seem to have some frills or lace there, I guess to fade out the corset top edge which can be quite visible.
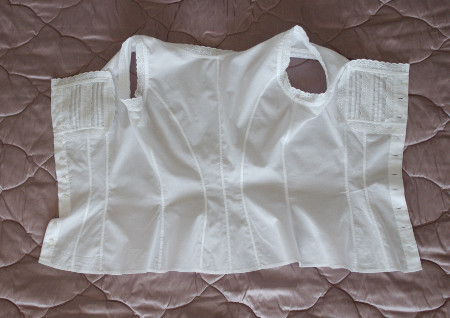
The pattern is pretty much straight out of my basic victorian dress pattern tweaked a bit to add the front panel. I had learned my lesson from the combination suit buttoning and drafted a wider front edge facing for horizontal buttonholes.
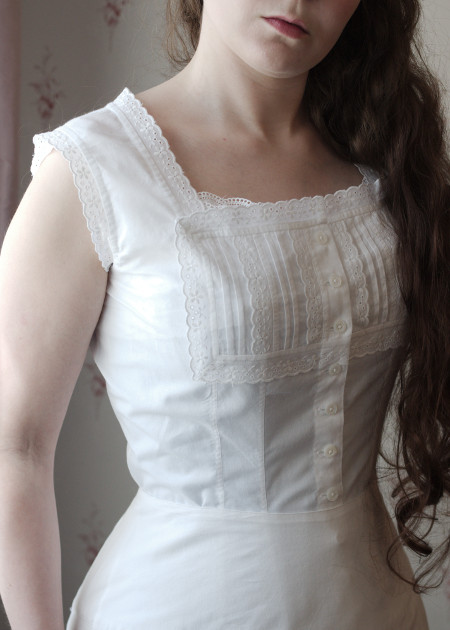
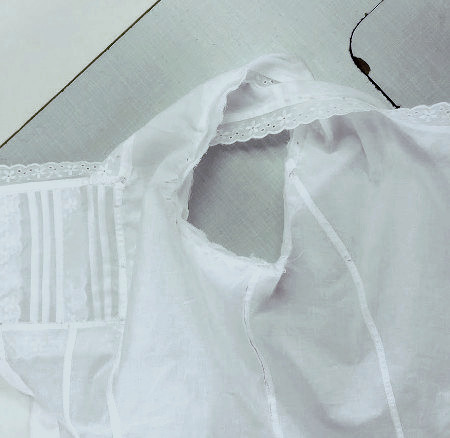
I cut the corset cover in the same cotton batiste as the combination suit. The front panel has 5mm wide tucks alternating with rows of broderie anglaise. The neck and armholes are finished with a bias tape and broderie anglaise edging. All the seams are about 5mm wide flat felled seams.
Sewing this pretty little garment was, like with the combination suit, rather fun and relaxing with enough detail to keep it interesting. There is nothing really to report about it except the weird thing I somehow managed to do in the picture below. Just don't ask. I was tired.
Similarly to the combination suit I again made the buttonholes by machine, this time horizontal. The difference it made is easy to see. The buttons are fake mother-of-pearl ones I happened to have and which I thought looked pretty.
In the end I had to admit that I had been wrong about the usefulness versus uselessness of a corset cover. When I wore it for the fitting of my new day dress it really helped to disquise the corset underneath and give the dress a smooth line. Once again I have to note that historical garments may seem weird at first but surprisingly often they are functional in their way after all.
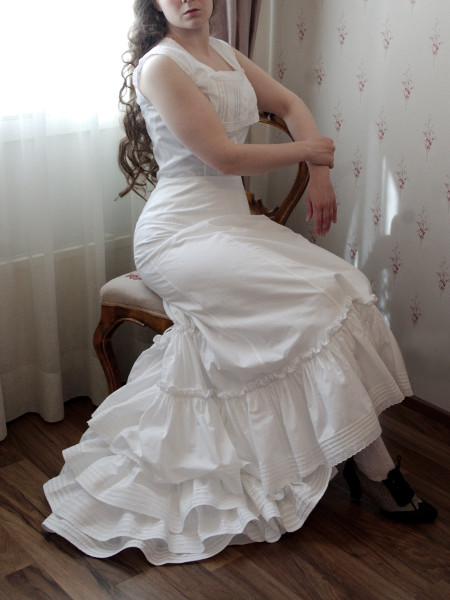
Petticoat with a removable train,
2017-2018
2017-2018
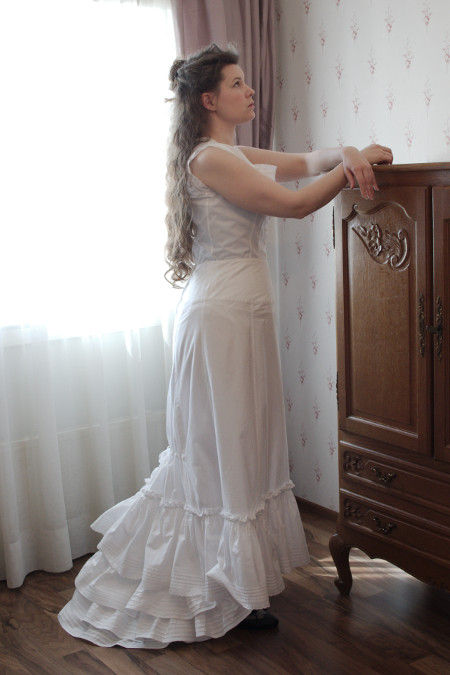
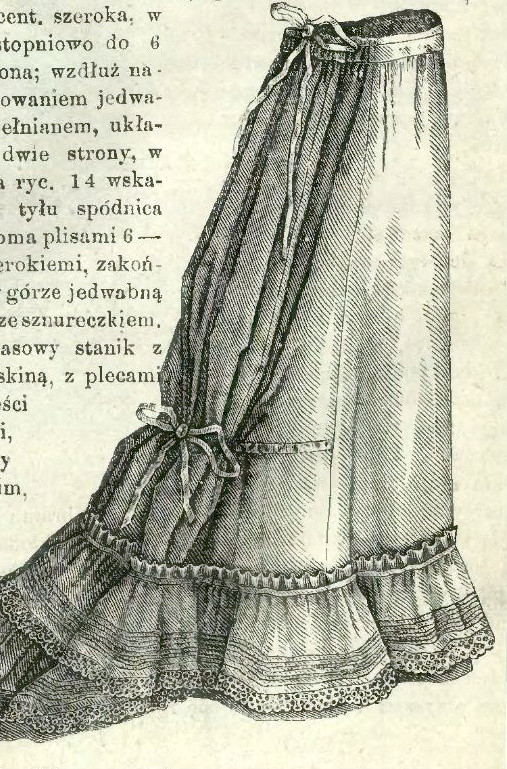
The petticoat needed for a true Natural Form-silhouette is smoothly fitting at the hips and with plenty of frill at the hem. My first dress being a very narrow princess ballgown I chose a model with a wide shaped yoke.
I began with a pattern from the Fashions of the Gilded Age - book, but in the end I had to shape the skirts panels even narrower. When I was happy with the skirt shape I fitted it into the yoke made after my corset pattern.
The yoke continues downwards at the back to form a wide buttoning placket with the extra width of the center back skirt panel gathered into its bottom edge. A drawstring placed lower keeps the fullness at the back of the petticoat.
I had planned to make a separate, lightweight balayeuse to be fastened on the balldress train, so I could make the petticoat without a train. I thought it would be more convenient to use separate balayeuses for future trained gowns too, so the petticoat hem would last longer and the whole petticoat would not have be washed every time - its worn over undergarments after all. If I would need a trained petticoat, however, I could always add a removable train as you see in many period images. Thus this basic petticoat would work with both trained and walking length dresses.
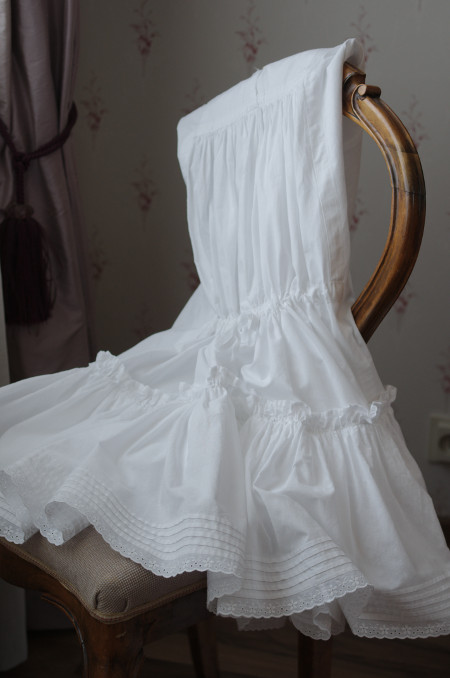
I decided to cut the petticoat short enough to clearly escape the ground (and to flash an ankle, even), so I could edge the ruffle with the same broderie anglaise I had used for the corset cover without having to fear it would get torn at the first wearing. Otherways I kept it quite simple, as I would have to wash and iron the damn thing myself. Truly elaborate creations of tiny ruffles upon ruffles with lace insertions would be a pain in the derriere both in the making and afterwards. Besides the broderie anglaise I made just a few rows of pintucks. They are not really only decorative, by the way, I noticed when making this that they actually turn the ruffles from limp fabric to much more substantial skirt support even without starch, and prevent creasing in washing.
So, for my next dress, a demi-trained day dress I had originally planned a wide shaped balayeuse to be buttoned on the skirt so I could just use the short petticoat again. It did not work out quite like that, however.
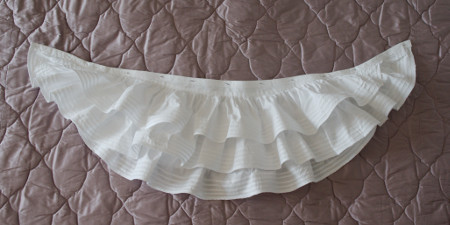
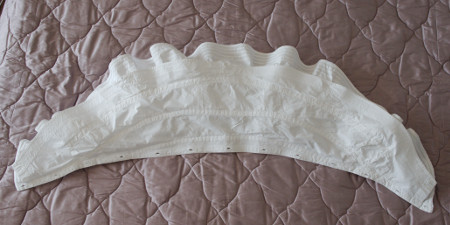
I cut the base for the balayeuse to match the skirt shape, finished the edge with a wide bias strip and sewed a couple of rows of pleated ruffles with pintucked edge on the top.
But alas, when I pinned the balayeuse on the skirt it was a disaster. The heavy balayeuse just destroyed the craceful fall of the flimsy skirt material which I had been stupid enough to interline only at the hem. The cut of the skirt had other problems too, I had to shorten it in the end so it would not roll up etc, but the balayeuse certainly didn't help.
Revue
de la Mode 1877
I was quite pissed off at myself for all the wasted effort I had put into the stupid balayeuse thing. After fuming a bit I come up with the idea to try to pin it to the petticoat (like the detachable petticoat train above) and then try the (now fixed) skirt on the top. The effect was instantly much better, the balayeuse ruffles supported the flimsy skirt instead of twisting its shape. I fine tuned the shape a bit and shortened the ruffles at the sides so that they would not peek out under the hem. Then I added buttonholes for the top edge and corresponding buttons on the petticoat hem, disguised under the ruffle.
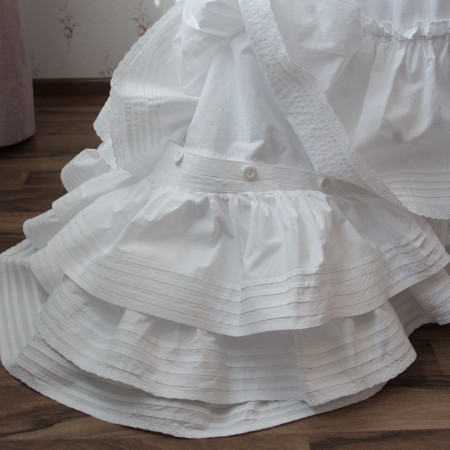
The balayeuse turned removable petticoat train did not reach as far back as originally planned when buttoned on the hem of the rather short petticoat. I had made a matching pleated ruffle for the front of the skirt, which I now used for an extra ruffle at the back to match the train shape. I also added tape ties which can be loosely fastened the the skirt hem to keep the petticoat train securely in place.
When starched the removable train is really quite a substantial support and protection for the dress train. Having it will hopefully help me to get my skirt patterns right before cutting the real thing next time and make my life so much easier!