Houppelande, 2015
My hopelessly cliched
must-have-list for medievalist garb, beginning with the
sideless surcote, eventually arrived at the "Houppelande"-
point. I just had to make that opulent and impractical gown,
and when my wardrobe began to be adequately filled with
practical basic stuff I gave myself leave to go for it. Then
there was of course the question of budget, but this too was
solved by finding a lightweight emerald green wool blend for a
very reasonable prize. Yes, it's a blend, but with the fabric
quantity needed for a houppelande one has to compromise.
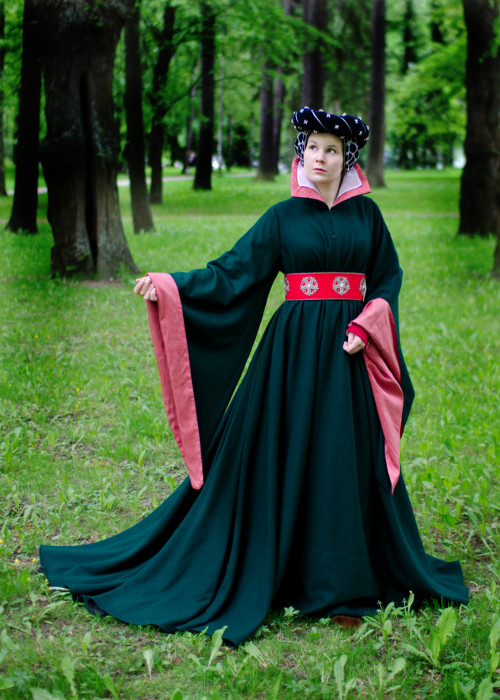
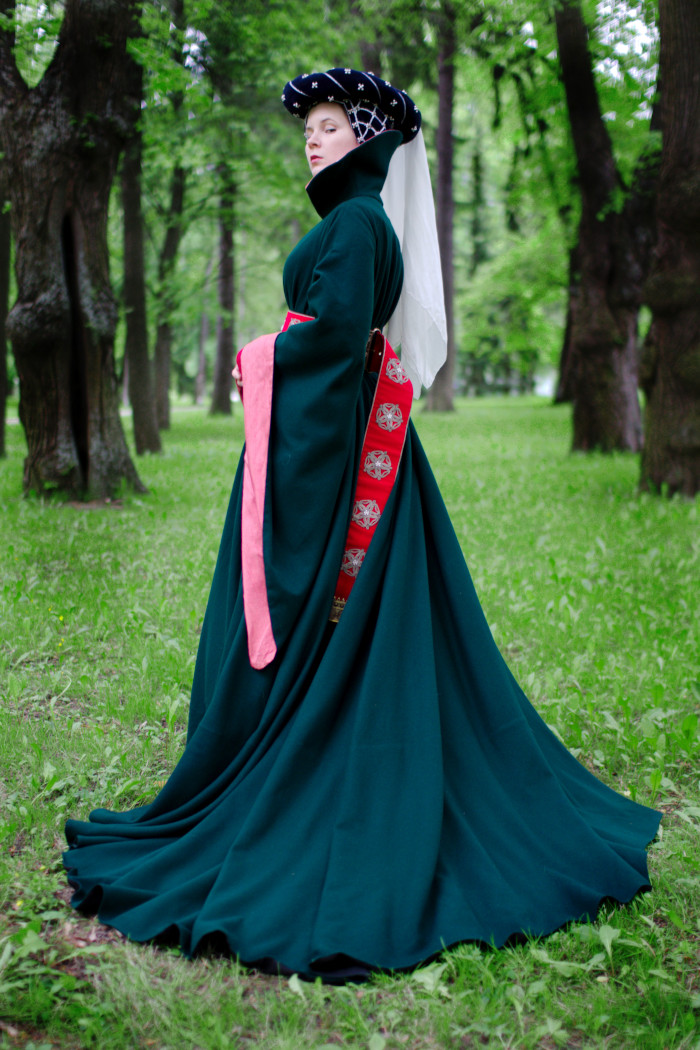
When looking at period images my favorite style became an early form of houppelande with long open sleeves and a high shaped Disney-esque collar. The later collar style falling on the shoulders would not be half as cool.
My initial idea was to edge collar and the sleeve with fur. Then I began to fancy a silk lining in a contrasting color. Then I wanted a combination of both, until I realized that this would be totally inaccurate. If I interpreted the image sources correct, most of the houppelandes with fur seemed to have a full fur lining that turned on the outside on the edges, not just a fur trim on the edges. Lining the sleeves with fur would have been costly, not to mention making them terribly heavy with a visible contrast to the unlined bodice and skirts. In theory I could have cheated by lining the non-visible parts of the gown with some heavy and fluffy wool, and the result might even have looked very period, but it would also have been way too warm to wear unless maybe outdoors in wintertime.
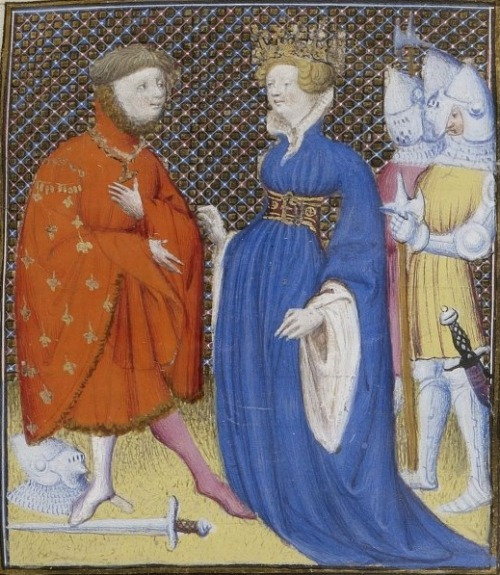
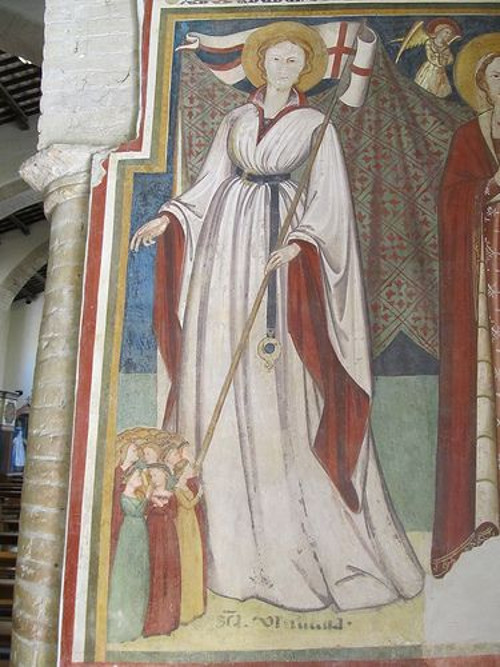
So, I had to forget the fur. It was a bit dissapointing, but happily I had found a piece of rose colored dupioni on the bargain bin. Okay, dupioni is totally inaccurate too, but it was on sale and all. It was also so lightweight that I could use it for just the visible parts and leave the rest unlined without it showing much. Thursfield's "The Medieval Tailor's Assistant" mentions colorful silk linings for houppelandes, and I have seen written descriptions elsewhere, but on the image sources it seems to be much less common that a fur lining. Moreover on the pictures its sometimes hard to tell whether a lining is fur or something else (except in the most clearly hairy cases), and just to be sure I counted all linings in shades of white, gray, black or brown suspected fur. Happily I also found a rare green lining (in a pink dress, too!) that I thought I could safely declare fabric. I also found an Italian fresco from circa 1420 depicting Saint Ursula in a white houppelande lined with red material.
Drafting
the pattern
In the pattern drafting I once again followed mainly Thursfield. I began in my pedantic manner by drafting a straight block from my basic 14th century pattern with a close neck and somewhat larger armholes. I even made a waist-length mock up of this, mainly to test the pattern for sleeves and collar.
I drafted a modern loose fitting sleeve with a low sleeve cap to match the bodice block armhole. I widened the sleeves from the elbow according to Thursfield's diagram. The width was determined by my calculations of what I would get out of the 1m silk piece. While the sleeve was very simple, I still made a mock up.

When trying it on I realized that Thursfield's sleeve pattern that curved out near the elbow did not look quite like the period images when on. On a closer look most houppelande sleeves seemed to flare out right under arm. As the mock up sleeves were also way too long it was very easy to pin a large horizontal tuck on the upper arm. The sleeves looked instantly more "right".
The shape of the sleeve opening still bothered me, though. The curve at the bottom of the sleeve opening, faithfully copied from Thursfield's diagram didn't fall very gracefully. I experimented with shaping the sleeve sharply triangular instead, which ended up looking a lot like Saint Ursula's sleeve. The sleeve head shape might not be totally period accurate, but looked decent.
My friend Hanna had begun her houppelande before me, and I happened to be hanging around when she was working on the collar, so I had the chance to help her to fit the collar and copy the pattern. Like me she also has a small head, so the collar pattern copied from Thursfield's diagram was huge on her. While I did want an awesome tall collar there is a point where it begins to look oversized.
When I got to drafting my own collar I shortened Hanna's pattern at both top and bottom edge, and also took it in a bit at the seams to fit my gown neckline. On the fitting the mock up collar still felt too tall, and I made a further 1cm horizontal tuck. I tried the mock up collar on with my velvet coif. The back of the collar was still a bit problematic, it tended to wrinkle whenever I moved my head and get caught in the coif pearls. I happily came up with the solution of pinning a 1cm tuck on the center back seam at the neck, which changed the angle of the back pieces and made the collar top edge tilt more backwards.
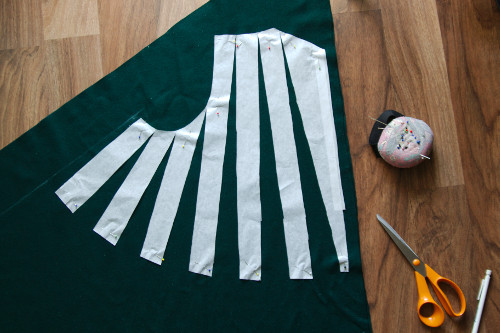
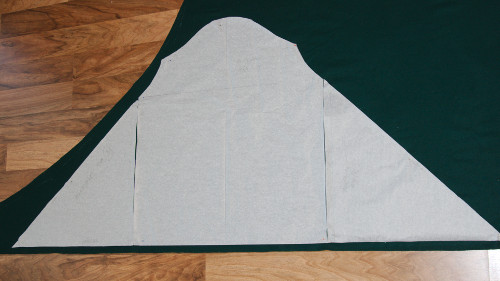
I slit the bodice block pattern open at regular intervals, pinned the front edge to the fabric edge and then flared the pieces as much as the fabric width allowed. Thursfield recommends this cut for men's gowns with waist pleats, but for some reason women's gowns, including houppelande, are flared only at the side seam. Following other sources I agreed with Hanna that the underbust pleats on the period images don't happen by flaring just the side seam.
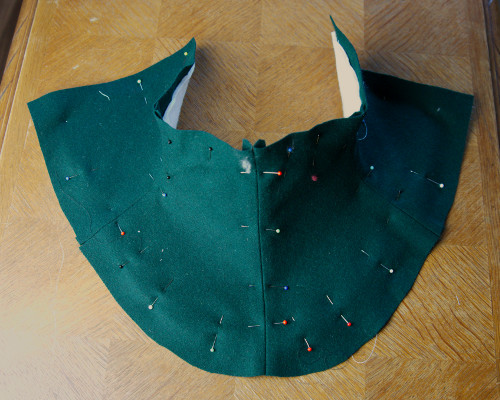
Cynthia Virtue's "rotated corner, circle plan houppelande" looked very interesting, but a full circle dress would make me run out of material. I had also at this point already seen Hanna's finished gown, which was cut a lot narrower than a full circle, but was still huge, so I was quite happy with my roughly 3/4 circle cut. As you can see in the picture, the pieces were triangular, which saved a lot of fabric.

The houppelande is supposed to be overly long, but I was practical enough to cut in floor length in the center front, slightly trailing at the sides and with a tiny train at the back.
I had decided to leave the houppelande mostly unlined so it wouldn't be too warm and heavy to wear over a woollen kirtle, but I still wanted a light facing on the hem. First, it would give a more finished look (and the illusion of a lined dress) to the glimpses of the underside when I would carry the skirts on my arm (with the train I would have to from time to time), second, perhaps give the skirts some volume, and third, most importantly protect the fine wool. I decided to use thin but densely woven black linen for the facing. Black linen is of course not a very authentic choice, but I had lots of it, and in the lining it doesn't show that much.
Sewing
First I sewed center front and center back
seams. Then I carefully laid the back and front pieces on top
of the double wide linen and cut the facings following the
shape of the wool pieces. On the sides I had to do some
piecing. Then I basted the facings lightly on the gown pieces
and turned the top edge of the linen facings under. I fastened
it with light herringbone stitch. At the sides I basted the
facings about 10cm from the seam so that I could finish them
after closing the side seams.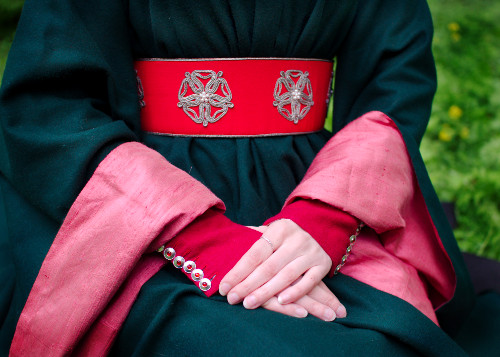
Next I lined the sleeves. Like in Jarno's houppelande the lining didn't reach quite up to the sleevecap, but only the lower part that would show when the garment was on. Still, I had to do some piecing to get the lining out of the piece of silk I had and still have some left for the collar. I sewed the seam in both sleeve and lining with machine, then pinned the lining on, fastened the top edge with herringbone stitch similarly to the hem facing and finally turned the edges under at the sleeve ends and finished them by hand.
After cutting the collar lining there was still some scraps of silk left, and I pieced them together for a front slit facing. Some of houppelandes have a buttoning, others not, following the Saint Ursula dress I decided to leave my collar open.
I closed the shoulder seams, adding supporting tapes to prevent stretching and neatened the seam allowances. The was the time for the most interesting part of the project, the collar.
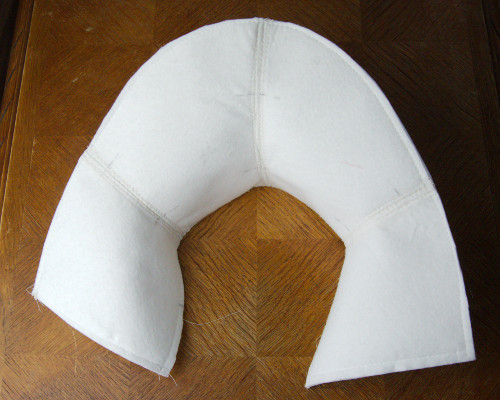
A collar this large needed some heavy interlining. At first I had planned to use the heavy jute I'm familiar with, but then I got introduced to felt that Hanna uses a lot in headdresses etc. The stiff interlining felt I bought at the local fabric store of course had nothing to do with wool, but hidden inside the collar no one would know. I reasoned that in the period a real wool felt might well have been used in interlining large collars.
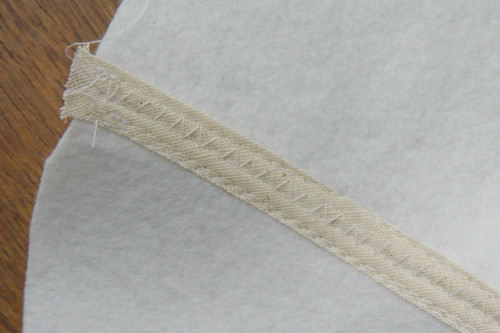
The collar got two layers of felt. I cut the interlining pieces without seam allowances and joined them by placing the edges side by side and pinning a linen bias tape over the seam. Then I machine stitched over both edges of the tape and added a further row of zig-zag in the middle to really tie the pieces together.
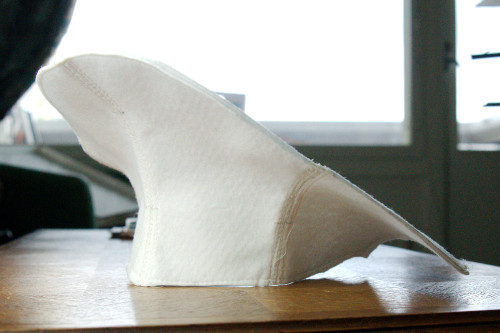
After finishing the seams I pinned both layers together on the final shape. I shortened the inner layer a bit at the front edges and the outer layer at the top edge as the collar curves outwards. Then I stitched them together around the edges.
I cut the wool and silk pieces in the collar on bias for a smoother fit, which is possibly very inaccurate. I checked that the pieces still matched the felt base and then closed the seams and pinned and basted the wool top layer on. Just to be sure I also stitched the wool down at the seamlines.
Then I sewed the collar on the neckline from the wool seam allowances only. I tried it on, and as the collar seemed okay I moved on to finishing it. I turned the wool seam allowances over the top edge and basted them on the felt interlining by hand. On the neck I treated the seam allowances similarly. Usually I still further reinforce pieces interlined this way with a hand stitching through all layers in the edges, but now my interlining was so heavy I thought it would hold shape without the edge-stitching.
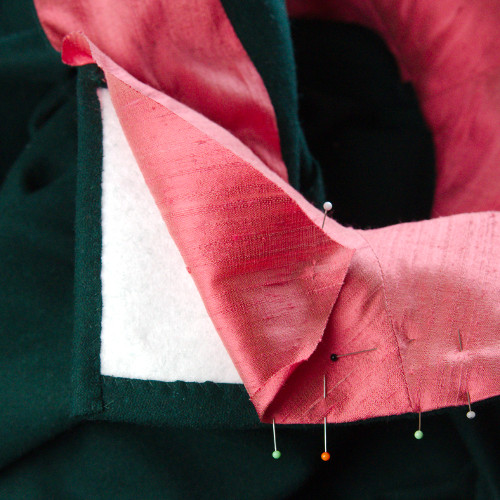
For the last thing I added the silk lining. I sewed it first on the neck, then smoothed it over the collar and pinned, and then turned the edges under and sewed them on.
I had already at the planning stage been a little anxious about the silk lining in the high collar, as it would be exposed to sweat and make up on the neck and face area. On some images, for example the Saint Ursula fresco, there is a hint of another white collar under the houppelande collar. I've seen just a few, but based on these I thought that some sort washable protecting layer between skin and gown collar might just be plausible. I have no idea whether the collar in the images is attached to a shift or some kind of early form of partlet or something else, but I decided to make it just a basted-on separate piece.
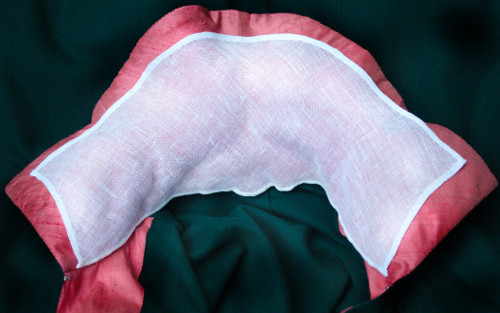
I used the most sheer linen in my stash to get the same look as on the St Ursula fresco. I cut the removable collar in one piece following the shape of the collar pieces, again in bias so it would mold to the curves of the shaped collar. I left ample fitting allowance on the edges, and smoothed it carefully inside the collar. The sheer, loosely woven linen took the shape very easily.
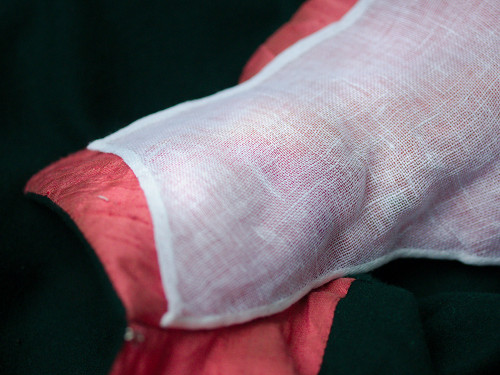
I carefully basted a cotton tape to follow the neckline seam and then sewed one edge of the tape on the linen with small dense hand stitch. Then I cut off the extra seam allowance and folded the tape in two, and stitched the other edge. As the lower edge of the removable collar was thus finished I basted it on the gown neck, smoothed it to follow the collar shape again, and basted a supporting thread to mark the final top edge. Following the St Ursula fresco I left the removable collar a bit smaller than the gown collar to show the beautiful silk. Then I hemmed the top edge following the basted thread, carefully following that the piece kept its shape with the outer edge stretched and curving out. For the last thing I evened and hemmed the front edges.
The hemming stiffened and shaped the flimsy material to some extent, but to make sure the collar wouldn't collapse I starched it to shape. In the end the practical precaution of a separate washable collar actually looks kinda nice, and does its job.
As mentioned above, at first I had planned to wear the collar open, but in the end it turned out so heavy that it looked nicer closed at the base. Thus I added a single pair of hook and eye on the top of the front slit.
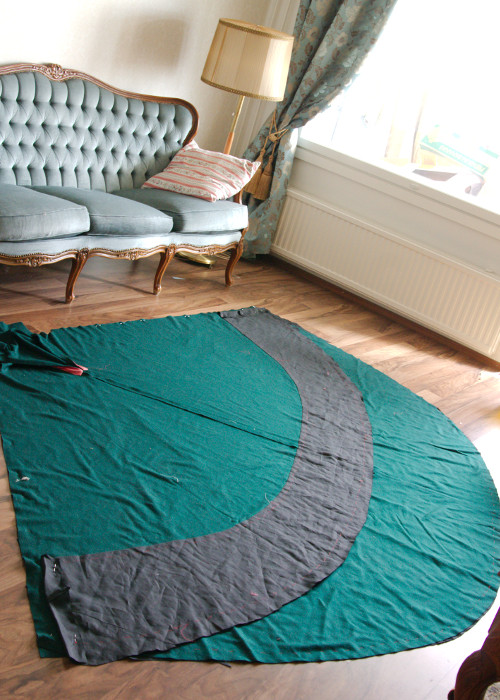
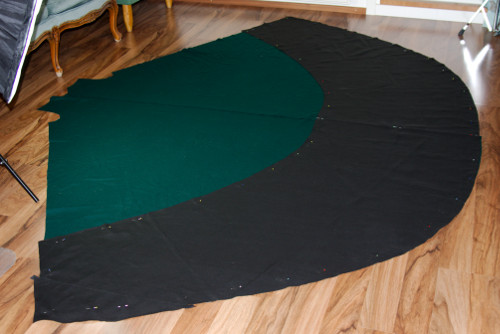
With the collar on the houppelande was already not far from ready to wear. I closed the side seams, finished the hem facing at the sides and then sewed the sleeves on. I flat felled the armhole by hand. Then I put the gown on the dummy to check the hemline shape. I adjusted it a bit at the side-back and evened the length at the sides, which were a bit asymmetrical as the pieces been cut separately. At this point I also stopped worrying about the hem not being a full circle for good, as it was already huge as it was. As you can see at the picture, it took up most of my living room floor.
I pressed the wool edge to turn narrowly inside, and then pinned the linen facing on the top. Then I stitched the layers together by hand.
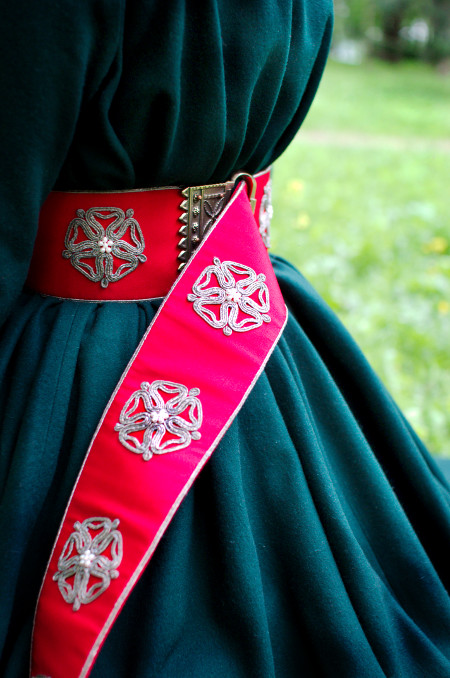
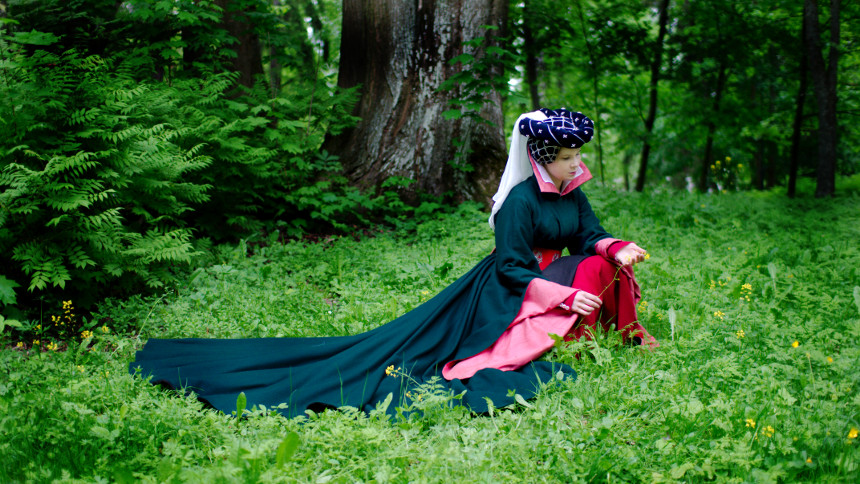
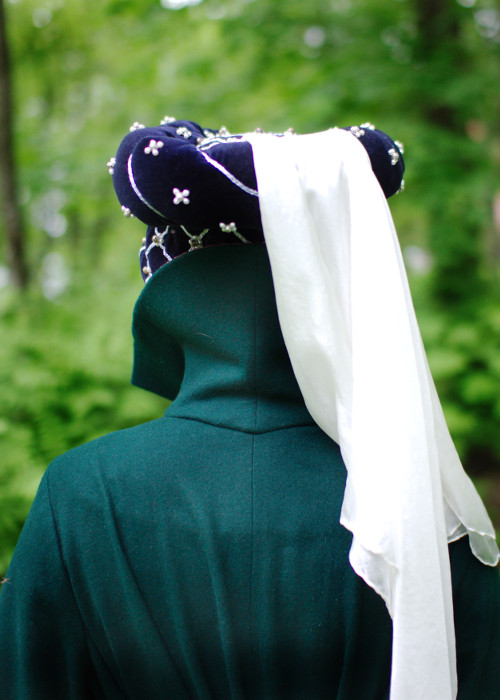
Of course the Houppelande also required a fancy massive belt with some bling. More about making it can be found here. The headdress is my ancient velvet caul spiked up with a matching padded roll. It's huge but I rather like the style.
Conclusion
As I had hoped, the Houppelande became truly grand and opulent at least in the sense that with the hanging sleeves and the train its a completely impractical garment. Even in a quite light material it's heavy, especially when you fold all that fabric of the skirts on your arm to keep it from ground on foul weather. A lady in waiting would truly come in handy. Well, it's not an every day dress, and I've meant it to be worn mainly at the grander SCA court occasions with a royal presence.
While I'm mostly happy with the Houppelande, unfortunately the lightness of the material shows. While it drapes gracefully it does lack a little something in volume, and thus looks different from period examples, veering more towards fairy tale land. I'm aware of this even thought the material choice was a conscious one. But, then again, it's at least wearable, and hem facing helps a bit to give it some fullness and shape.