Late 18th century shoes, 2019
I have from time to
time been inspired to upcycle modern shoes for re-enacting
purposes, partly because it's a cheap option for proper high
quality replica footwear, partly because I just like crafts.
However, after my last 18th century shoe project
for the Robe a la Francaise I felt quite fed up with this
special form of madness, as I made the shoes as a final part
of the long big project that was the Francaise and was
generally exhausted. However, some time later I found myself
playing with shoes and fabric and glue again,
this time for my 1870's ballgown. And suddenly that was fun
again, especially I had had a lot less to do without massive
alterations to the shoe shape as the pumps didn't need the
quintessial 18th century buckle straps.
At some point it also occurred to me that my striped Robe a la Polonaise might need new shoes. My first pair of upcycled shoes ever I had worn with it in the past were beginning to show considerable wear, and besides they had always been a bit too tight. I reasoned that with this dress I might just be able to pull off the later shoe style without buckle straps. It would be so much easier to make and it's also nice to try a new style.
With this project in mind I had purchased a very affordable "used only once" pair of satin pumps. I had even hoped that the color would match to the turquoise stripe in the dress fabric so that I might even been able to save the original fabric covering and just fix the heel shape and cover the heels with leather, which is a typical look for the era.
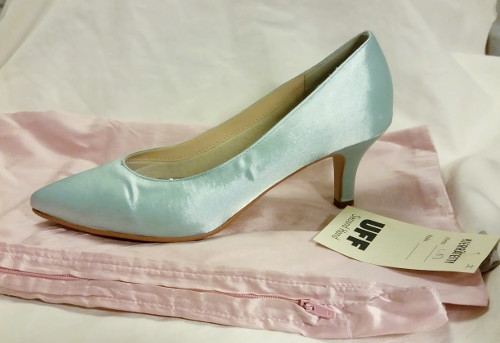
Well, of course it did not work out quite that easily, when the shoes arrived I had to admit that the shade was way too green. Besides, the satin had a very modern shiny look, and not a very great quality as it was already damaged at some places even though the outer soles and heel tips seemed barely used. Oh, well, I very much doubt I would have ever managed to redo the heels without soiling the rest of the shoe somehow, so it was better in the end to take them apart altogether.
The natural choice might have been to use the leftovers of the dress fabric, but for the first thing stripes have to be matched I was feeling a bit lazy, and the material was of the type to invite glue stains. Also a bit more generic look would go well with other outfits too.
When in doubt, go for pastel pink for late 18th century (or whatever)! It goes with white, turquoise and all kind of pastels. Also all shades of blue. I also have a large stash of pastel pink materials. A tiny thrifted silk pillowcase was perfect to for this.
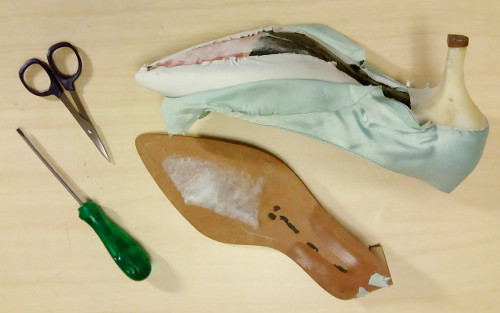
First I removed the outer soles and peeled off the satin covering. This pair had a heel tip screwed in to tightly (not a bad thing in itself) that I just didn't manage to remove, but luckily I managed to lift it just enough to rip the satin out from beneath it.
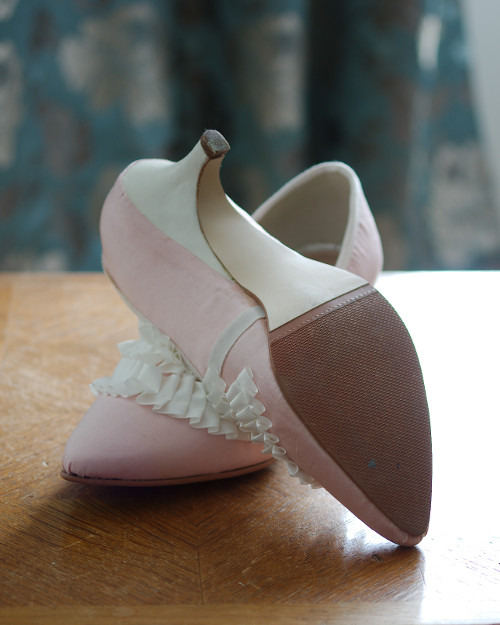
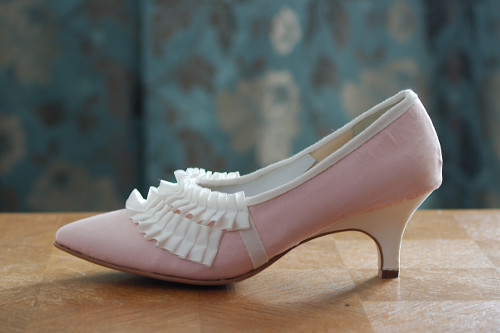
As the heel had a rather curved shape to begin with I didn't have to carve it almost at all this time, just pad the front edge under the sole with epoxy putty to get the gently rounded shape typical for the era, which really gives the shoe a period look.
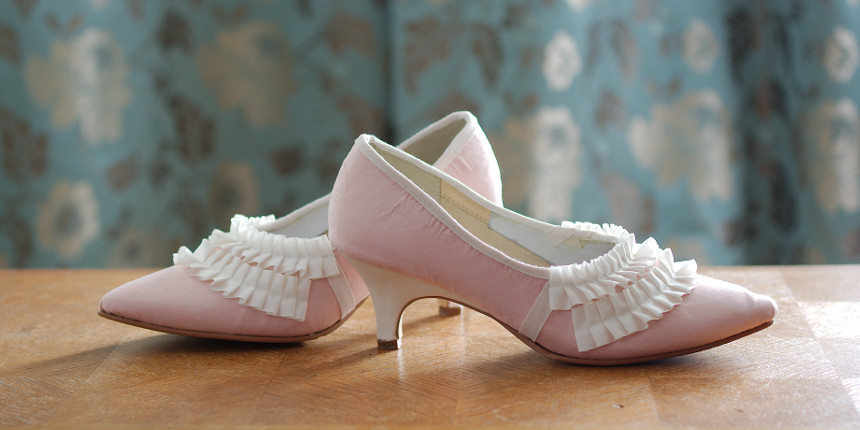
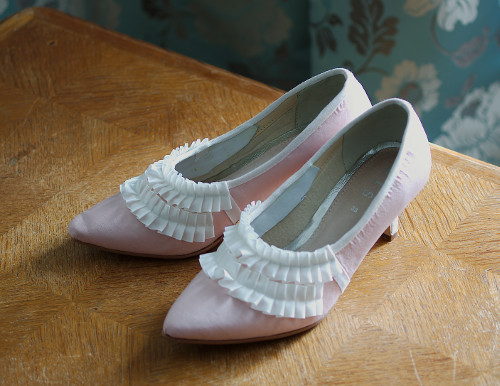
Modern pumps are usually cut very open at the top, almost revealing the toes, so I raised the front edge a few centimeters for a more period look. This, combined with the heel set well under the foot also rather cleverly makes the shoes look smaller.
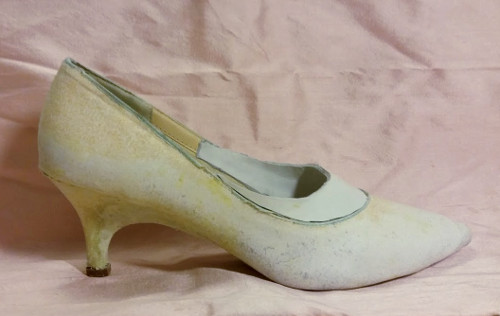
This patchwork at the top of the shoe can easily show through the final fabric covering, but then again it's also easy to disguise under the decoration. At this stage the shoes began to have a pretty, quite Vivier-esque look.
Covering strongly curved heels with fabric can be rather tricky, if not impossible depending on your material, but thin leather has a lot of stretch and is thus so much easier to shape smoothly over the heel. I'm quite willing to bet that as the heels turned narrower and more curved in the late 18th century the new fashion of covering them in leather instead of silk was not a coindicence.
My biggest problem with the heel was instead to finish the tip neatly as I had not been able the remove the heel tip. I tried to push the leather edges under it, but managed to tear the leather at some places in the process.

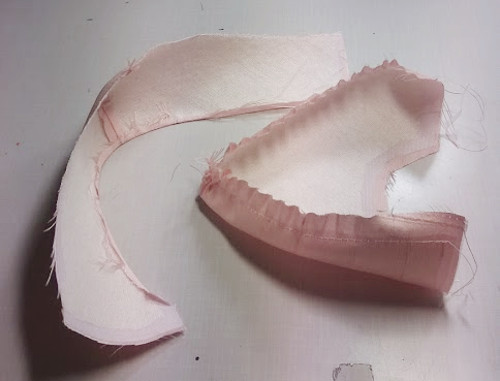
Pattern for the uppers was very pretty easy to drape with muslin. I have learned with practice that most shoe patterns for the same size and roughly the same heel height are nearly identical, but I still prefer to make a new pattern every time just to be sure.
As the silk was very thin I used two layers of iron-on interfacing this time to prevent glue from leaking through, first a thin one on the whole piece and then my regular heavier, slightly napped one on top of it. The heavier interfacing does not extend to the seam allowances to that they don't become too bulky.

I gathered the edge of the toe part to curve neatly under the sole. I also gathered the lower edge of the back piece slightly and glued the seam allowance to turn under at the heel edge.
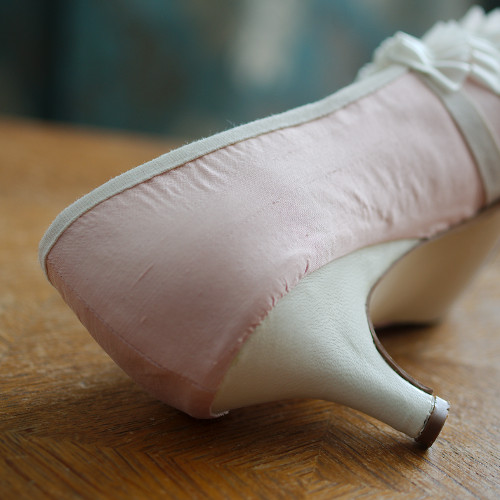
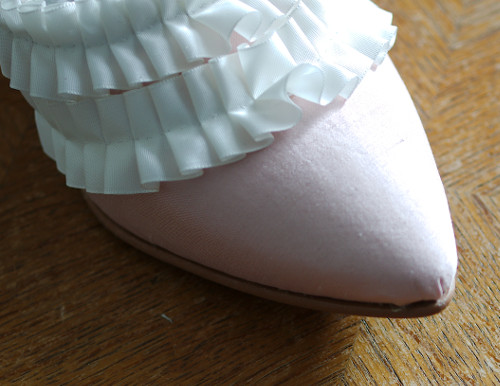
I glued the silk pieces on and covered the join in the sides with tape. At the counter and sides there remain some wrinkles, but the toe turned out very neat. As the dupioni silk has a more subdued, softer shine compared to satin the imperfections are not as visible from some distance, however.
Then I tried on the outer sole and cut off the extra at the sides to match the altered heel shape. This is always a bit tricky part and and I never get the edge very neat (a sharp knife gives a neater finish that scissors, though), but it doesn't show much when wearing the shoes.
I finished the edge of the shoe on the trusted method of glueing a tape to cover it. Okay, I could in theory sew the tape on, but sewing through several layers of leather with all the heavy shaping layers they put on modern shoes is hard work so I just usually use glue.
The part where my extention pieces join the original opening were so thick that the tape didn't look that great there, but what is decoration for if not to cover up mistakes?
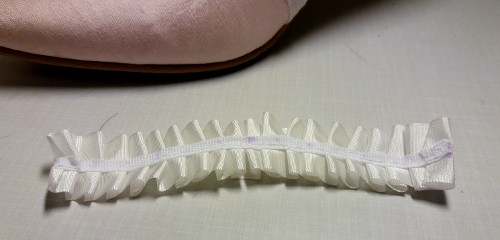
I kept the decoration quite simple, I could always pin on extra bows and rosettes later if I wanted to. For now I just pleated two rows of taffeta ribbon on narrow tapes, which I glued on the top of the shoe.
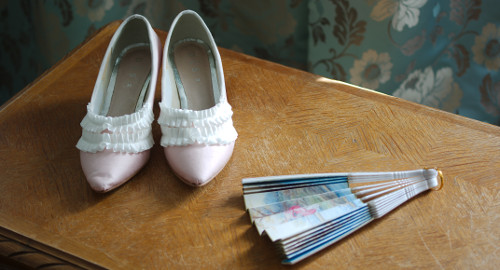
The rather quickly made shoes turned out quite pretty. This style is very charming, and the white decorations complement the white heels. The light color combo will hopefully go with many outfits, and brings a delightful touch paired with pink roses.

With my current mania for Victorian styles I will probably not be starting any major dress projects for 18th century, so it was nice to get some new stuff at least in the form of accessories.