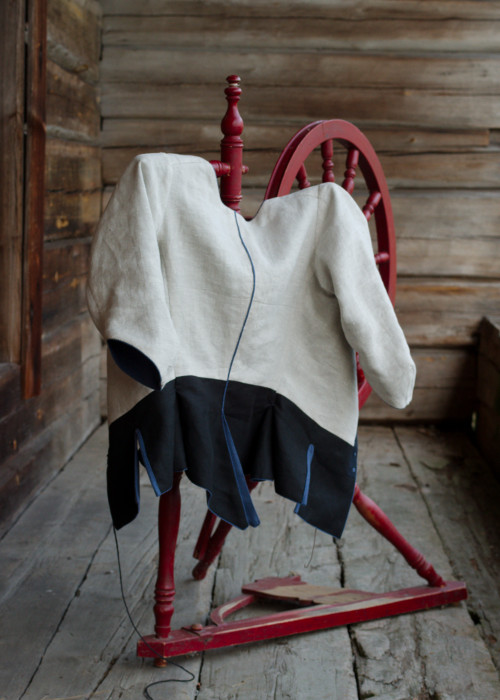
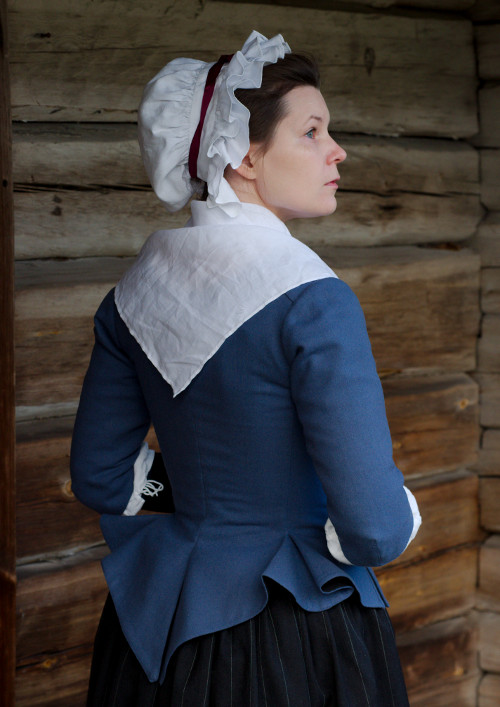
Wool jacket, 2020
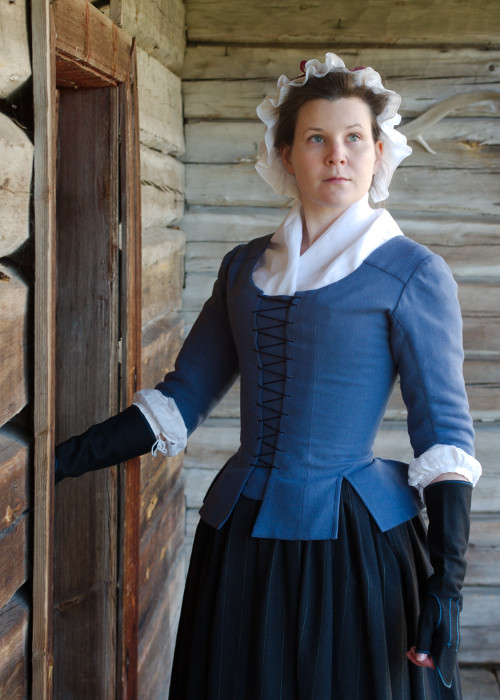
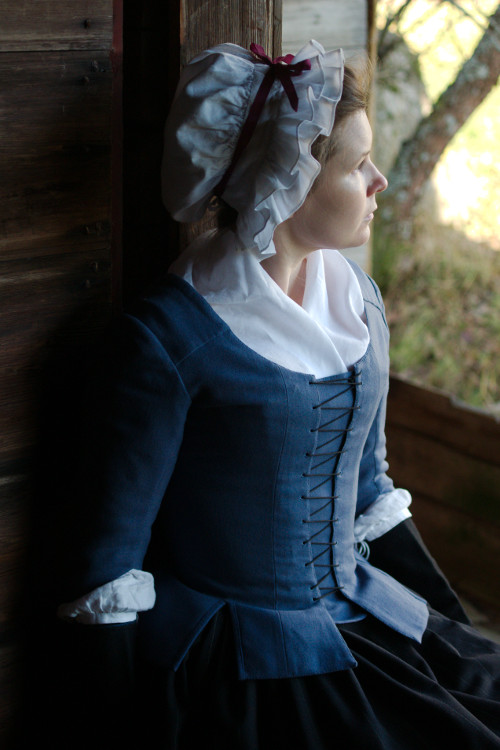
For several years now I have not really been hanging out in military camps or even been to 18th century faires much, so I haven't had much use for "relaxed" or lower class wardrobe. Still, I have for a long time admired simple, unadorned outfits which can look really graceful, as seen in early seasons of Outlander or the famous "La Belle Chocolatiere"- painting by Jean Étienne Liotard. Finally a coming "winter evening in a tavern" - type of event kicked me into actually putting this outfit together. The main thing was to make the pretty little jacket.
I had found this fabric from the pretty much only medieval faire of summer 2020, and when I saw the bolt the idea of this jacket came to my mind for the first thing. It's very soft, thin wool, and the color, a dull cornflower blue is both subdued enough for the look I wanted and also one of my favorite colors. I had no shortage of matching sewing threads is my stash!
Choosing the style
I wanted a simple, unadorned jacket with preferably a front lacing. Not only does front lacing give that classic romantic, rustic look, but its also very convenient when you might want to lace your stays looser from time to time.
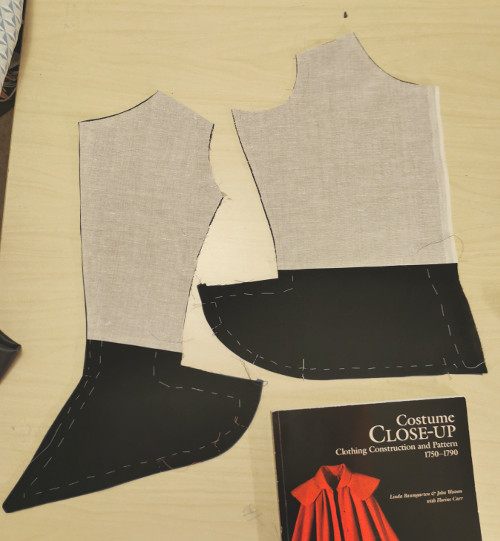
The "Costume Close Up" book (Baumgarten & Watson with Carr) has this charming printed calico jacket with a pattern which pretty much everyone has used, and for a good reason. I have also dabbled with it in the past, using it as a base for my printed cotton jacket, though I ended up altering it heavily.
I made it rather hurriedly with a very hasty fitting, and it ended up a bit loose for me, though wearable. It has nevertheless served well to be loaned out to event musicians or newcomers who need a slightly larger size than the rest of my wardrobe is, and also as the emergency option when I'm feeling really bloated. I also once wore it for a heavy Christmas dinner for obvious reasons.
Anyway, I decided it was the time to revisit this pattern, fix the fitting issues and also make a version that would be more faithful to the original. I took out quite a bit at the center back seam and front edges and partly redrafted the skirt to follow the original pattern more closely. In the cotton print jacket the side pleats begin slightly too high, which was probably meant to allow room for the voluminous quilted petticoat I wore with it. In this version I lengthened the bodice a bit at the waist. The sleeve also needed some minor adjustments.
My first pair of stays came rather high at the front, so most of my early garments have a too high neckline for the period (I have later fixed this in some). This applied to the cotton jacket as well, so I curved the neckline a few centimeters lower. As you can see, it's still not by any means very low. I also re-shaped the front edges to leave room for a lacing gap over a narrow stomacher. This time I also decided to keep the slashes in the front skirt which I had previously replaced with gores.
I had imagined I would only have to try to older jacket on, throw in a few pins and then draft a brave new pattern, put somehow I ended up making a mock up version as always no matter what I do. Still, especially with adjusting the sleeve it was very handy.
Sewing the jacket
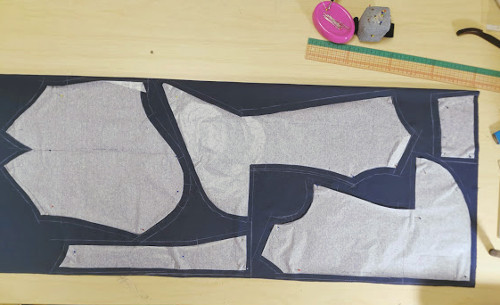
The wool came in a narrow width, which made the cutting interesting as it somehow brought me closer to what a period dressmaker would have faced (although their fabrics were often even narrower). The small jacket pieces fit rather well without resorting to piecing (save the almost obligatory join in the sleeve underarm).
I had beforehand thought to leave out the joining seam near the front edge, but lo and behold, with this fabric width it made total sense and allowed the bodice pieces to be cut side by side. The other obvious fabric saving solution would of course have been to piece the flared skirts.
I hate to admit that this seemingly rather economical cutting plan was still missing the stomacher, which I had lazily planned to cut separately when I could try on the jacket and measure the required size more accurately. There was plenty of material left, as it had been so cheap considering the quality that I had hoarded up more than I needed for this project alone.
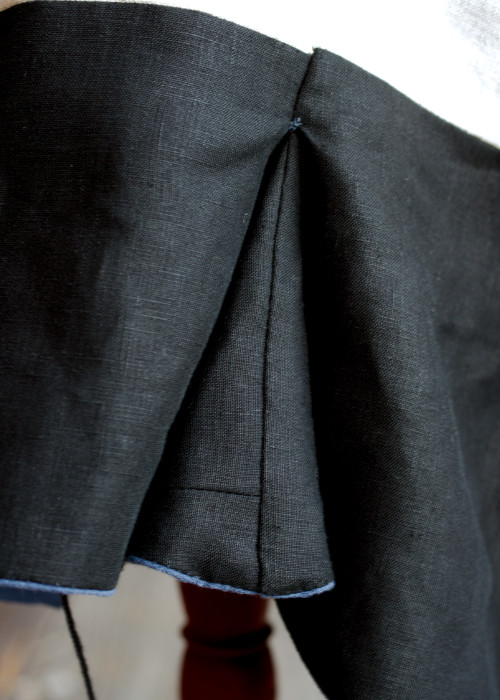
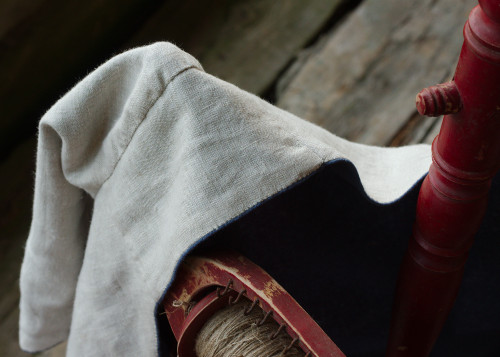
I had originally intended to line the whole jacket with thin unbleached cotton I had, but then my OCD self got the better of me and I began to be insanely troubled by the idea of the light colored lining peeking from the skirt pleats. As the lower part of the original jacket was lined with a different shade of linen I decided to take this as a legit excuse to line the skirts with black linen I also had in the stash. It was roughly the same weight as the unbleached one but a lot stiffer, so it would also give nice shape to the flared skirts and also hopefully keep the waistline from stretching in use.
I had a bit more time with this second version and a lot more experience, so I decided to give it a bit nicer finish using more period sewing techniques. I had bag lined the cotton jacket, which is far from ideal method for assembling a fitted garment like this, though I had afterwards finished the edges with running stitch which kept them from bagging quite so much.
Now I wanted to include significantly more handsewing, largely because I like it and in a small garment like this it doesn't begin to feel tedious. I wasn't still quite ready to sew it all by hand, though, as for a simple straight and durable line of stitching a sewing machine is just a very, very good invention.
After joining the few piecing seams of the wool (by machine) I basted the wool and lining pieces together. I had already prepared the lining pieces by turning and pressing the seam allowances under at the edges.
It would of course have been most convenient to finish the front edges as well at this point with lacing holes and all, but I wanted to see how the jacket would fit before finally shaping them. So, for now I just basted the layers together some distance from the edge and left the lining untrimmed as yet.
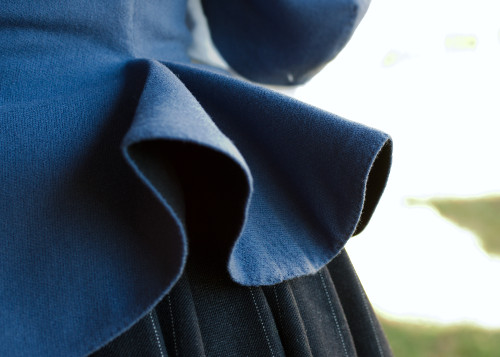
While turning the allowances on the stiff black linen I sewed gathering threads to get it to curve smoothly on the skirt edges. On the center back seam, which was slightly in bias I sewed a line of small machine stitch to keep it from stretching out of shape when pressing and sewing.

The soft wool was rather easy to fold under the lining edge, though in the sharp tail ends I run a gathering thread too to help in shaping it.
I began the actual sewing by joining the wool and lining at the edges by hand, working from the lining's side. Near the seams I left them separate so I could close the seams. Nevertheless is was easy to finish the edges for the most part while the pieces were still separate and flat.
At the sleeve I sewed the elbow dart on the wool, then folded the lining to cover the seam and stitched the seam from the outside with stab stitch, which also fixed the lining in place. Then I sewed the layers together at the edge, save a few centimeters near the seam.
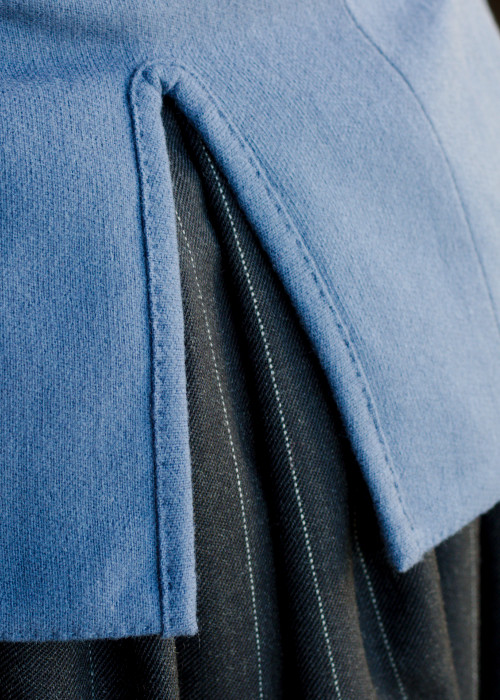
Following the original garment I finished the slashes in the front skirts with tape binding. First I sewed around the marked slash line with small machine stitch to keep the layers together, then cut it open and sewed on a straight folded strip of the wool with stab stitch. I resisted the urge to cut the strip in bias, which would have been incorrect for the period, and was happily surprised how neatly the soft, thin wool folded even at the top of the slash. From some distance the bound finish which at first seemed to me to be a bit random, if necessary, doesn't really stick out too much.
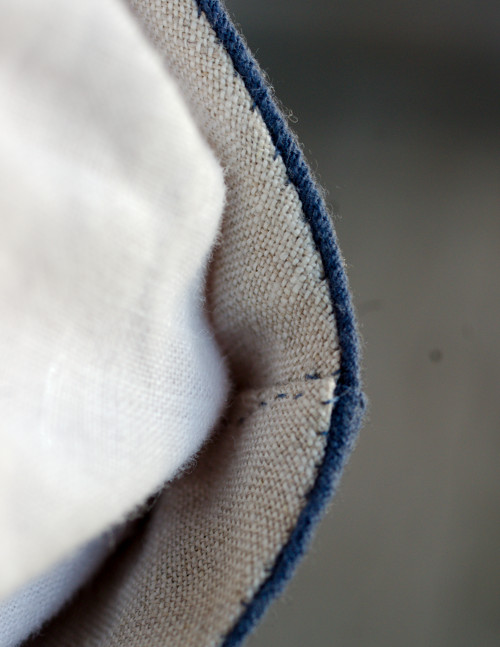
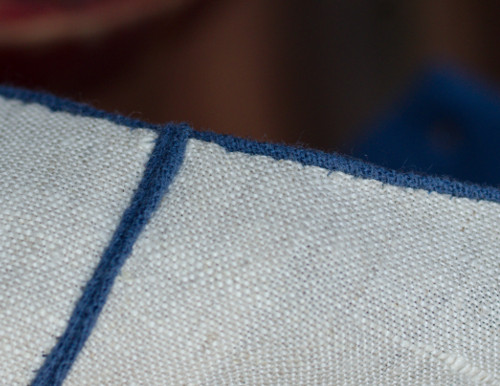
According to the description in the book the seams on the original jacket are sewn by first running a row of backstitch from the outside through folded seam allowances of both wool edges and one lining edge, and then the remaining lining edge was turned to cover the seam allowances and slip-stitched over the seam. The result is of course neat from both sides, but I was rather worried that when working with the combination of a very soft wool and a rather soft linen I would end up with seams stretched out of shape, especially in the curved side seams.
Thus I ended up faking it by first sewing a line of reliable machine stitch through both wool layers and one linen edge, pressing it and then adding a line of stab stitch which would keep the seam allowances in place and give the period correct look on the outside. Then I would sew the other edge of the lining from the inside with slip stitch. It's not quite a period correct technique then, but it's easier, very durable and gives very nearly the right look.
I used the method described above in the side seams and sleeve seams. Seaming all the layers together was especially useful in the tight corner at the top of the side pleats, as the top and the lining would never have matched quite exactly if bag lined no matter how carefully I had cut and sewn them.
I turned the seam allowances towards the back piece and after sewing the lining of the back piece I finished the bit at the hem that had been previously left open. I also reinforced the corner, where the seam allowances had been slashed nearly to the stitch line with some additional stitching through all layers.
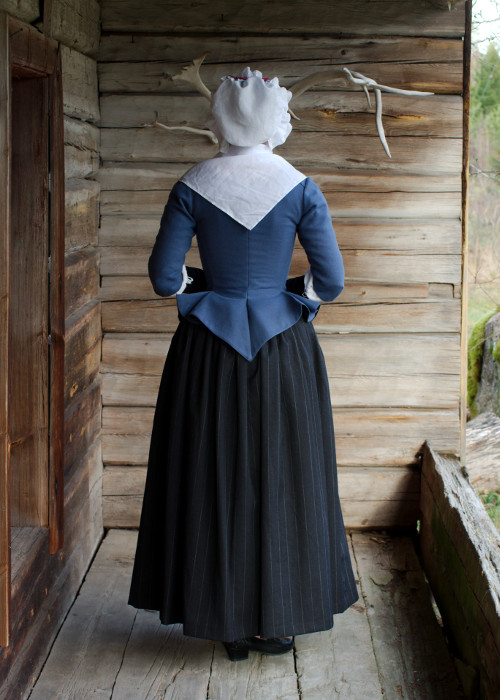
If I understood the description correctly, this same technique would have been used for the center back seam as well. As the seam ends at the waistline while the lower part of back pieces form separate tails this would, according to my logic, lead to some fuzzling with the seam allowances at the top of the back slit. This part would also be under considerable strain in wear, so slashing the seam allowances to allow then to suddenly turn on the other side did not seem like a very good idea to me, though I guess there might have been some trick to avoid this.
Thus using a different construction method for the back seam seemed like an attractive option. I quite fell in love with the late 18th century technique of lining bodice pieces separately and joining them with tiny stitch through the folded layers when trying it for the jacket with redingote-esque collar. While I don't have any idea whatsoever if these two techniques were ever combined in the same garment, it would be ideal for the smooth transition from seam to slit, so I decided to go with it.
The shoulder pieces are put on like in dresses: first the shoulder piece lining is sewn to the lined fronts and backs (I did this by machine) and then the top material is pinned or basted on top, the edges turned under to cover the seams and then sewn on place by hand. While in dresses the top of the sleeve is left between the lining and top material on the shoulder, here I sewed on the sleeves separately after finishing the shoulder.
When inserting the sleeves I once again broke from the book description, I seem to be incorrigible in this "following instructions" - thing. I just felt like sewing the sleeves on from the outside through all the layers would be kinda hard to get neat without practice, and besides, the armhole seam gets so much strain I really wanted a reliable machine stitch there (my staple excuse).
Another thing in the book description that didn't really make sense to me was to finish the seam from the inside by turning the seam allowance of the bodice lining under and covering the seam with it. It just felt so much easier to me to do this with the sleeve lining instead, like I had done in Jarno's coats, leaving the lining separate from the sleeve seam for a few centimeters at the top.
So, in the end I sewed the wool layer of the sleeves on the armhole with machine stitch (a close backstitch would probably have been even better). The sleeve pattern had quite much ease on the front part of the top of my shoulder, something that I always have to battle with, and the soft thin wool alone settled in rather smoothly. Then I pinned the sleeve lining to the seam, marking the line, and run a gathering thread for the sleeve top. I trimmed away the extra seam allowance and cut slashes on the underarm close to the seam to allow the seam allowance to turn towards the sleeves. Then I pinned the sleeve lining to follow the seam with the edges turned under and sewed it on with slip stitch. While it may be not quite the right way to sew in a sleeve, it works and looks neat on both sides.
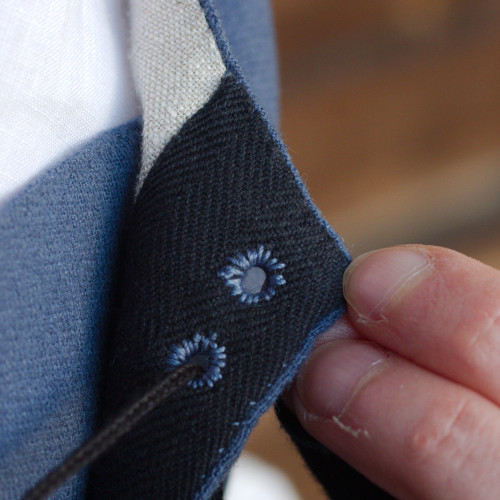
Then there were only the front edges to finish. I tried the jacket on over stays and petticoats and pinned the front edges to my stays. Like I had anticipated, the soft wool lined with lightweight linen was a bit stretchy, so the edges came closer together than I had planned. I trimmed away a bit at the top part, folded the edges to turn under and pressed them.
I sewed the wool and lining together by hand like I had on the other edges. Then I added a heavy black cotton tape to further support the edge where the lacing holes would go. Then I worked the lacing holes 3cm apart.
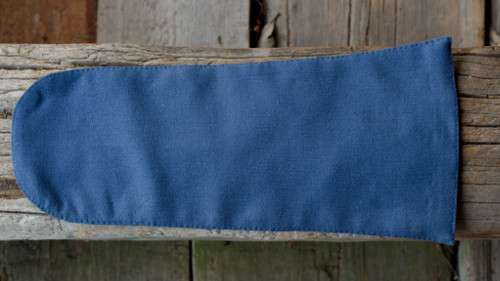
I had calculated the measurements for the stomacher in the fitting. While the lacing gap was quite narrow I cut the stomacher a bit wider for ample fitting allowance. I lined it with the black linen which was stiffer than the unbleached one, so it would stay in shape better. The wool is mounted on the linen and the edges sewn by hand as elsewhere.
The
Petticoat
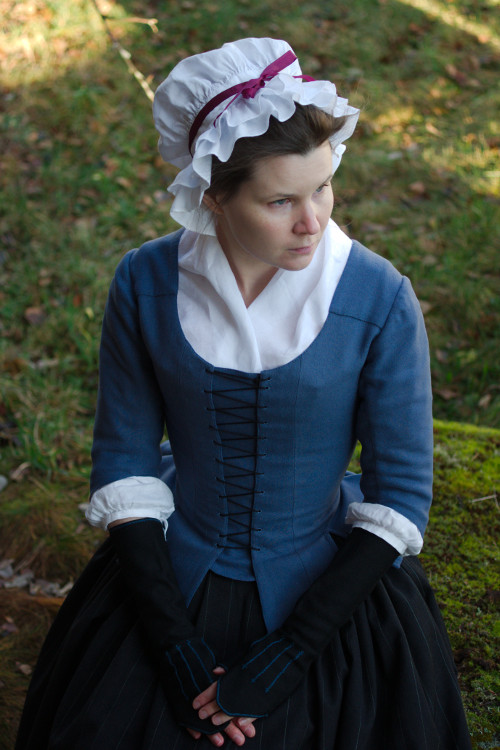
Of course I did not have a petticoat that would go with the new jacket very well, so I had to make a new one. At first I thought something in dark burgundy or maroon which would have made a lovely color combination, but the selection of affordable fabrics was limited and the time I had to hunt for the fabric was limited. In the end I just grabbed a wool blend in very dark, almost black charcoal grey with slight white stripe. At first I thought it was too lightweight and limp, but it turned out to look okay enough over a heavy cotton under petticoat. The combination of a dark petticoat, white linen and blue jacket is a bit severe, but in a way I sort of like it as a contrast for all the pastel tones of my fancier garb.
Unlike the lovingly handstitched jacket I put the petticoat together very fast, all by machine down to the hemming. I find petticoats generally quite boring so I try to get them done as fast as I can.
Accessories
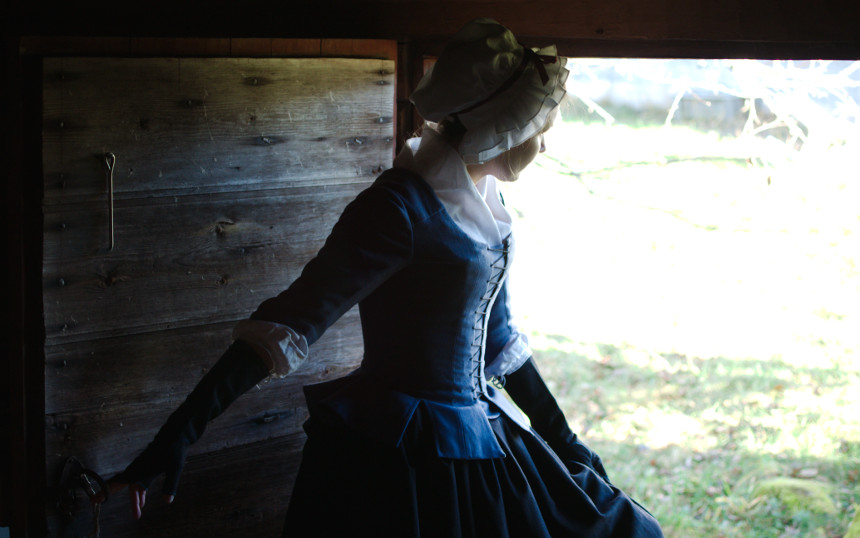
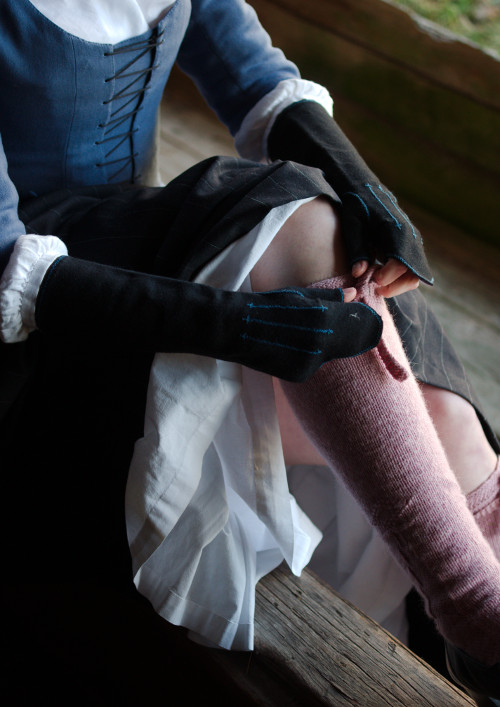
Luckily I had some of the necessary accessories already: The large, very basic linen cap, woollen mitts and clocked woollen socks knitted by a very talented knitter friend, commissioned by my wonderful husband. I've decided to use this as an excuse to include a period-naughty picture of me flashing my legs.
Unfortunately all my kerchiefs were more of less transparent and flimsy, so I still had to quickly cut and hem a new one from the same linen I had used for the cap. The last task was to make the lucet cord for the lacing.
Final thoughts
I rather like the outfit, and it's really comfortable to wear. The wool jacket, though thin, is surprisingly warm, and of course the wool was a dream to work with. The overall look is plain but very neat and charming in its quiet way - simple, but well cut and made with quality materials. Worn with a more fashionable cap and maybe a decorative apron it would look different again.
We took the pictures a week before the event was to be, and in the end the event had to be cancelled due to new restrictions like bloody everything this year. I had been looking forward to it, but at least I got this outfit made, and hopefully will get another occasion to wear it before too long.