Stays, 2012/2013
My red silk stays were originally made with just a few occasions on mind, but as they turned out so pretty and comfortable I ended up wearing them a lot. Only very lightly boned pair of stays are nice on more relaxed daytime wear when you don't want to be laced very tightly, and thanks to the front lacing I was also able to lace them by myself. However, when the first bone broke through and I noticed the eyelet threads being broken at some places I added a new pair of light stays on my "some day" project list. After the red stays I had already made a fabulous pair of light blue stays with visible boning channels, but they were a bit too tight for more relaxed wear, and most of my bodices look too large over them. Thus I needed a new pair to save the beautiful red ones from further heavy wear so that I could still wear them when I wanted to dress up as a shepherdess (or a pirate wench).
The time for the new stays came actually quite soon, as some time before Christmas the same year I realized that I didn't have any hand sewing project for the holidays. I had already bought a pretty rose pink cotton twill with the stays in mind, and as I also had coutil in my stash I decided I could as well begin the new stays now, as I would have to get to them eventually after all. I could then work on them whenever I had time from more pressing stuff with no deadline. I was also very happy to realize that I had learned something during the past few years: Making a pair of stays is no longer necessarily a terrifying challenge, but can also be an easy, relaxing project that doesn't need very much planning before beginning.
I was also going to make this pair the easiest way possible. Obsessing over the light blue stays was rewarding, but at the moment I didn't want to put nearly as much time and effort into these practical stays. They should be durable, of course, but I gave myself leave to take some shortcuts when it came to how they looked out.
Hidden boning channels were the most obvious time-economical design choice now that I knew how much work would go into visible ones. I had also chosen the plain cotton twill for the top material with practicality in mind. I decided to bind the edges on bias tape, though it's not period correct at all. While the straight non elastic tape was not impossible to work with, bias tape is faster to get neatly. I cut the bias tape from an old but very sturdy cotton bedsheet. For the lining I used thin linen.
The pattern
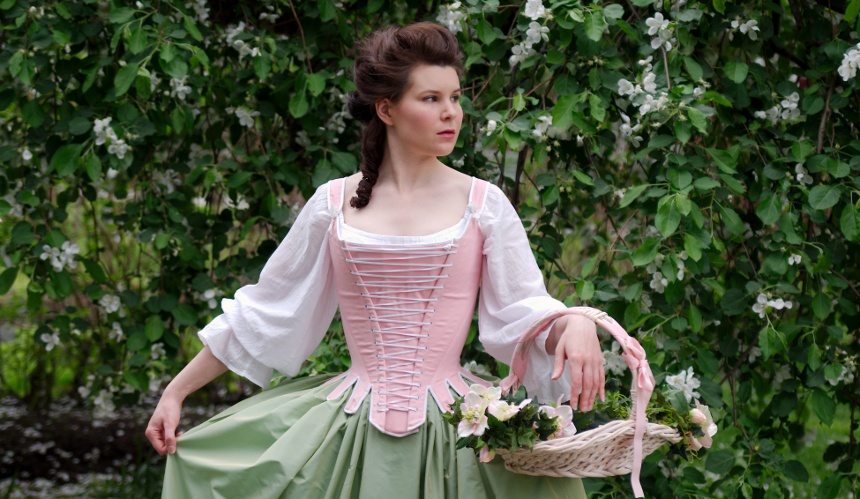
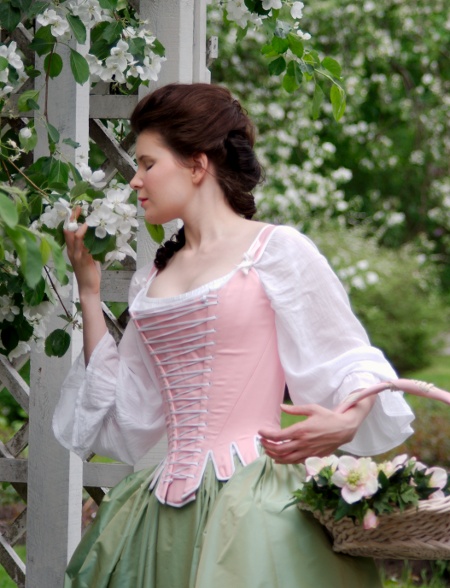
I wanted basically to make another copy of the red stays, but I did change a few little things I had learned. The red stays were very scantily boned, so I added some more boning to support the fabric. The boning still remained very light. As the added horizontal bones had worked so well on the light blue stays I added them also on this pair on the top of the stomacher piece and the side-front pieces. On the stomacher I also added a few horizontal bones lower to prevent it from wrinling when laced, as the stomacher on the red stays with only vertical boning was wont to do. I also made the stomacher narrower at the bottom, as in the red stays it tends to peek out between the front tabs when laced a bit tighter.
I also drafted the underarm a few centimeters higher so that the bust would get more support, but left the boning end lower. On the side piece I added shorter boning channels on the tabs which crossed the long vertical boning like in the light blue stays. For the boning I used 7mm wide cable tie, apart from the horizontal boning which was 5mm wide.
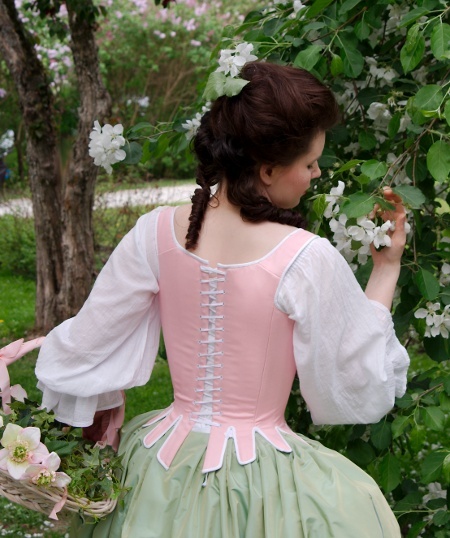
I wanted to keep both the front- and the back lacing, as they give so much fitting allowance, and for a moment considered metal eyelets for the total 62 of them. In the end my period self got the better of me, as I might some day use the stays visibly too, and hand sewing projects small enough to carry in handbag tend to get finished sooner or later anyway. I'm also hopeless on putting on metal eyelets and always get half of them crooked, and custom made this number of them would cost considerably more than just some thread, so hand bound they would be. As another improvement on the red stays I also made the lacing a proper off set one this time. Apart from being period correct, it's also much easier to lace by oneself.

Sewing
the stays
I begun, as usual, buy drawing the pieces with their boning channels on coutil. Compared to the visible boning channels stitching the hidden ones on machine with back stitch finishing happened on dizzying speed. An unwelcome surprise was awaiting me, however: I had somehow managed to draw all the pieces similar, not mirror-image right and left ones, so I had to draw the edge lines anew on the other side on half of them.
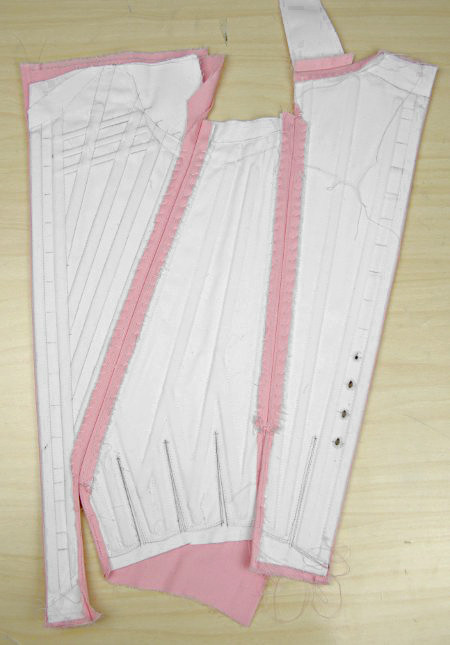
But that was not the end of it. When I began covering the pieces with the pink cotton twill I noticed that the pencil lines on the top side of the other half showed through the thin fashion fabric. My furious scrubbing with an eraser proved futile as I had done my stitching so precisely that the pencil was securely under the stitches. I did not want to try to wash them, as I had not prewased the coutil and knew from experience it might size a bit. Happily I had bought a lot of the cotton twill with the plan to use it for something else too, so I ended up putting a double top layer. In the end it was not a bad choise, as the pink color looks more fresh and saturated, and as the material is thin it doesn't create too much bulk either.
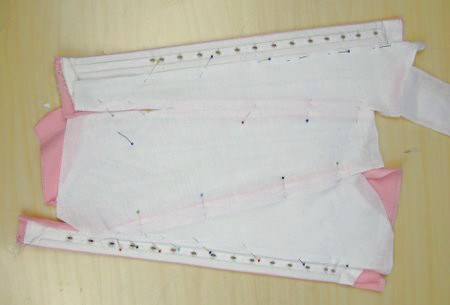
I finished the lacing edges with bag lining the pieces with top material. I covered the side-front and back pieces first so that I could work on the eyelets when the pieces were still separate, but in the end I didn't finish even half of them in time for Christmas. So I hurriedly closed the seams and secured the seam allowances by hand, pinned on the lining and stitched it on the edges before jumping in car. During the holidays I sewed the lining on the lacing edges, cut the lower edge to shape and reinforced it with blanket stitch before binding it with the bias tape.

After finishing the lower edge on both sides I made the rest of the lacing eyelets so that I could try the stays on with the still uncovered stomacher. The stays looked great, well fitting with a little stretching allowance still left. The only thing I had to fix was to shorten the shoulder straps a bit, as I had left some extra allowance on them.
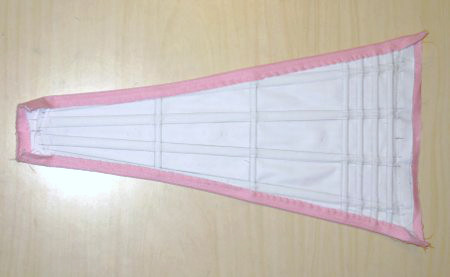
I finished the stomacher by turning the seam allowances on the wrong side, stitiching them on and them mounting the top fabric. I turned it's seam allowances also on the wrong side and secured them by hand. Then I pinned on the lining and sewed it on the side edges. The top and bottom edges were finished with blanked stitch and bias tape.
The bias tape on stomacher and the top edge of the stays could well have been sewn on by machine, but at this point my perfection got the better of me and I decided to bind them by hand to look similar to the lower edge.
Conclusion
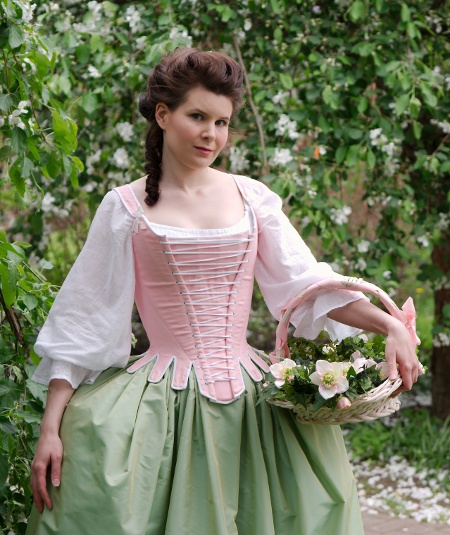
The finished stays are quite okay. They have some cosmetic flaws, like the top material wrinkling on the side-front piece and the not very neat eyelets, which are really below my standard ones. On the other hand I made some extra handsewing which could have been replaced my machine, like the edge reinforning and bias binding. But as I didn't have any other hand sewing project at the time due to failed organizing, I had hand-sewing time I decided to put into this.
As the stays were in the beginning mainly a practical, sorely needed garment rather than a new challenge I can live with the less-than-perfect finishing. The main thing is that the stays give a nice shape and are very comfortable.
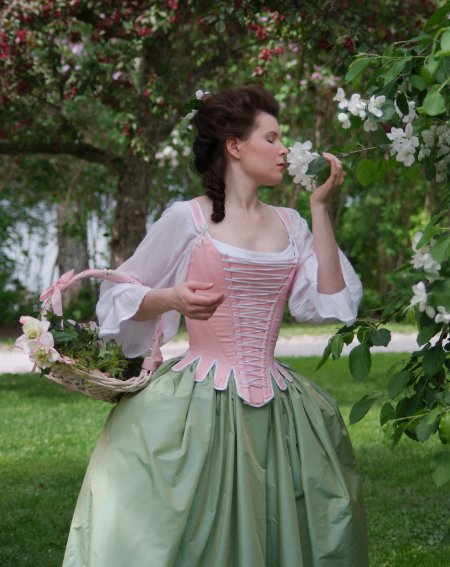
I wore the stays for the first time in a masked ball organized by the L'Amusette, and they were even visible in my costume. When I wondered what to wear, as I wouldn't have time to create anything very elaborate, I realized that the new stays looked adorable with my green taffeta petticoat. I only had to make a mask and a wreath for a pastoral costume inspired by the "Spring" theme of the masquerade.